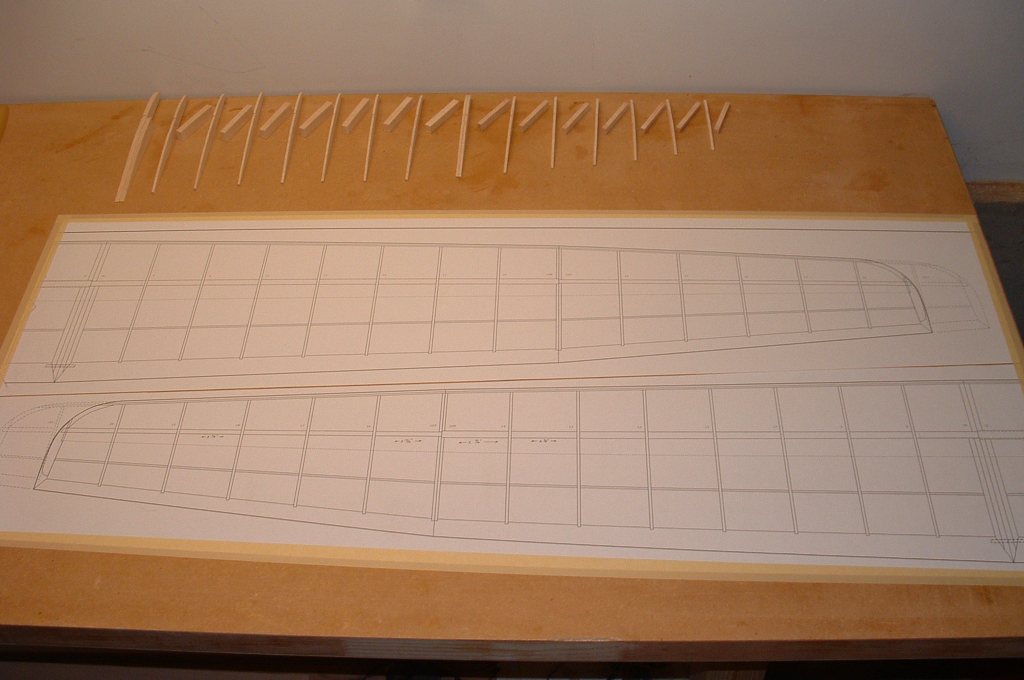
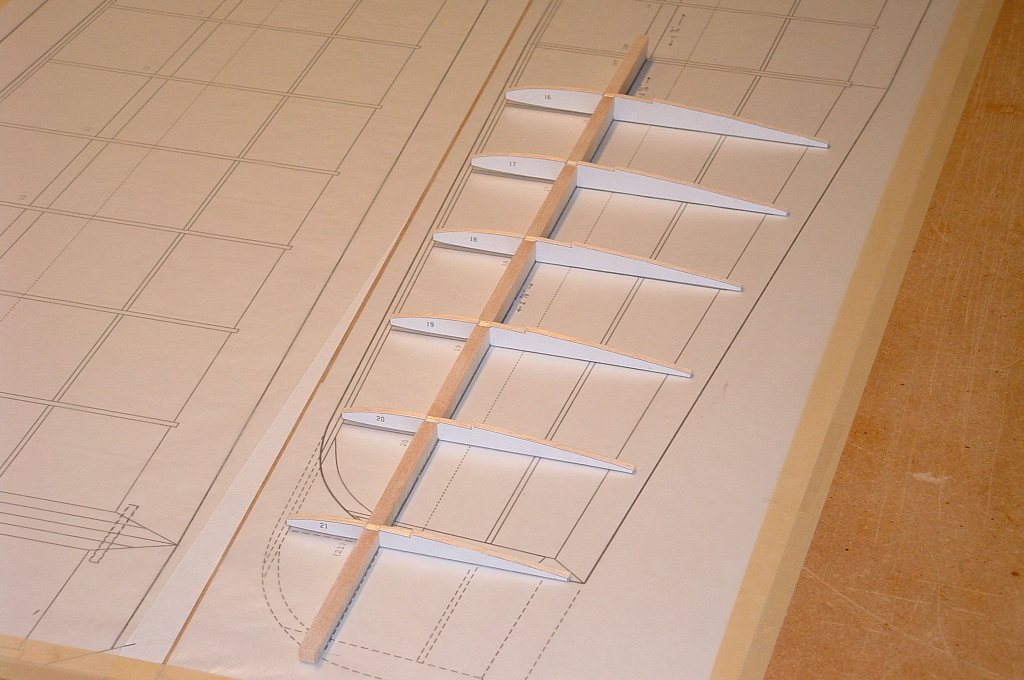
To facilitate building the wing, I sliced up my wing plans to just the mid and tip part of each wing. Additionally I cut them so that they could be placed side by side for easier comparison as I went along.
I then applied spray adhesive to the back of the plans and smoothed them down to the surface.
Finally, I taped around the edges to prevent accidentally catching an edge.
Rather than tape the plans right up to the edge of the workbench, I left myself a few inches at the close side of the table to allow an open work area for any long pieces.
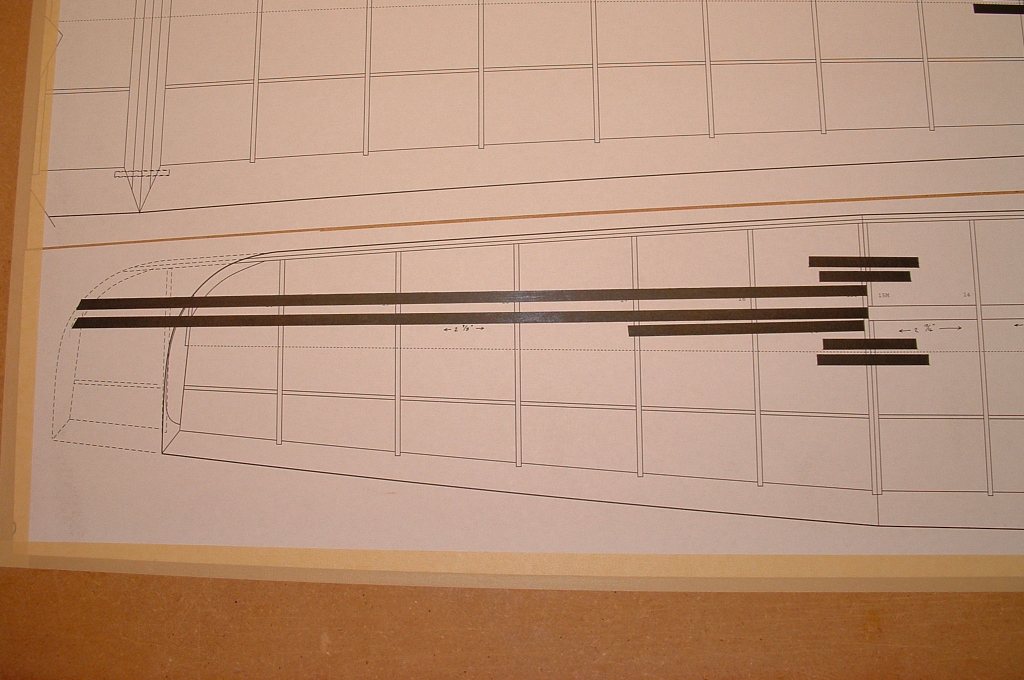
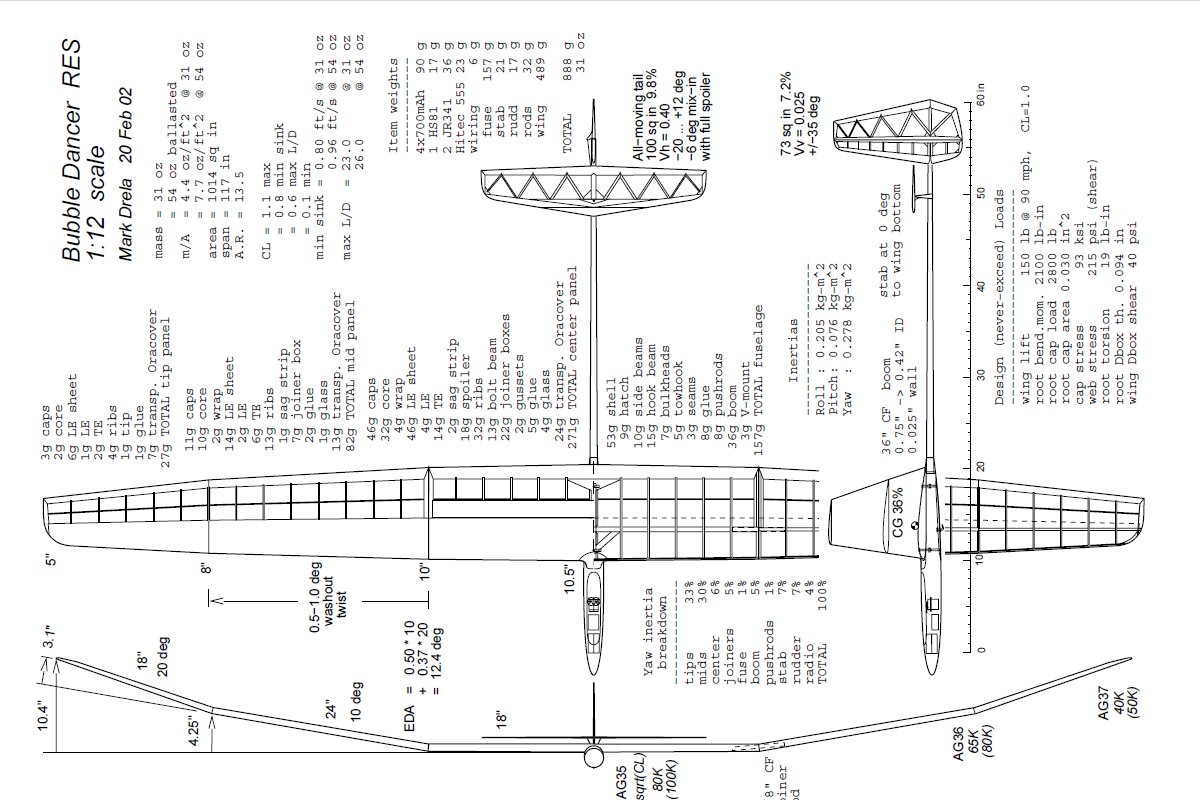
After poring over the plans and checking online, here is what I understood to be the carbon layout for the tip spars.
For the top spar cap, two .007" carry-through pieces and one .014" piece. For the bottom spar cap, one full length .007" piece and one shortened .007" piece followed again by two .007" carry-through pieces as on the top spar cap.

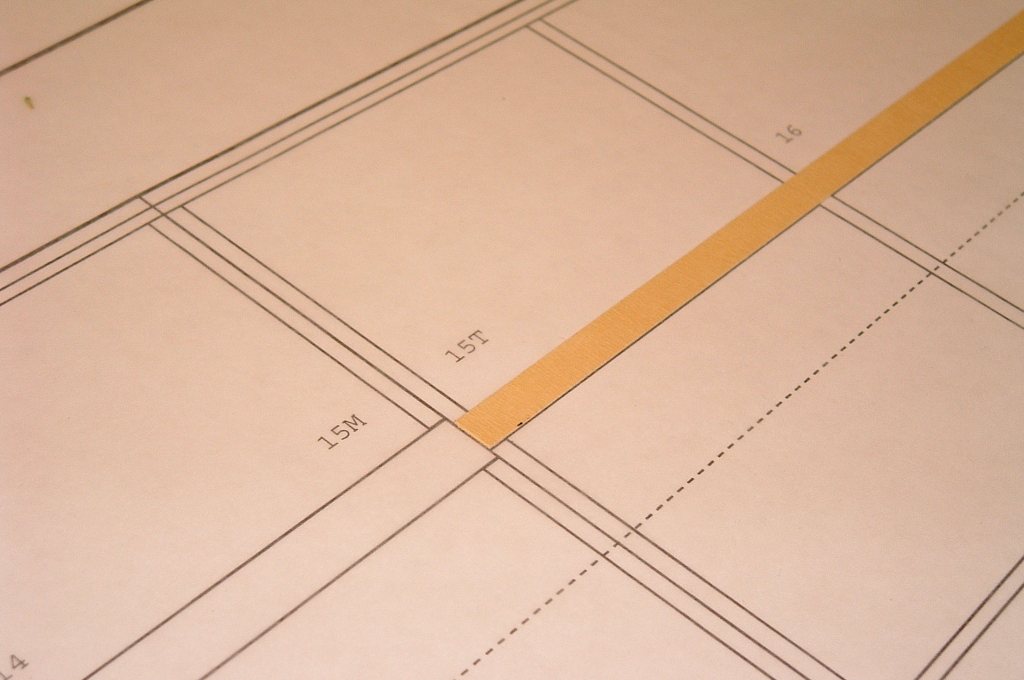
Now for something completely home-brewed... I needed to make the .015" bottom spar cap shims but didn't have the Mylar available that everybody has been using to do this, so I came up with a total hack that I actually ended up liking quite a bit.
It turns out that I have a lot of masking tape laying around the house - three layers of which is roughly .015" thick.
So I layered out three strips long enough for the tip panel shim and using a long straight-edge and my Xacto, I trued up one edge of the tape, marked off a 1/4 inch strip and sliced again to complete the shim.
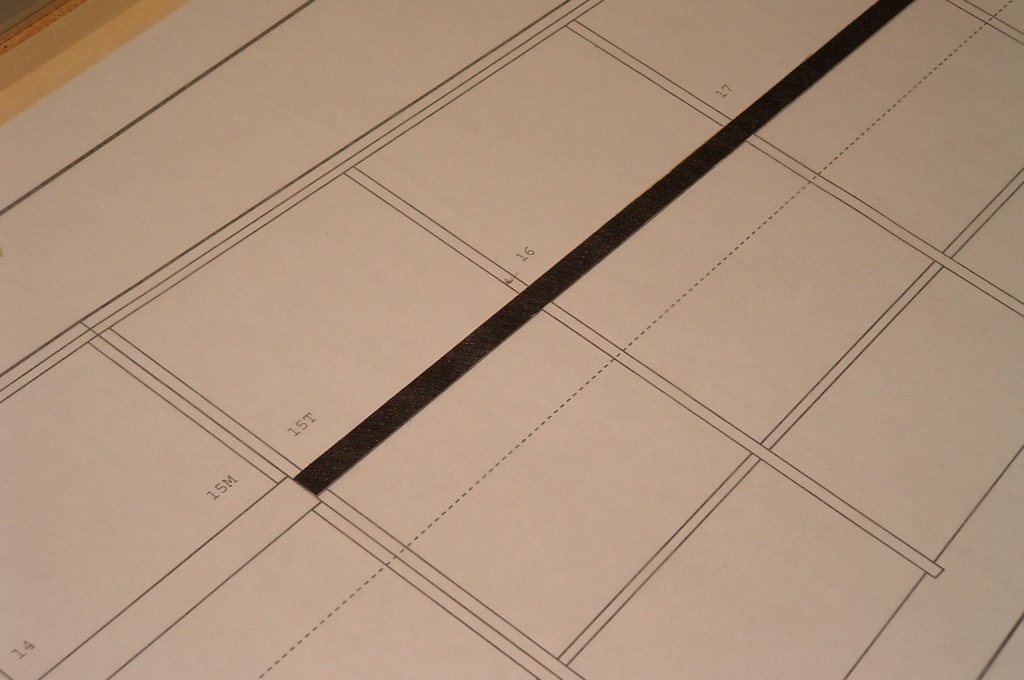
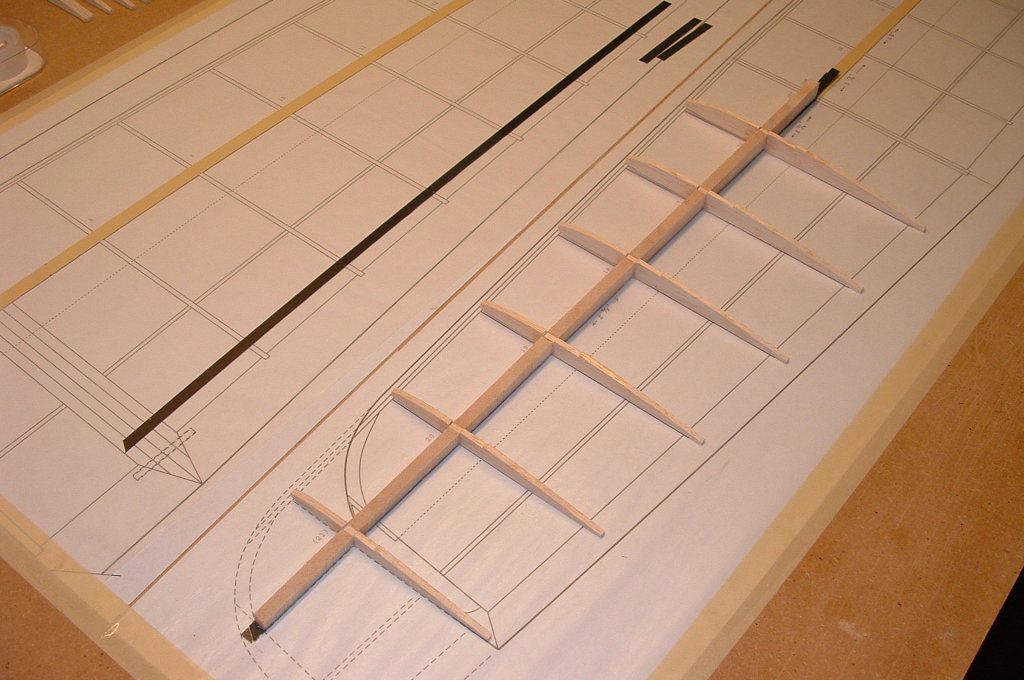
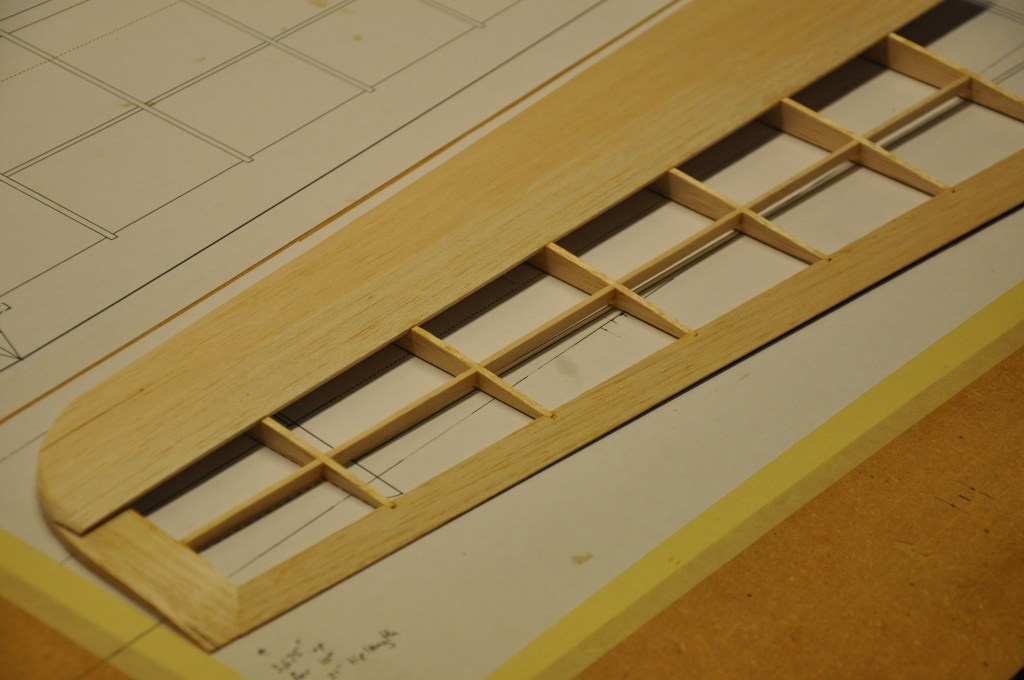
In preparation for building, I covered the plans with wax paper to prevent glue sticking to my plans.
I then stuck the masking tape shim in place over the plans to shim up the spar area.
I later repeated this process for the mid section spars as well.
Over the .015" shim I now placed the bottom spar cap which has first been lightly misted with some spray adhesive.
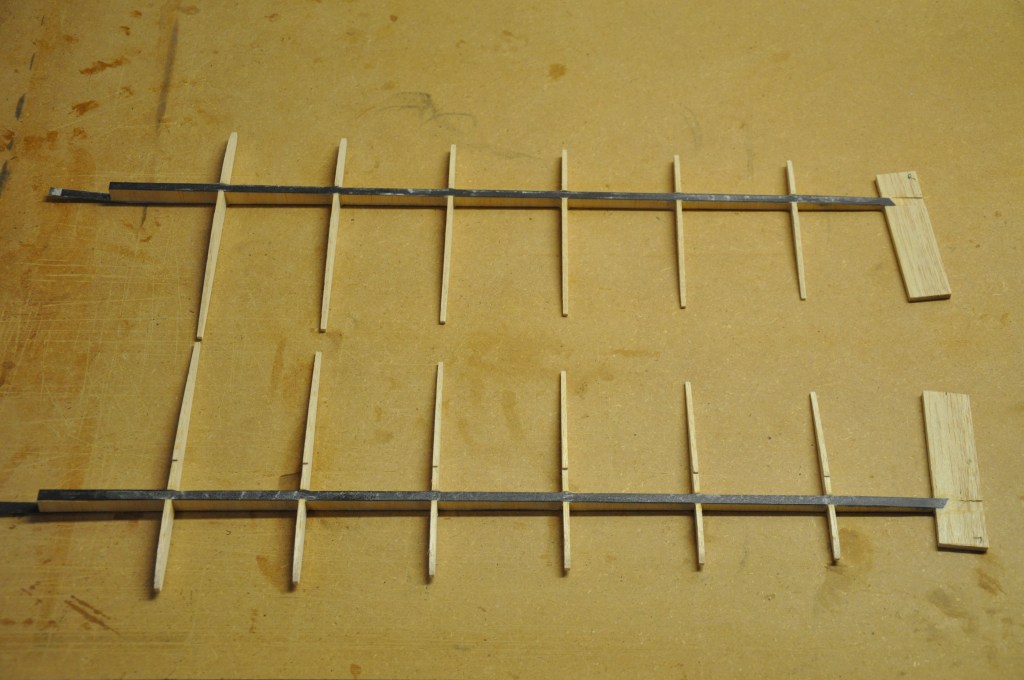
If I've done my work correctly, the ribs should butt up to the spar cap and be absolutely flush.
Now with the shim and spar cap in place, I dry-fit my parts to check the assembly.
I had to modify my spar layup a bit from the recommended procedure.
Due to the fact that I manually shaped my ribs, the dry-fit revealed small inaccuracies (gasp!) in the alignment of the top spar cap channel that would need to be adjusted. I decided this could best be done once the assembly was a single unit, so I went ahead and glued up the spar minus the top spar cap.
Once dry, I used a 1/4" sanding block as shown to true up the spar channel.
The spar is glued with thickened epoxy the consistency of butter. Some epoxy is spread along the spar and then parts are placed down in order: web, rib, web, rib, etc. until all components are placed. Make sure the epoxy mix is spread at each web-rib joint as well.
Note: it would have been preferable if I could have glued top and bottom spar caps simultaneously, but maybe next time...
Once everything is in place, weight down heavily for curing. (see below for how I did this...)
This is a shot of the wing tip after truing up the spar channel with the remaining carbon laying next to it.

I cut a piece of 3/16" stock for the wingtip and used my sanding block to notch a groove where the bottom spar cap would lay on it.
Note: This piece was oversized on purpose. I will finalize the shape once the tips are done.
I trued up the joint angle on the last web to wingtip and left the outer edge unshaped.
I then flipped my tip stock over, laid it in place and again used my sanding block to taper down 1" of the last shear web until it joined flush with the tip stock.
When the top spar cap is glued in place, approximately 1/4" of the spar cap will overlap onto the tip stock. This assured an even fit.
Here is a close up shot of the trued up top spar cap channel.
I made every effort to ensure that all contact points between spar, web and rib were precise with no gap. This is critical to ensure that the wing can carry its designed load.
I again prepared the silica-thickened slow epoxy, buttered up my webs and laid the top spar cap in place.
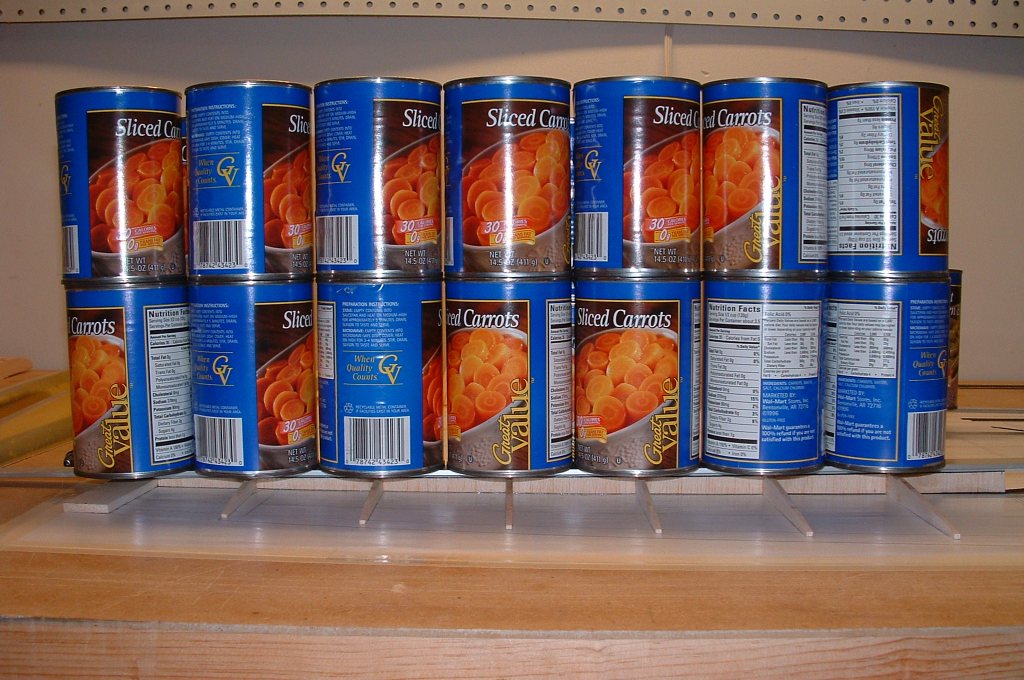
By raiding my wife's pantry I was able to find plenty of weight to compress the spar for curing.
Some of you may be fretting that I don't have the top spar cap carry-through segments in place and blocked up at the 10 degree angle... Not to worry, I purposely left the first 1 1/2" of the spar web unglued because I have an angle jig that a friend loaned me which I will use to clamp the tip and mid sections together at their proper angle. I will place the carry-through carbon in at that time.
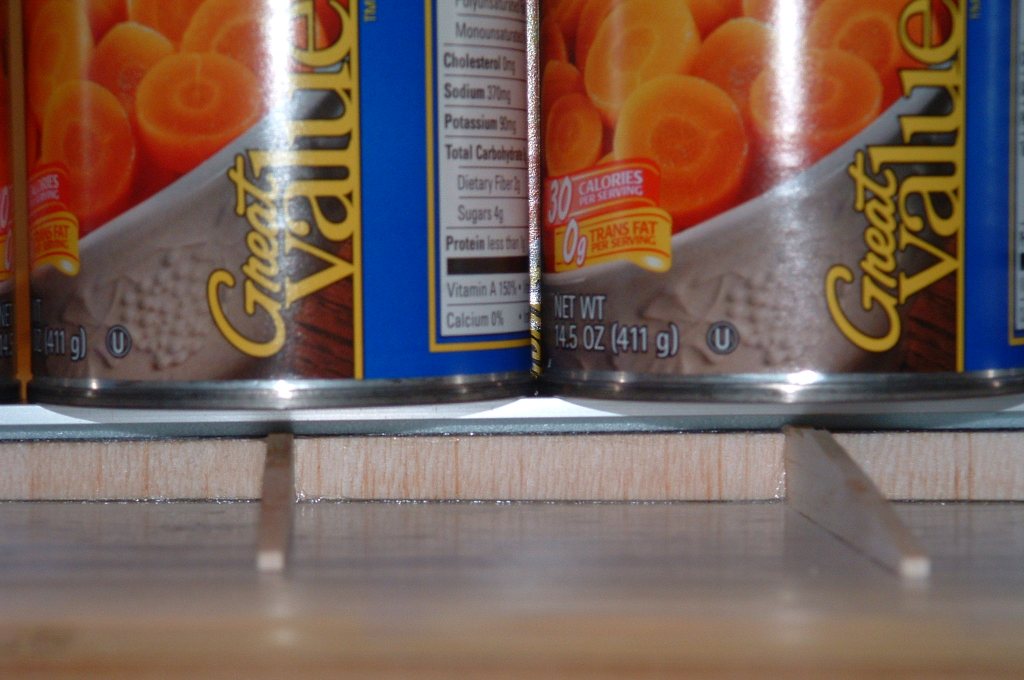
A close up reveals the strip of blue foam used to distribute clamping pressure evenly across the spar.
(Like most rc builders, I have plenty of blue foam laying around, so I just sliced up some of it into strips that would sit precisely in the spar channel, but stick up enough to ensure that the clamping weight was applied all on the foam and nowhere else.)
Note: Next time I think I will find some other kind of weight - bricks or leaded bars... something. -- The cans were a bit difficult to stack without tipping over.
The two wing tips were completed in the same fashion.
As we can see in this shot, top and bottom spar caps have created a strong and straight tip assembly.

After the spar was glued I rounded off the corners of the carbon. This is critical because of the Kevlar wrap that will be applied next. A sharp carbon edge will cut the Kevlar and ruin the strength of the spar.
Be careful of the carbon dust when sanding... I wore my industrial strength breathing mask for this task. I also wet the sanding block to control the dust.
You'll note that a tiny bit of the blue foam got glued to the carbon. I'm not going to fret about it...
Got hours to spare?
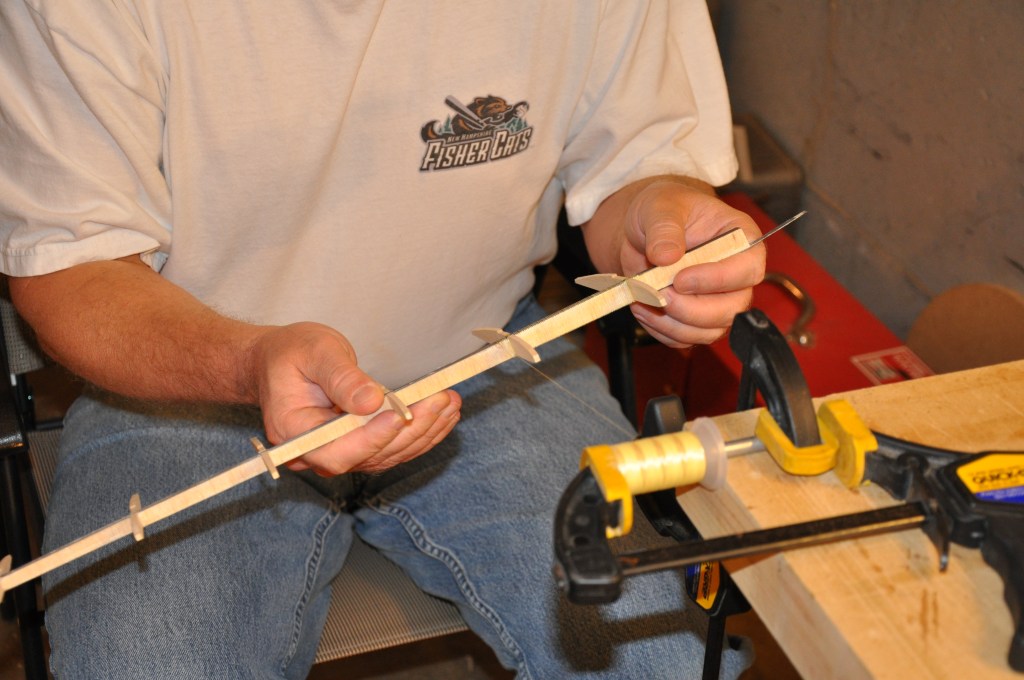
The next step was wrapping the spars with Kevlar. You can see that I secured my Kevlar thread spool on my X-Acto handle (blade removed) via two clamps.
Then holding significant tension I began the wrapping process. Because this took hours and I needed breaks from time to time, I would use a spot of CA to lock in my progress.
Note: The plans call for Kevlar tow. Trust me... get tow, not thread. It will save you days of work.

I was trying for a 1/16th inch or less wrap spacing. Surprisingly, if you go slow and steady it wasn't too hard to get an evenly spaced wrap.
When I got to each rib I did and over-under x-pattern 3 times to keep the strength across the rib.
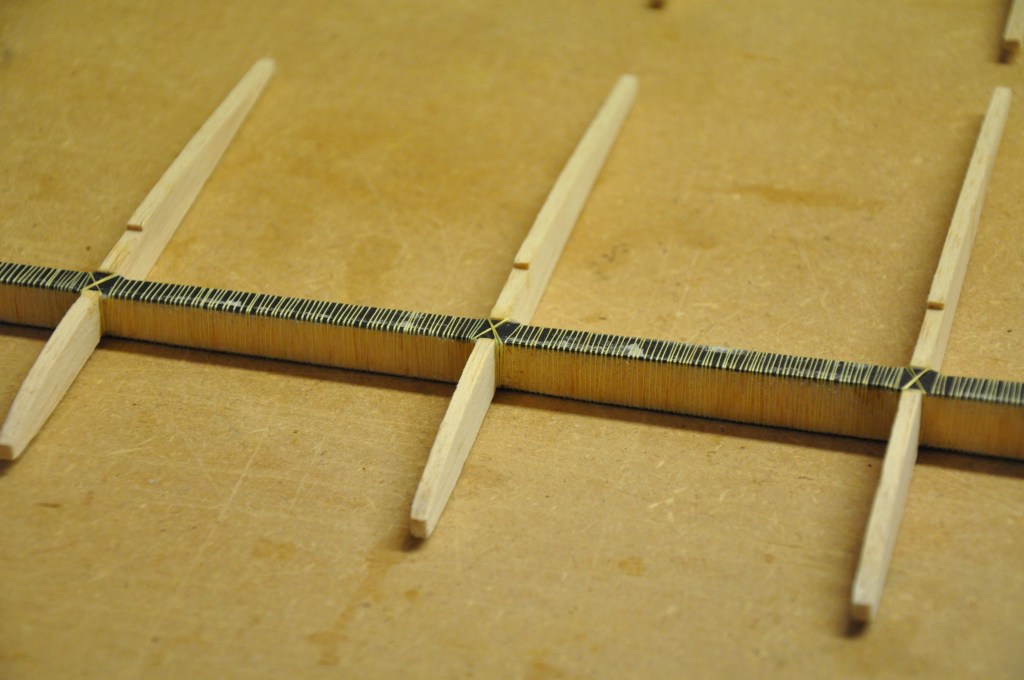
And here we see the finished wrap.
Though not accomplished when this picture was taken, the next step is to secure the Kevlar to the spar with thinned epoxy. This locks the entire assembly together to make a very sturdy spar.
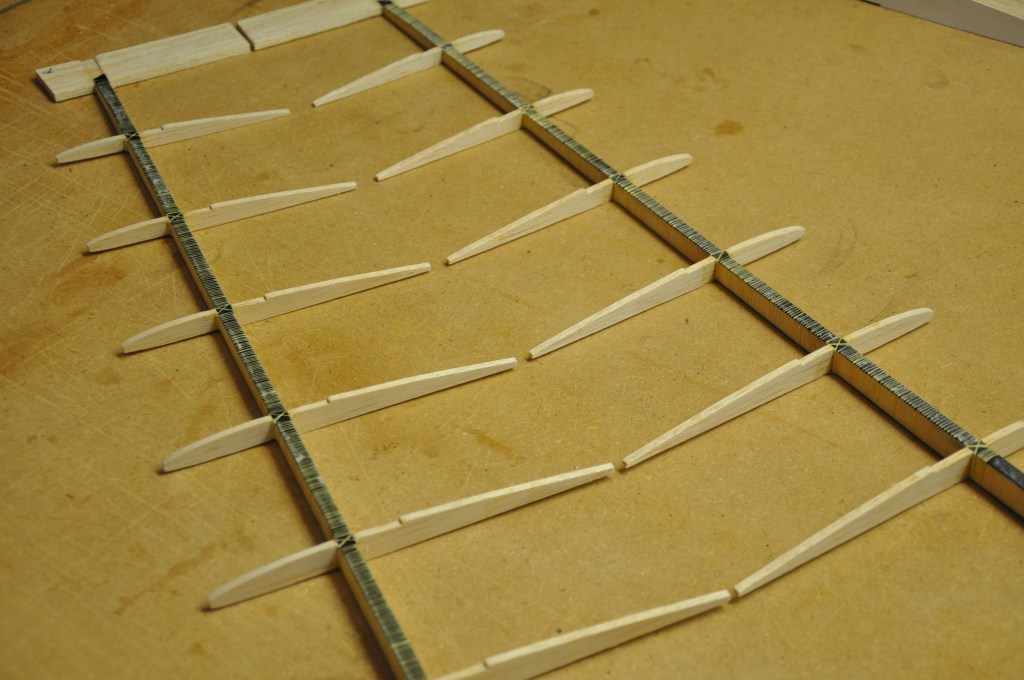
Both wing tips after being wrapped with Kevlar thread.
The next step will be to add the trailing edge stock. Note the order here... If I had glued in the leading or trailing edge stock first - the Kevlar wrapping would have been next to impossible.
The plans call for notching the trailing edge stock and inserting the ribs into that notch. This is accomplished with a slightly less than rib-thick sanding block.
While this provides a very good joint, it could be difficult to do. A little preparation makes all the difference in your success.
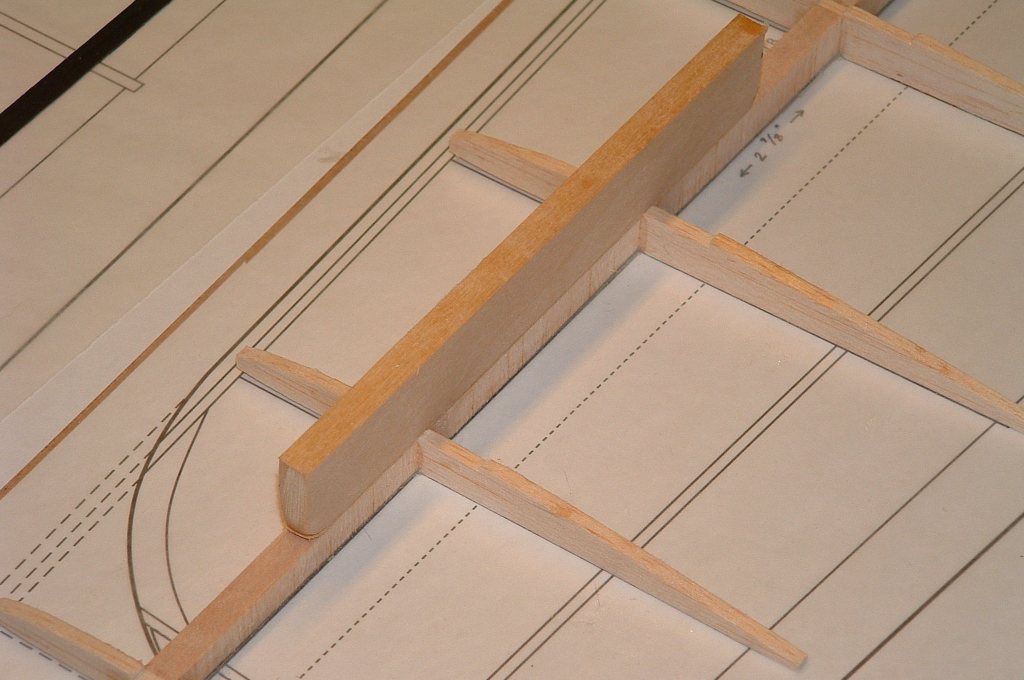
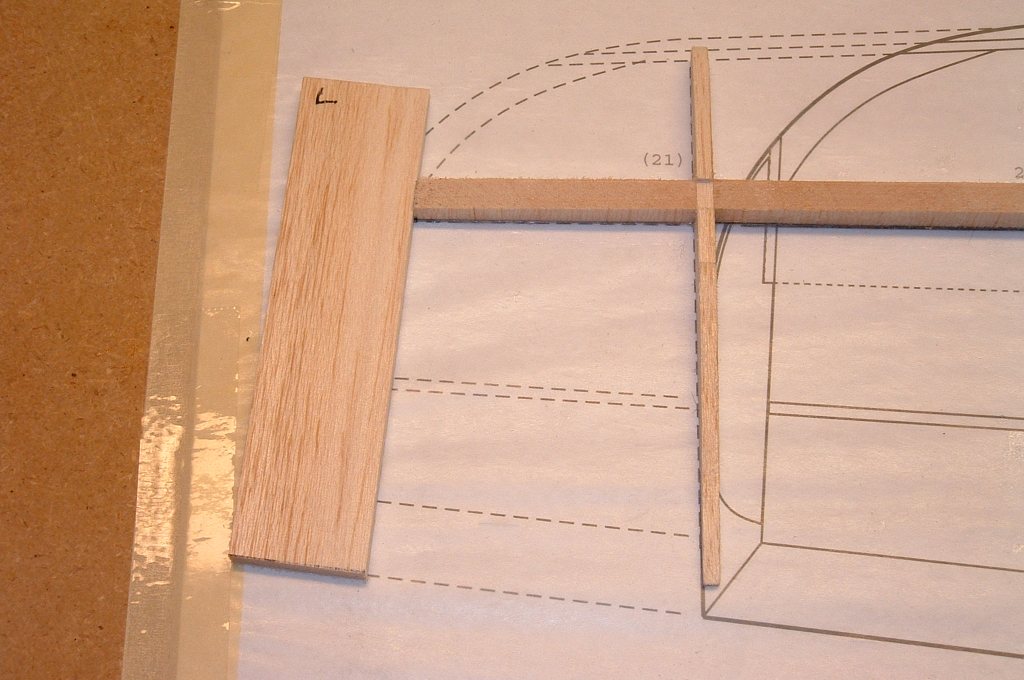
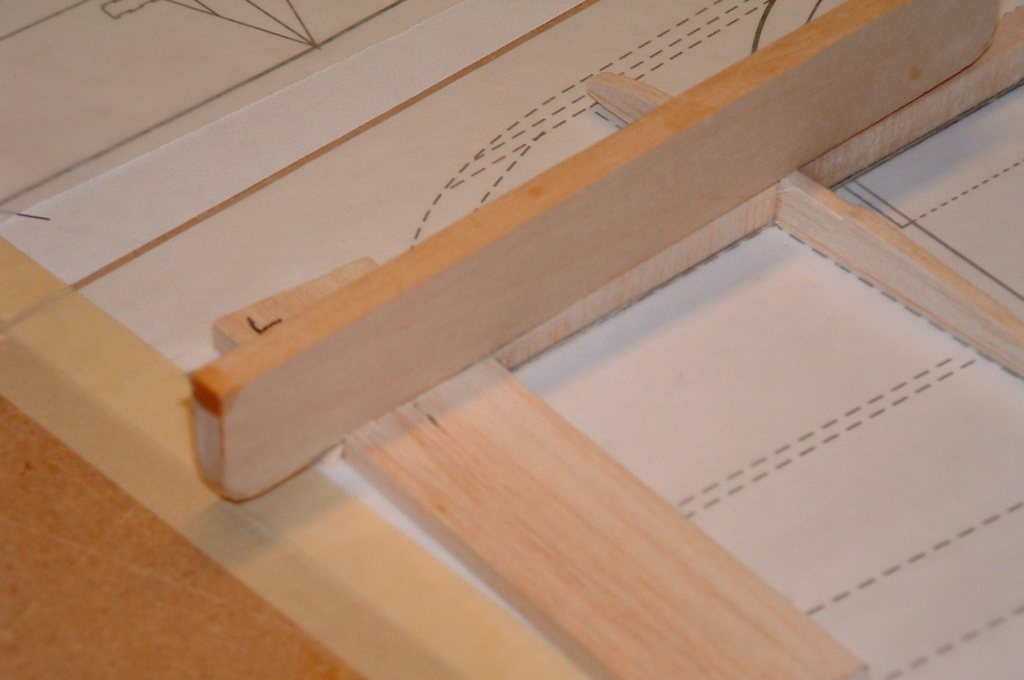
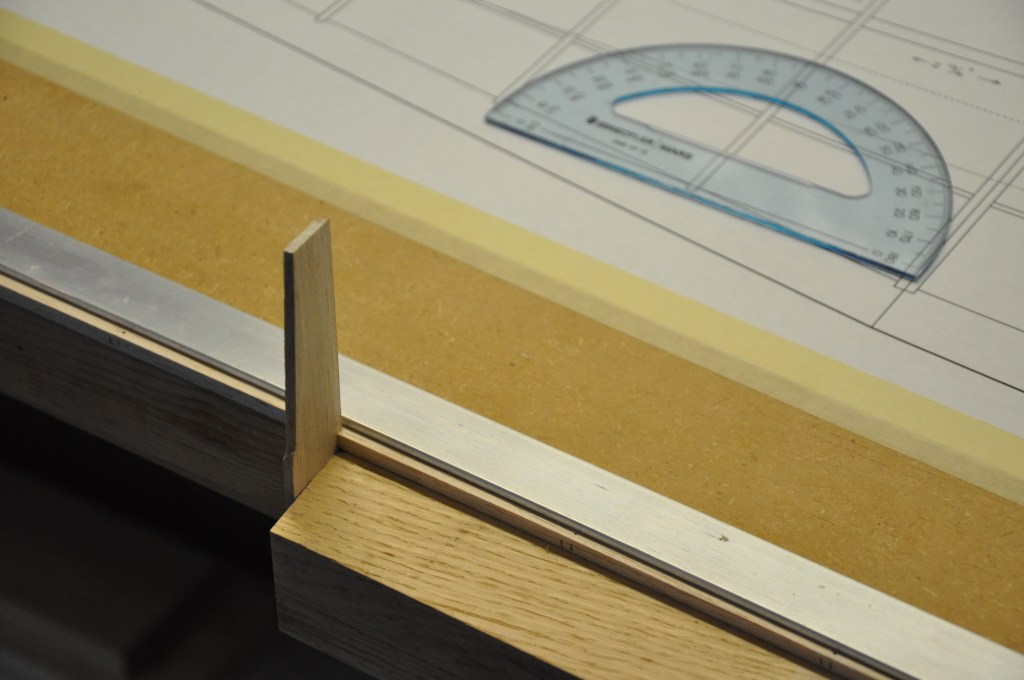
I measured the joint angle (see protractor) and sanded that angle into an oak board. Then I used double-sided tape to secure that board to the front edge of my workbench. I attached a metal bar to the trailing edge stock to be a depth stop and then proceeded to sand in the notches.
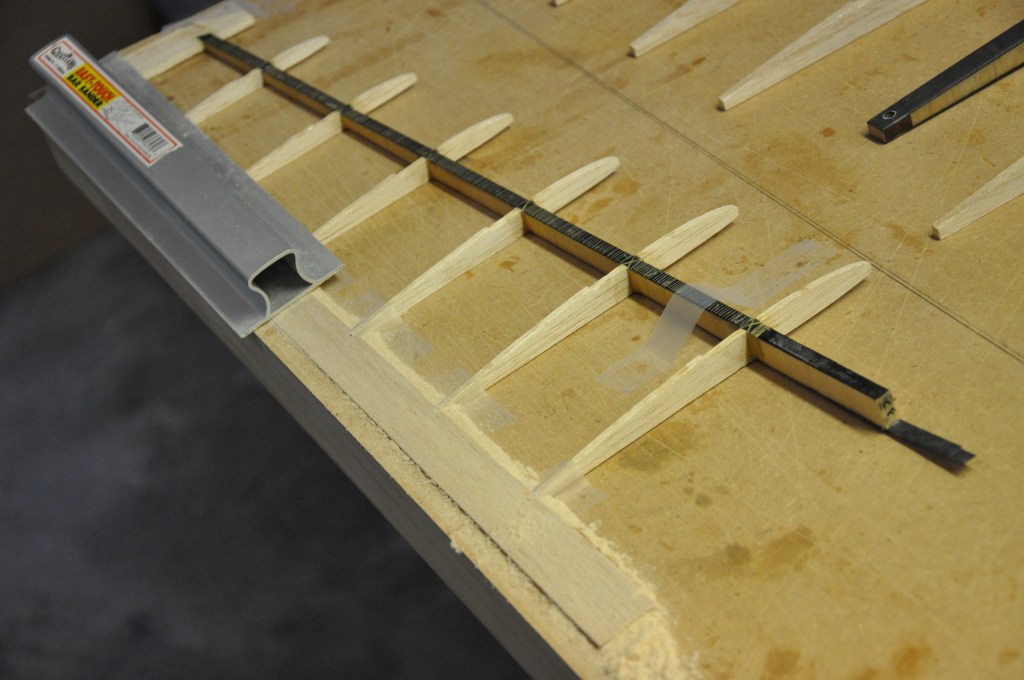
Once the trailing edge was glued to the ribs I used a long sanding bar to bring the trailing edge stock even with the ribs.
Note the tape over the end of the ribs to ensure that I didn't sand the ribs themselves.
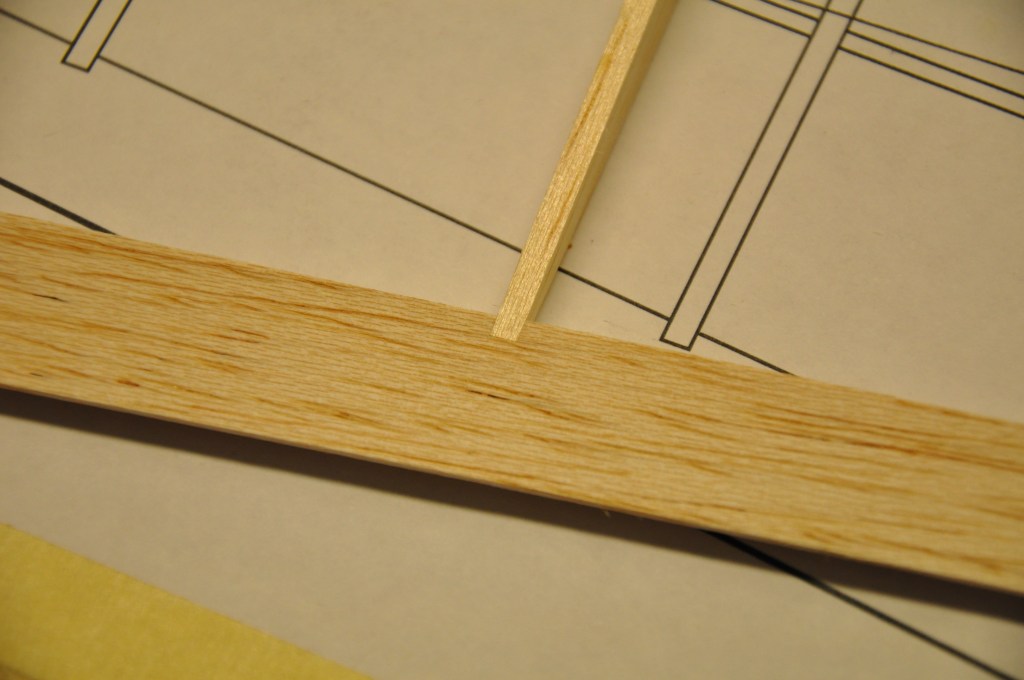
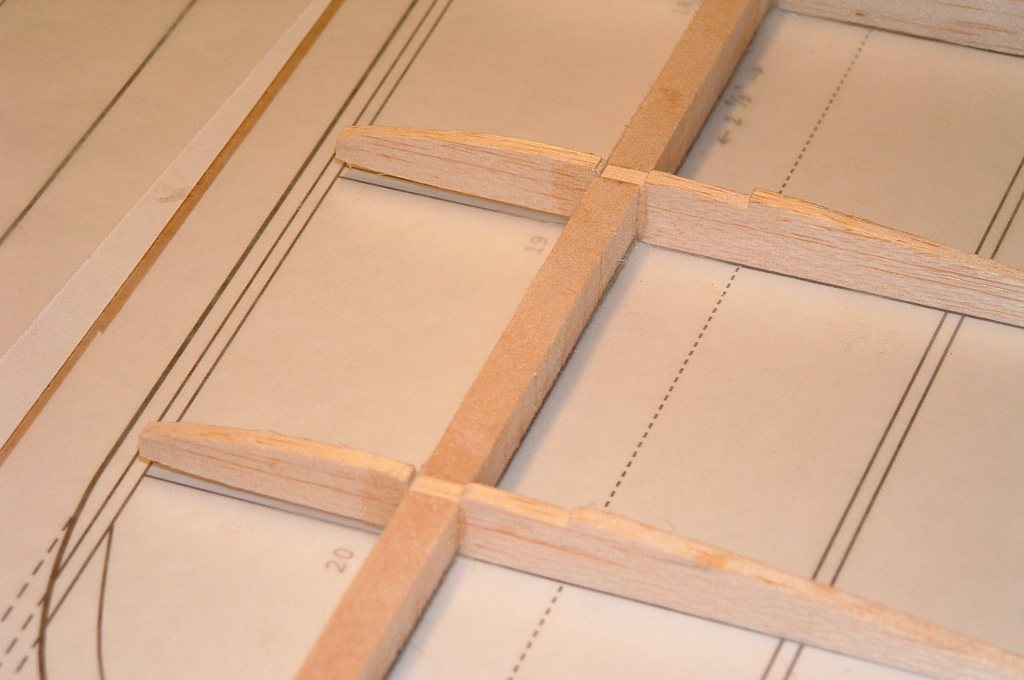
Here is a shot of just how good the joints are using this notching technique.
I had never done this kind of joint before, but I have to admit, with the proper preparation they are very good joints.
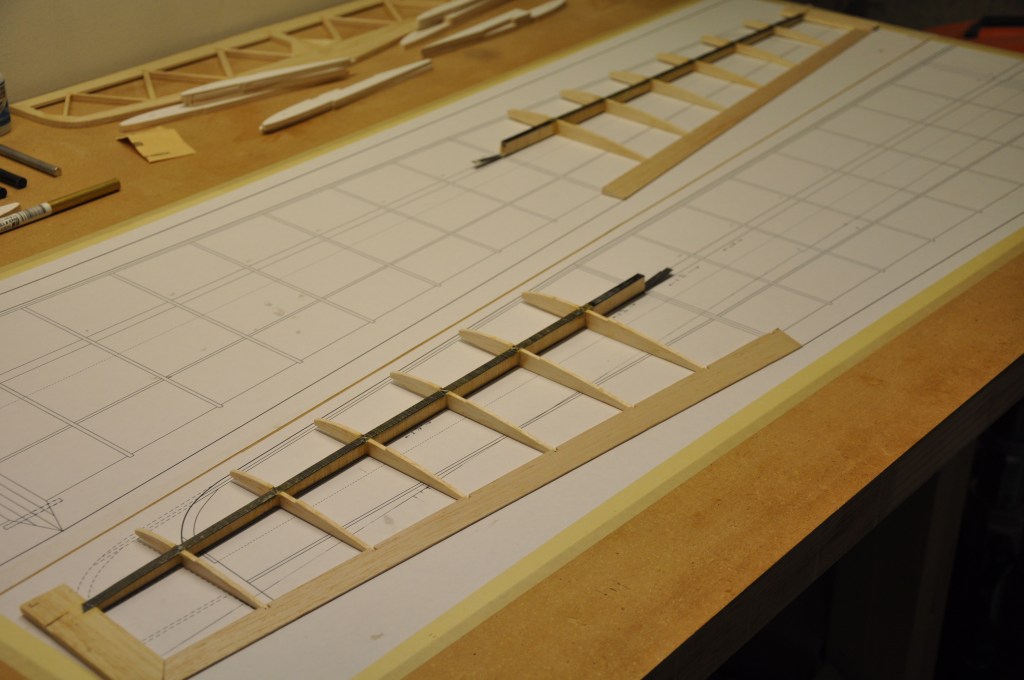
Here are both wing tips with trailing edges installed.
This shot was actually taken before the trailing edges were sanded down...
The carbon spar caps sit ever so slightly lower than the rib contours. Because of this, balsa spar cap strips need to be glued to the spar caps. Once in place I carefully sanded the balsa spar caps to the contour of the ribs so that the sheeting that follows would fit perfectly to rib and spar.
You can see the top balsa spar cap in place in the next picture...

Next I glued on the inner leading edge. Once the inner leading edge was secured, I sanded the proper angle to the top and bottom of the inner leading edge. This is so that the sheeting will fit properly.
After the inner leading edge was ready, I glued on the bottom sheeting.
After the bottom sheeting I used thickened epoxy to glue the triangle stock to the sheeting and the spar.
Note: you'll notice that the triangle stock is thicker than the plans call for. None of my local hobby stores carried the right size - and I didn't feel like making my own...
Next I glued on the top sheeting.
After that I sanded the inner leading edge flat. The inner leading edge is comprised of the inner leading edge strip and the top and bottom sheeting. It is to these three parts that the outer leading edge will be glued.
You will note in this picture that I've started shaping the wing tip, but that I still have more shaping to do.
This page is not complete yet!
I am currently doing more work on this part of the Bubble Dancer, so check back again.
-- Current through May 25, 2011