Ok, as with making the mold, this was the first time I've laid up a composite fuselage - so here goes!
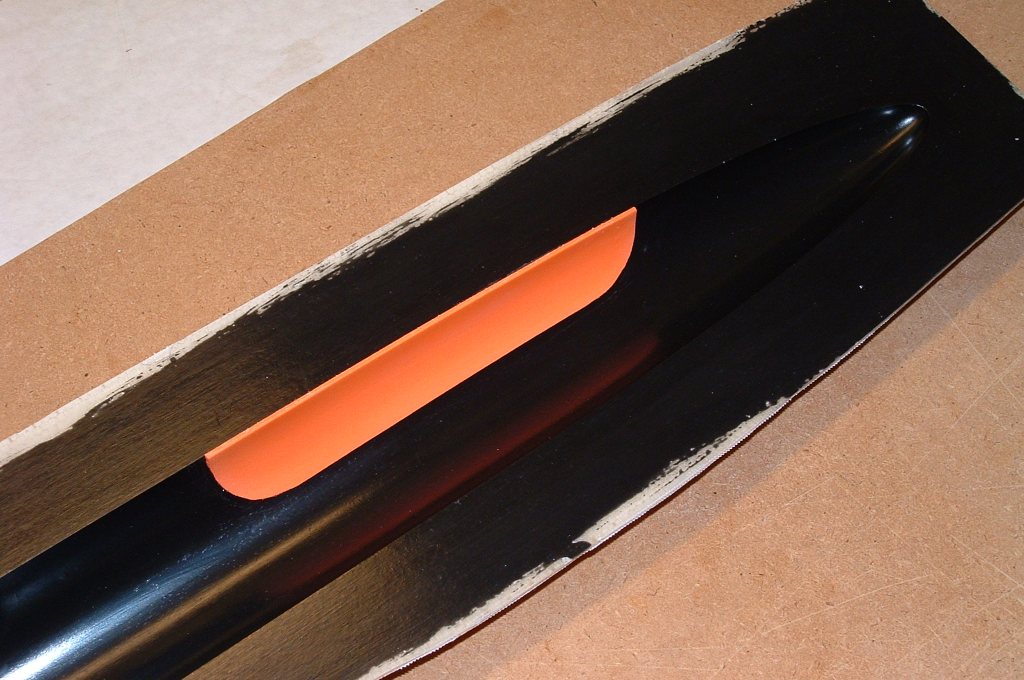
When I got started on laying up the fuse, I thought I'd like a stepped-down area for the hatch to sit in but since I hadn't carved one into the plug I needed to find a way to provide for it after the fact. I used a piece of sticky-backed art foam to make my step and placed it right into the mold.
In hindsight I should have planned this hatch area into the plug. It would have saved weight and the foam turned out too be too thick - as we'll see later.
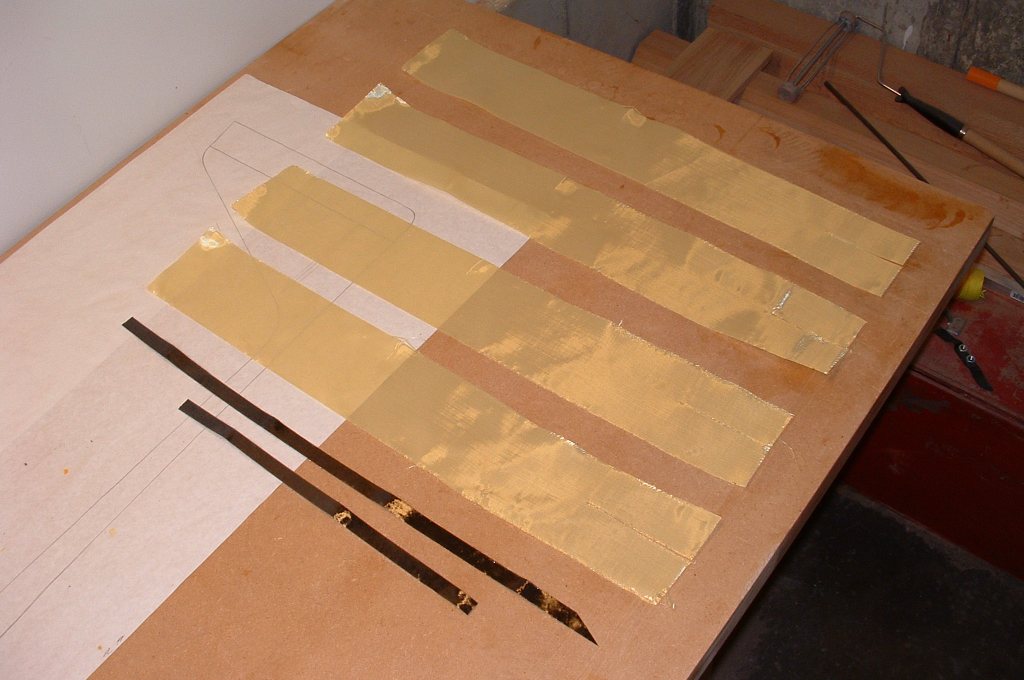
The fuse pod uses 4 layers of Kevlar as well as some carbon reinforcement. These were prepared ahead of time so that once the epoxy was brushed on, layup could progress rapidly and without interruption.
Notice the slits at the nose and wing-saddle for help with contouring. I found that preparing the slits ahead of time was much preferred over trying to cut them once the Kevlar was soaking up epoxy.
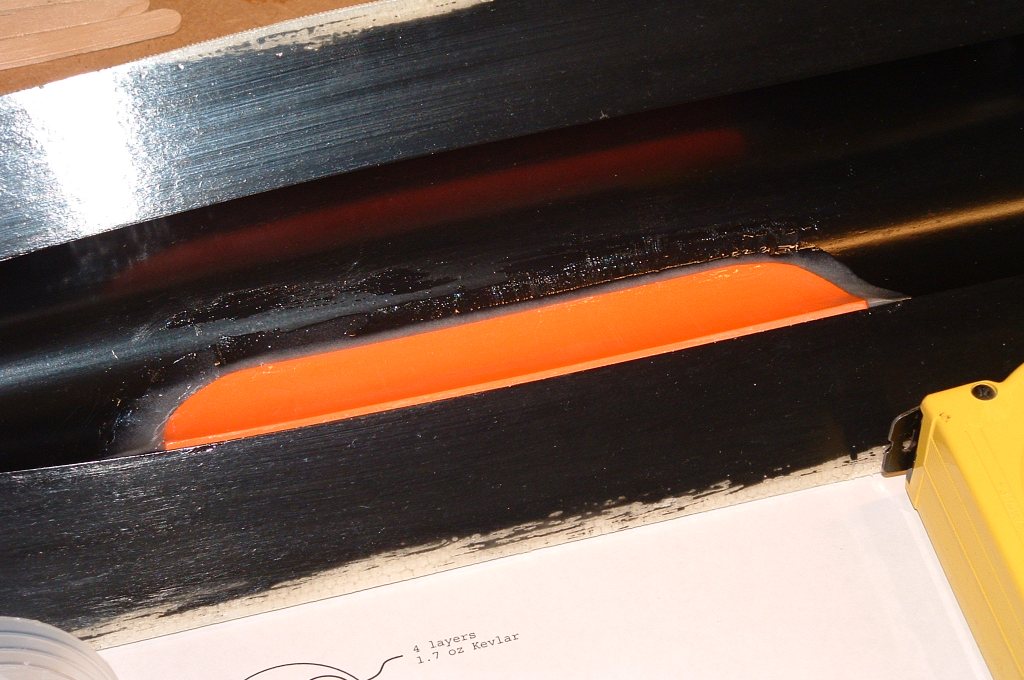
When I was ready to begin, I started by applying a silica thickened fillet of epoxy to the canopy step-down to allow the Kevlar to later bridge this area smoothly. This was allowed to thicken slightly before proceeding.
Again, this was not the best way to accomplish a hatch cover. This is needless weight that was not necessary.
Next I completely coated the inside of the mold with a regular mixture of West System 105 resin and 206 slow hardener.
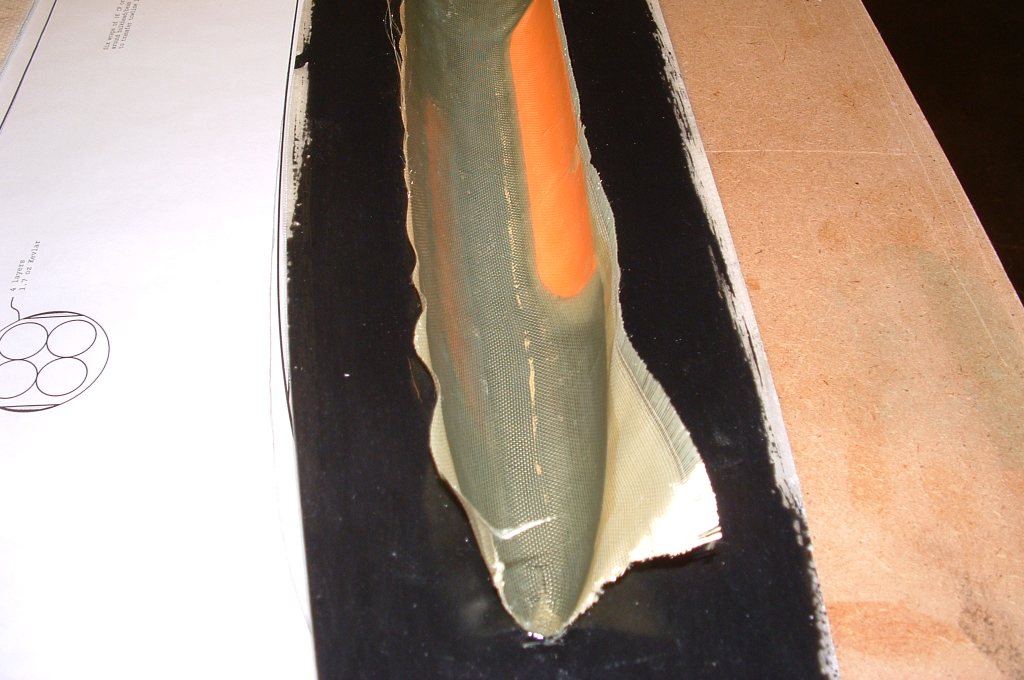
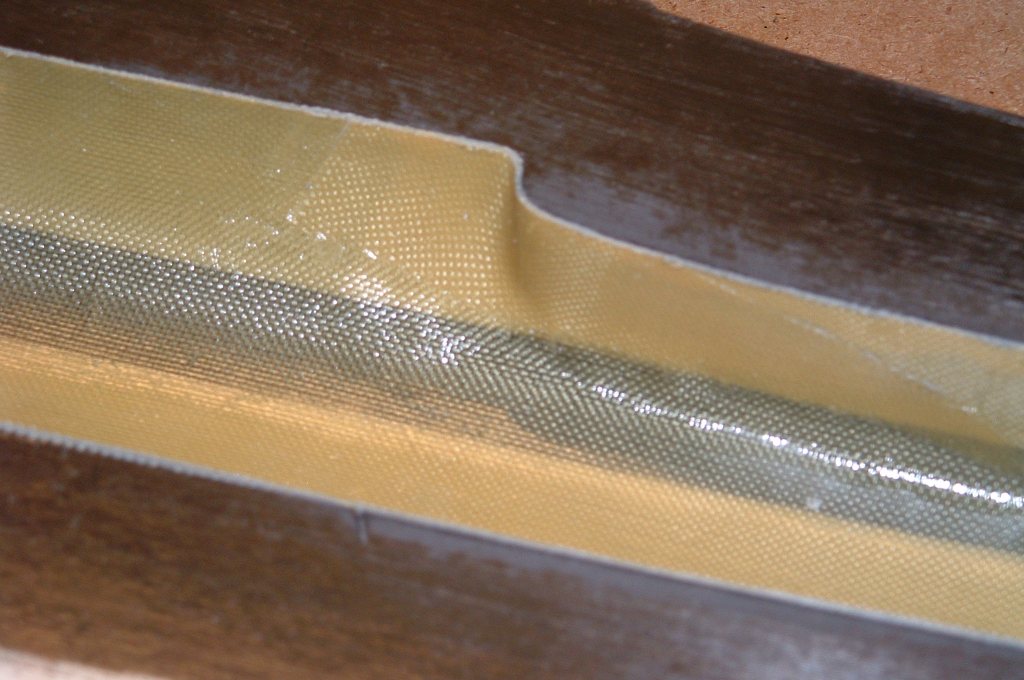
Working quickly, I applied the first layer of Kevlar. Notice that the area at the nose overlaps where the slit was cut in the Kevlar.
Care was taken to ensure that there were no air bubbles and that the Kevlar was wetted completely right up to the lip of the mold.
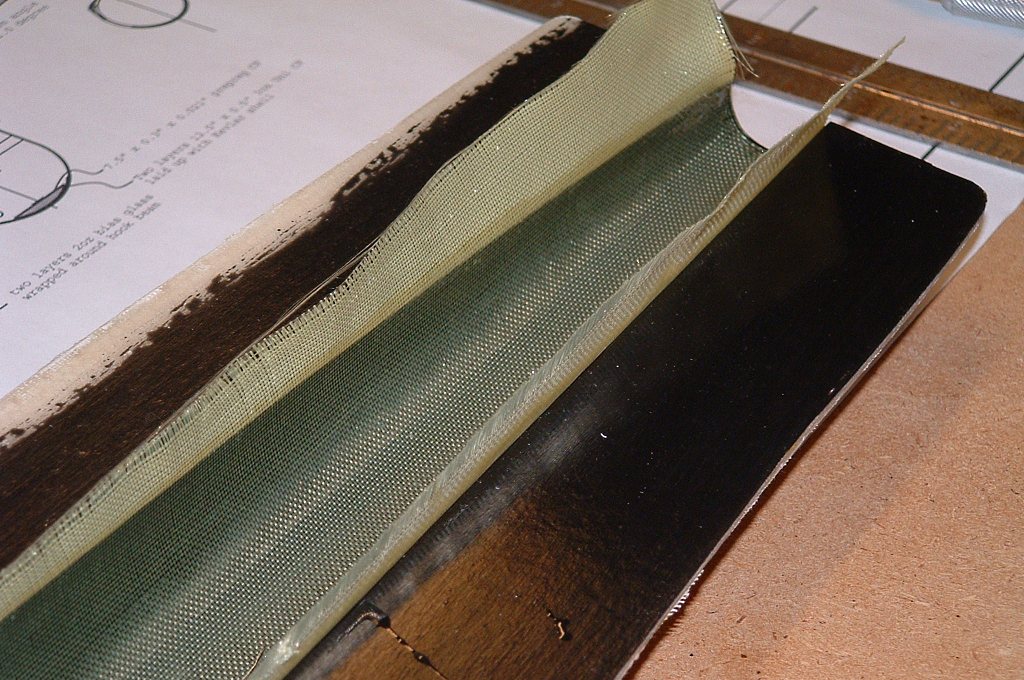
A shot of the rear of the mold with the first layer of Kevlar laid in.
I had read that using a graphite powder blackened mold helped in the lay-up process by showing any trapped air bubbles more readily. - I found this to be quite true and very useful. Fortunately, I have a huge can of graphite powder left over for any future mold making projects.
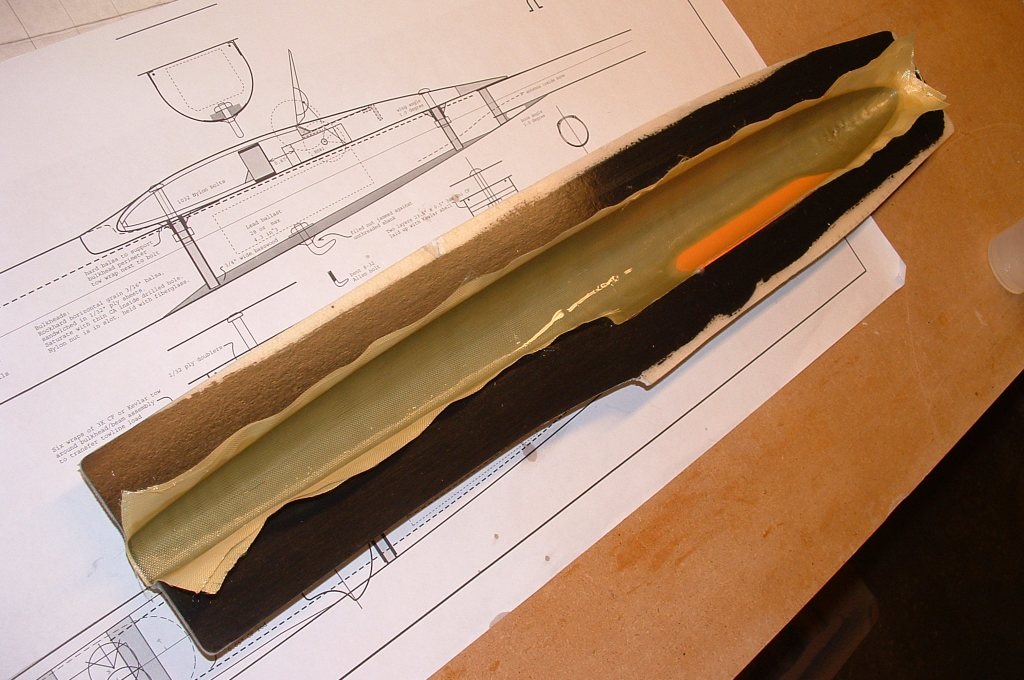
The second layer of Kevlar was applied just as soon as I was satisfied with the layup of the first.
By being speedy with the application of Kevlar, subsequent layers of Kevlar will soak up the epoxy that is already in the mold and thus reduce to total amount of epoxy required - thereby lowering overall weight. Stipling gently with the brush helps wet any spots that may not have absorbed enough epoxy.
The third and fourth layers were applied in the same way, with the carbon strips added between the third and fourth layers to lock them down.
Now the whole lot was allowed to dry overnight.
A small confession: In my haste to lay up the Kevlar, I botched a few things. I forgot one of my bottom carbon strips until after the fourth layer was down. I also placed one of the long carbon strips upside-down so that the diagonal wedge at the nose is oriented opposite to the other half. -- No big deal, really, but a note to self... pay attention! :-)
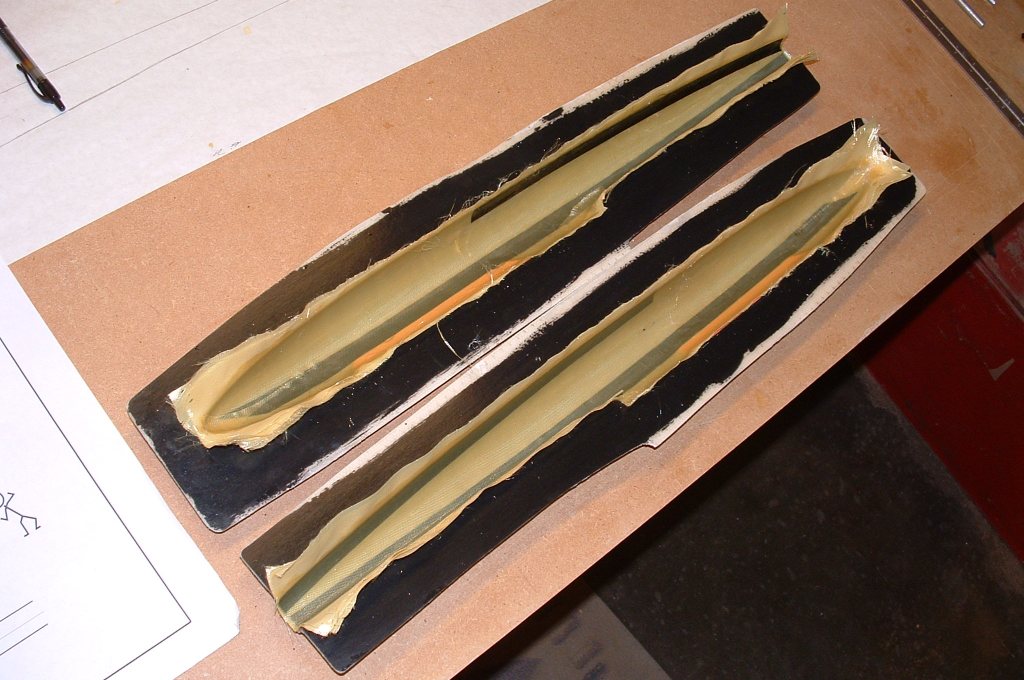
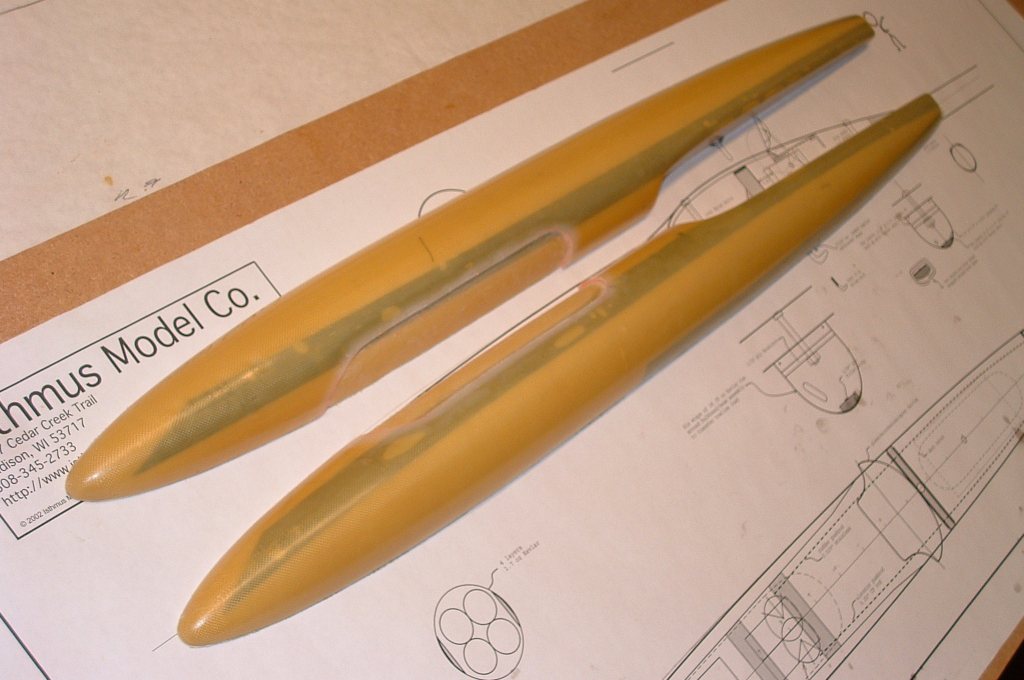
The fuse halves came out of their respective molds cleanly and easily.
Next I removed the canopy recess forms and cleaned up the little bit of foam that had adhered to the fuse.
Taking a closer look at the fuse halves, it appears that I have a few air bubbles trapped under my carbon strips. The bubbles are on the side that I couldn't see during layup, so it looks like I'll have to take a little more care in the future when I lay in carbon parts...
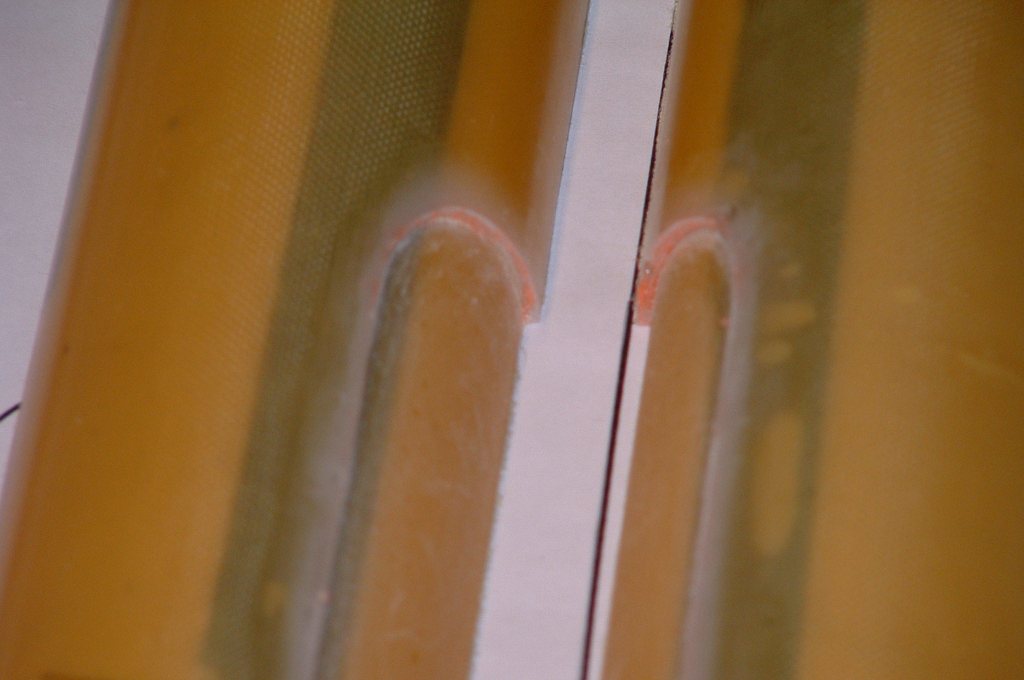
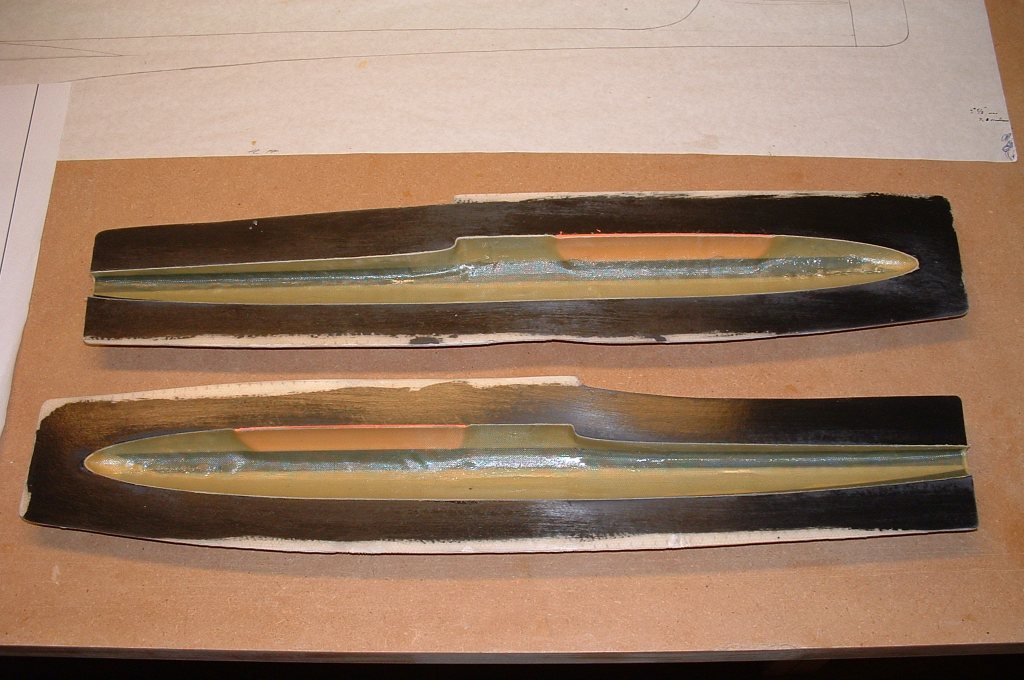
A close-up of the canopy recess.
I will cut out the canopy access and ballast holes at a later date when I do the remaining assembly of the fuselage components.
The cloudy area around the canopy is just the silica thickened epoxy that I used to fillet the area.
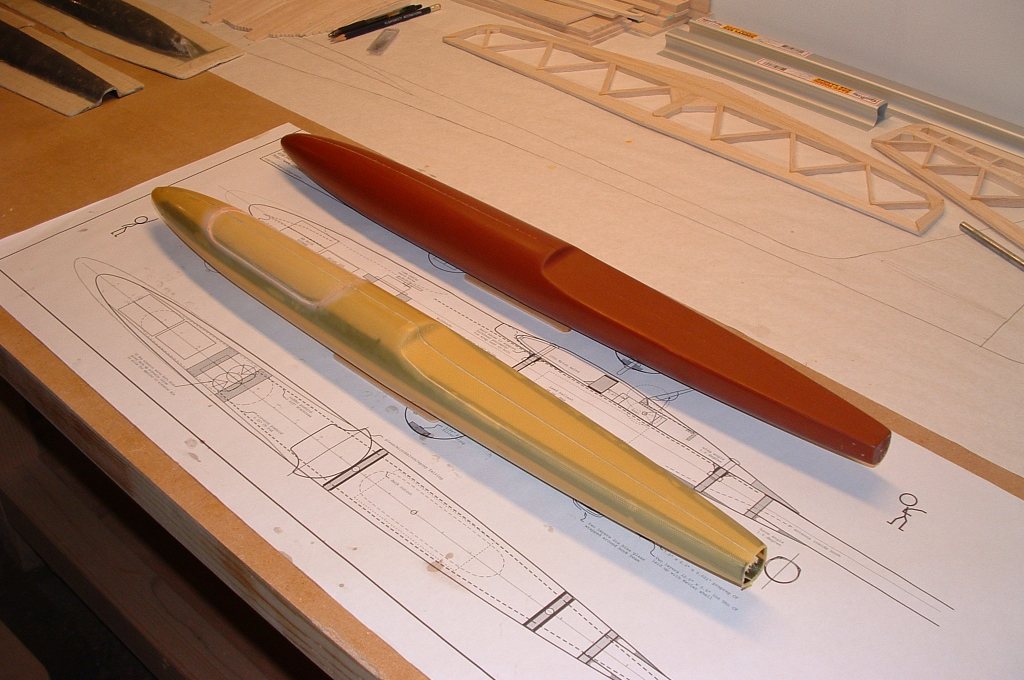
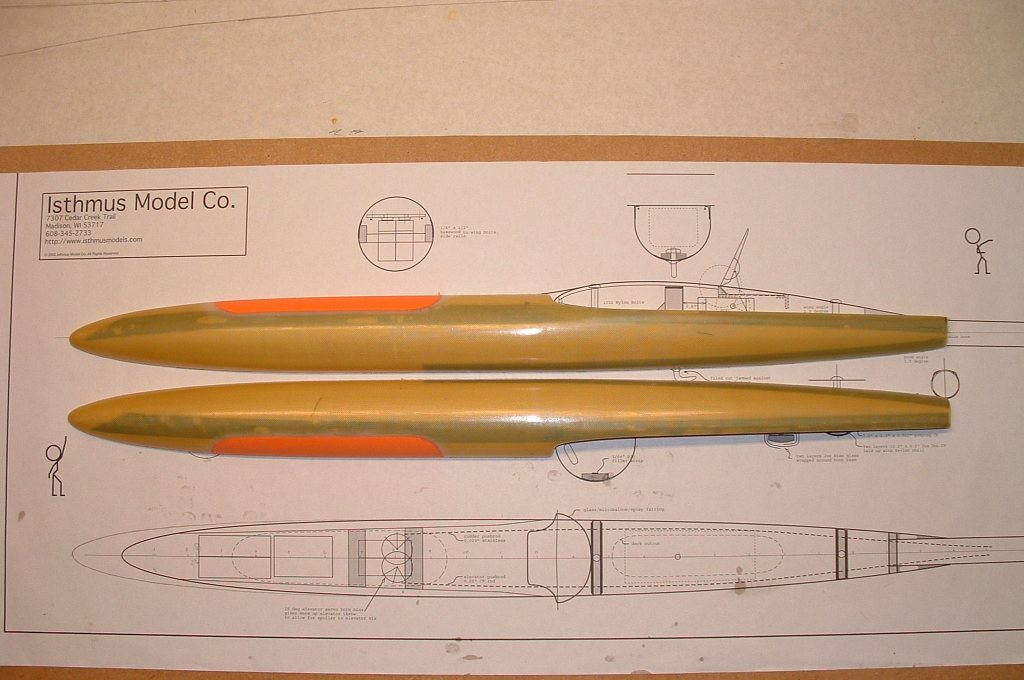
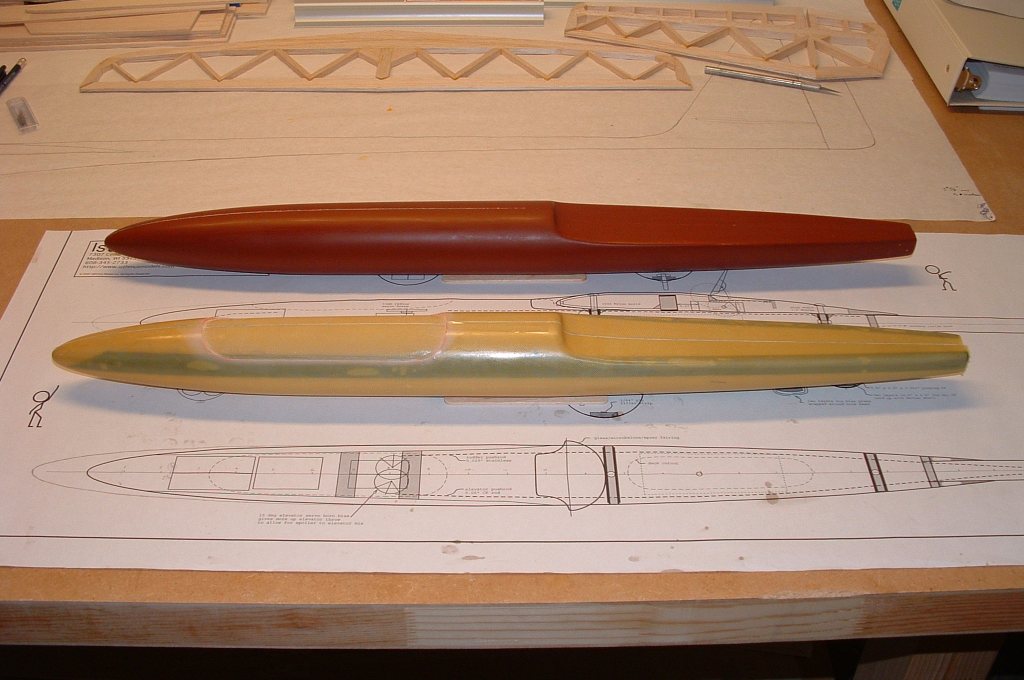
Another shot of the plug and fuselage side by side.
You can see the extra 1 1/2 inches of length over the original design.
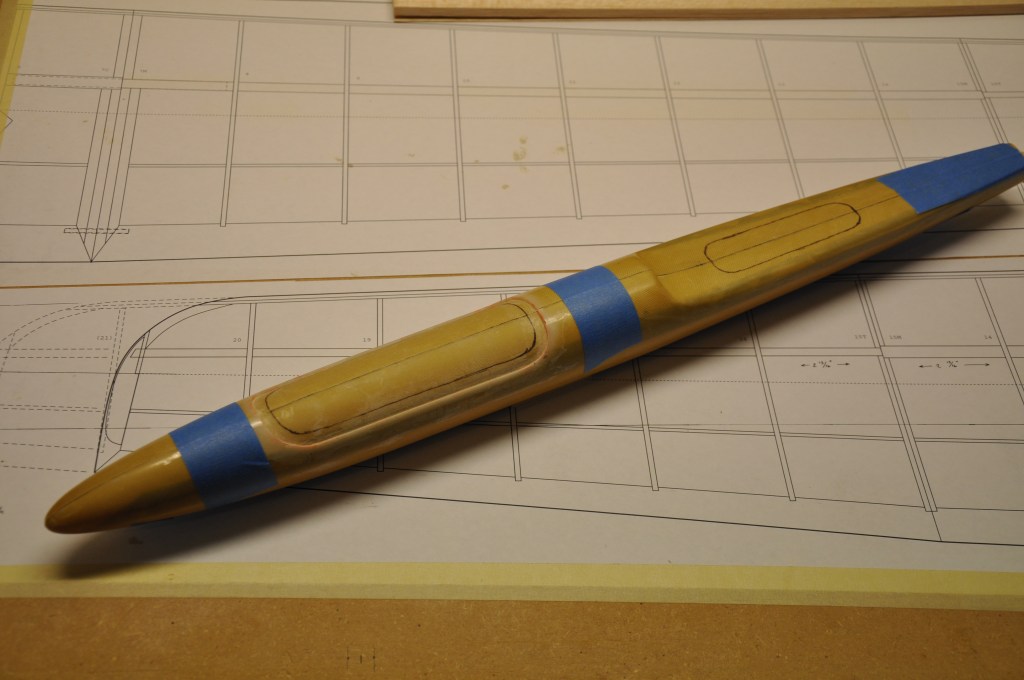
With the pod halves securely taped together I drew in the cutting-lines for the hatch and ballast access holes.
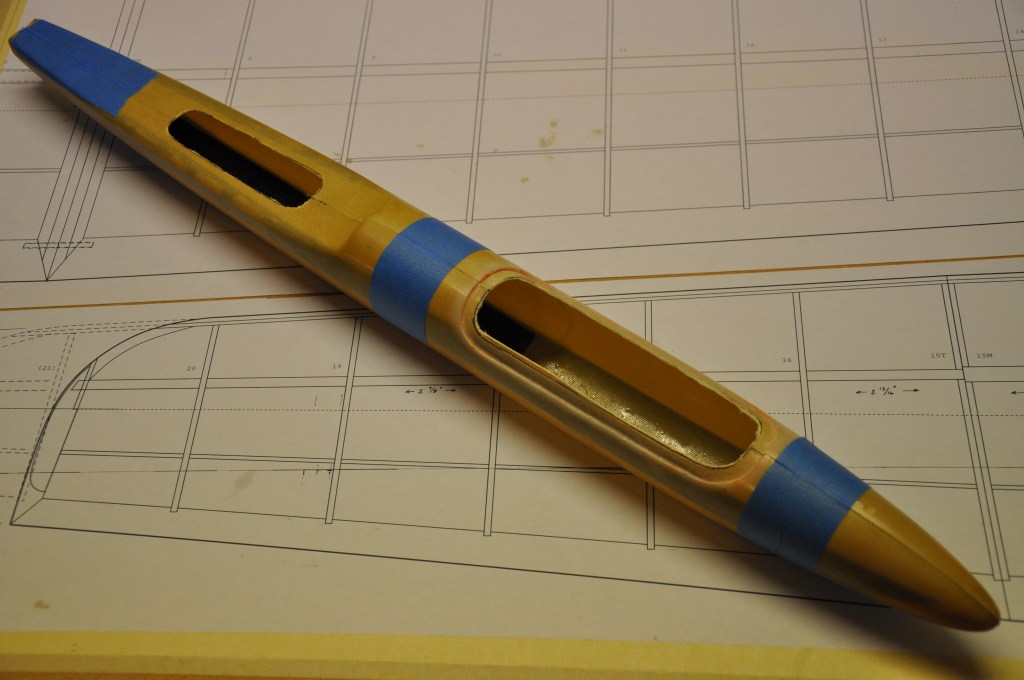
Using (several) brand new X-Acto blades I carefully cut out the access holes.
Kevlar is not the easiest material with which to achieve clean, pretty edges - so didn't stress it. However soaking the edges with CA hardened it up a bit and helped make the cuts a bit cleaner...
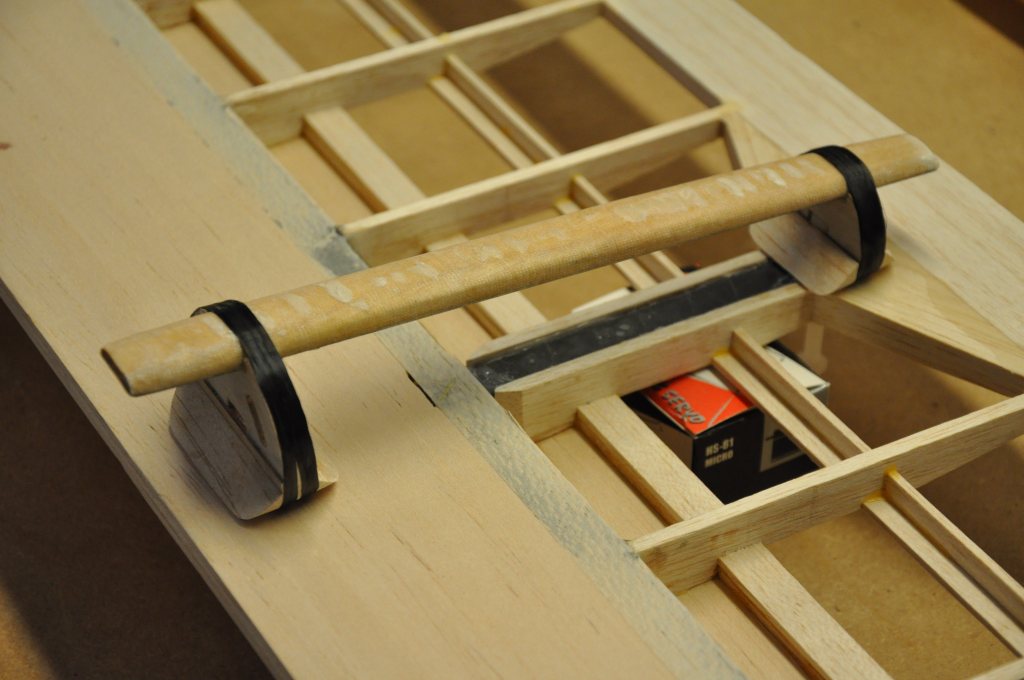
As I prepared for "working inside" the fuselage pod, I prepped the Tow Hook beam and attached bulkheads.
The Tow Hook is made from basswood and strips of carbon left over from the wing spar stock. The plans call for .021" pre-preg carbon strips but since I only had .014" on hand, I doubled them up for .028".
The carbon is glued to the basswood with epoxy and then the basswood-carbon group is wrapped with 2oz. bias glass to ensure that the assembly won't pull apart.
Here is another case of needing to re-read the plans. You will notice that the bulkheads as shown here are only made from balsa. The plans call for a balsa core with 1/32" plywood faces and a second plywood doubler on the top of the bulkheads.
I fixed this a bit later...
I shaped and installed the two basswood servo rails with thickened epoxy.
This took a lot of trial and error fitting to achieve a good fit. The result is not exactly pretty, but I guess it just needs to be functional...
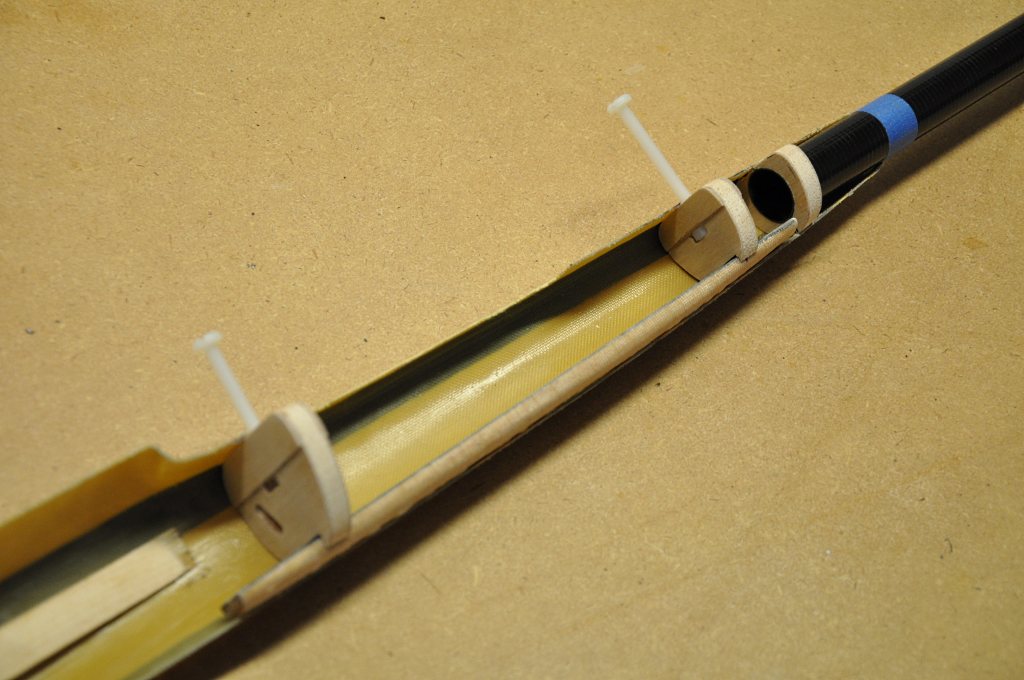
You can now see the completed tow hook beam with the carbon and glass wrap.
You also see the re-worked bulkheads with the plywood doublers. The bulkheads are not attached yet to the tow hook beam. Still needed at this stage was to shape the balsa triangle stock the is attached to the top of the bulkheads.
Once the bulkheads are completely ready, they are wrapped with carbon tow around the bulkhead and tow hook beam. We'll see that later.
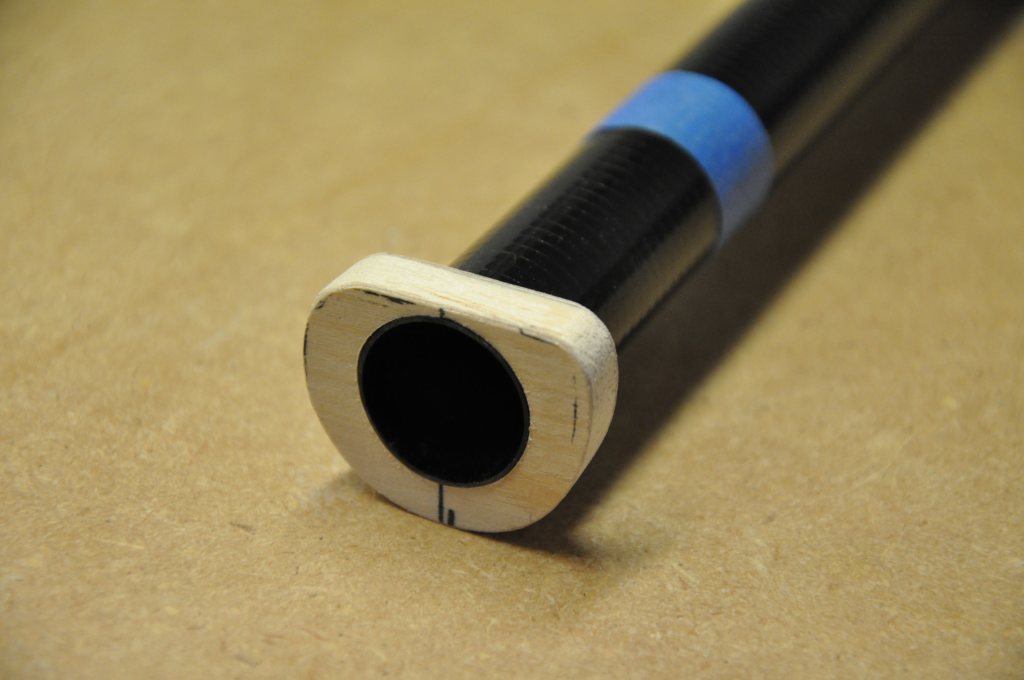
I made a tail boom bulkhead using the same technique as the other bulkheads.
Again, careful shaping and trial fitting is necessary to ensure a proper fit inside the fuse pod.
The blue masking tape is just to show me how deep the boom fits into the pod.
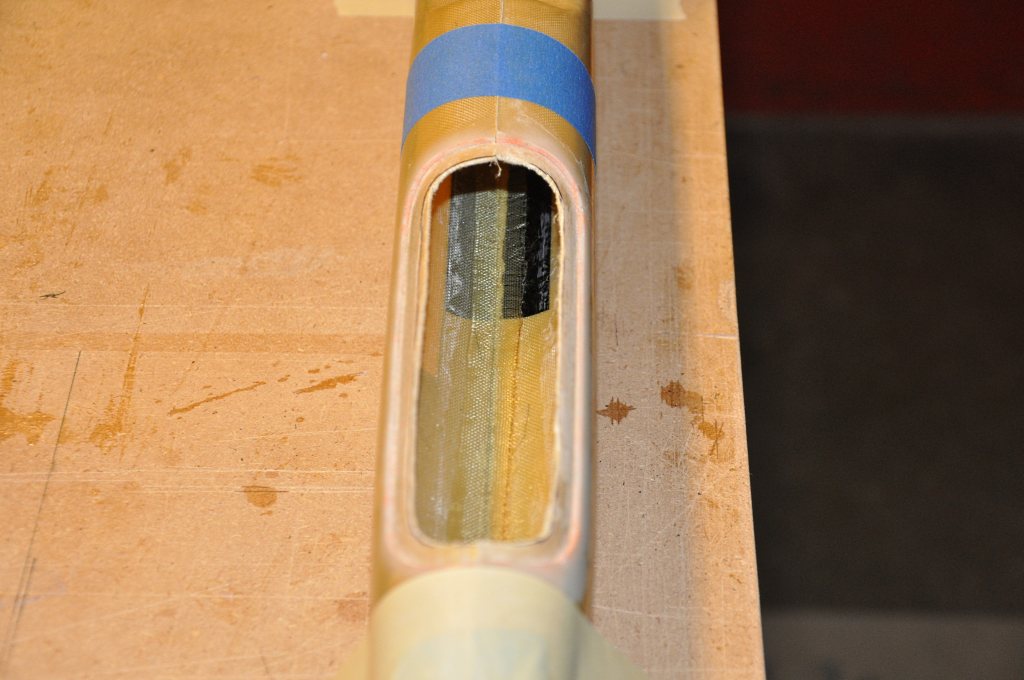
Here is a picture showing all three bulkheads being test fit inside the fuse pod.
Note that I still need a little room around the first two bulkheads for the carbon tow wrap that will be installed shortly.
I used the wing screws to ensure the bulkhead location was accurate and then glued the bulkheads to the tow hook beam. Note: this step is strictly gluing the joints where the two parts meet. I wet the carbon tow/bulkhead with epoxy at a later time.
You will notice the air bubbles in the tow beam glass wrap... I had to sand a bit of the wrap down for a better fit, but figured that epoxy would fill these bubbles again when I glued the beam to the fuselage.
This is one of those steps you might want to do differently. It seemed reasonable to me, but I'm sure there are plenty of other ways to proceed.

Once the bulkhead assembly was finished, I was ready to join the pod halves.
I painted unthickened epoxy along the seam-lines of both pod halves and laid kevlar tape onto the epoxy.
I then painted silica thickened epoxy around the contact points of the bulkheads as well as the bottom of the tow hook beam.
Finally and very carefully, I brought all of it together. I use a brush to make sure the tape was completely wetted out with the epoxy.
The whole assembly was allowed to cure in a v-block setup.
Here is a close-up shot of the kevlar tape used to join the two pod halves.
This page is not complete yet!
I am currently doing more work on this part of the Bubble Dancer, so check back again.
-- Current through June 6, 2011