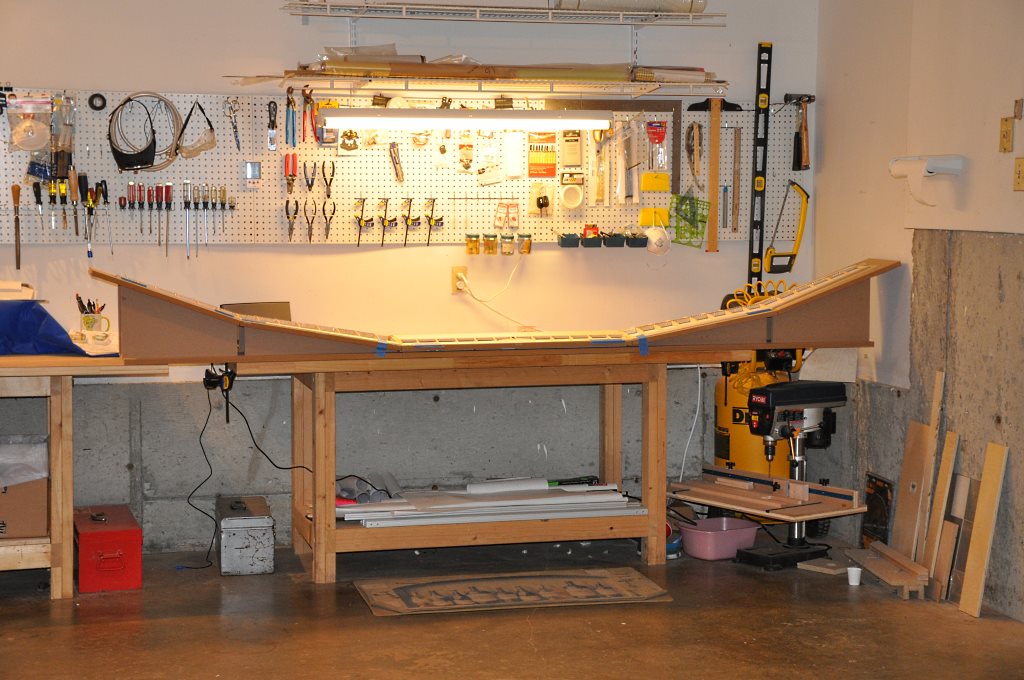
Note: This wing construction write-up will cover construction of the wing as one unit using my jig. For panel-by-panel details, look at my original construction notes...
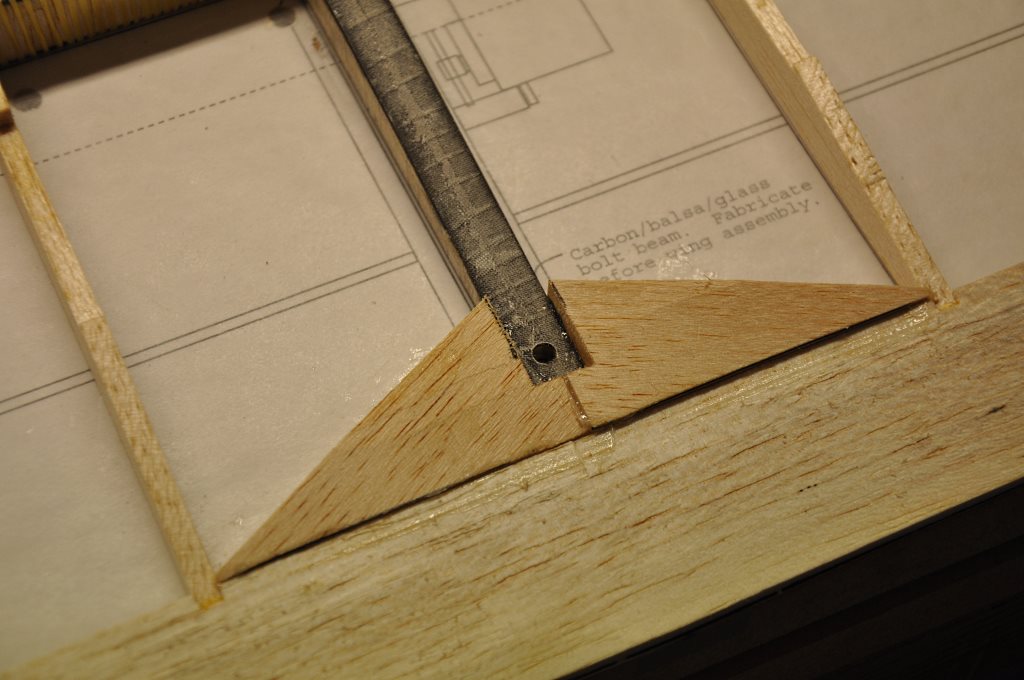
Before wing construction can begin, certain things will need to be ready in advance. Notably, the Bolt Beam and the Wing Joiners.
You will also want to have prepared all the ribs and shear webs, perhaps numbering them so that there is no confusion during the spar assembly.
It would also be a good idea to do a complete test fitting to make sure no further sanding or cutting is required on any part.
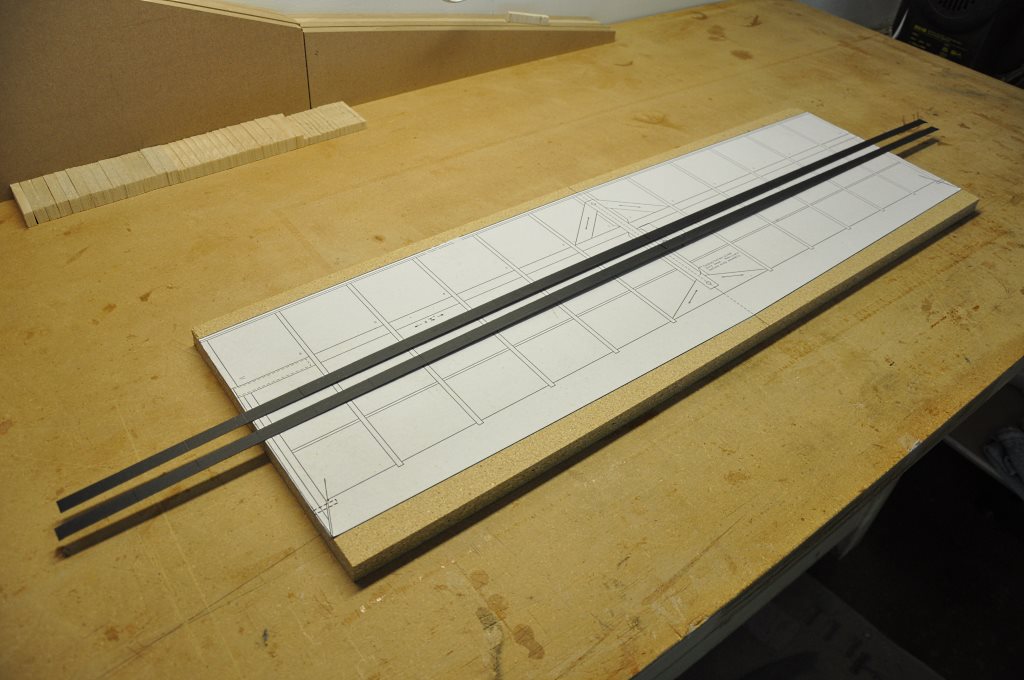
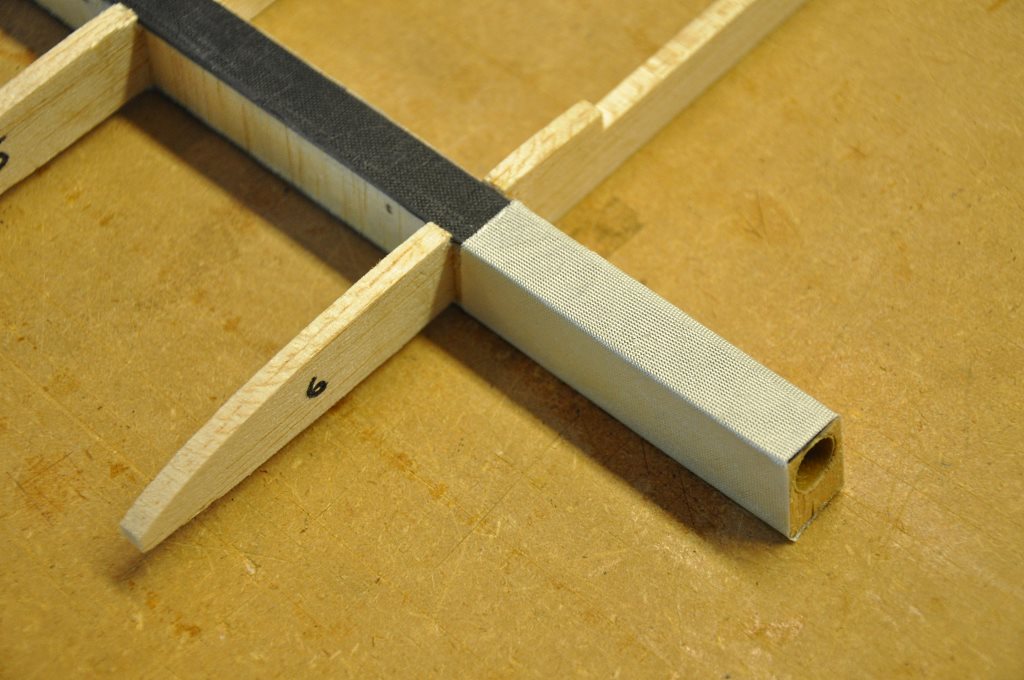
Start by cutting the spar cap carbon to the length of each panel.
Set the trimmed ends aside as many of them are used in other locations on the wing - notably, the center spar cap carbon is used for making the Bolt Beam.
See spar_V2.pdf for detailed instructions.
If you have not made the Bolt Beam yet, make it now.
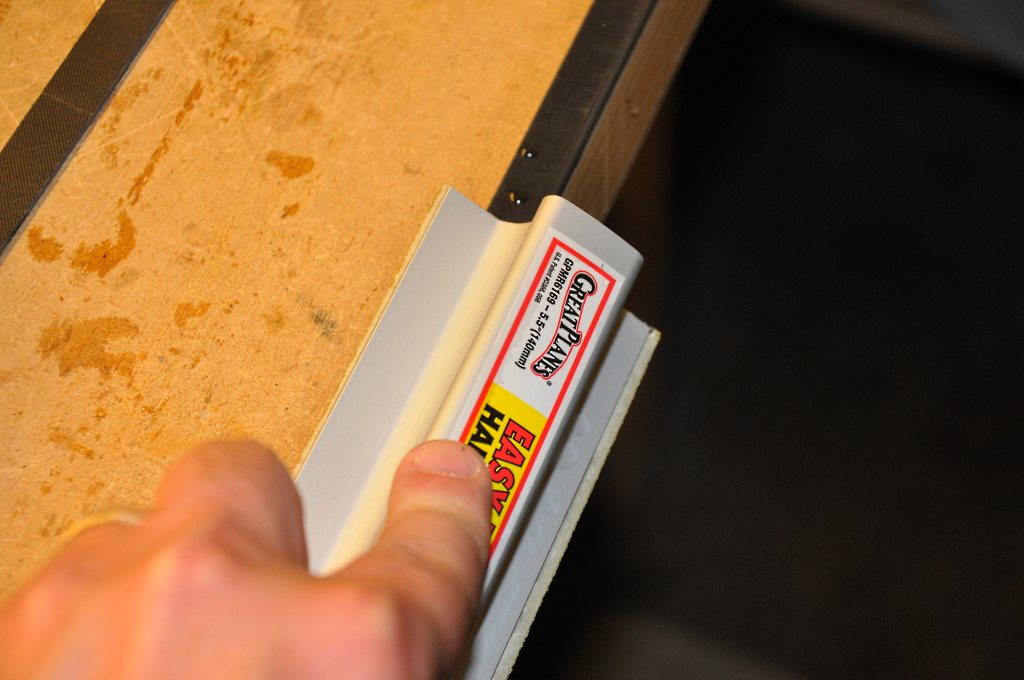
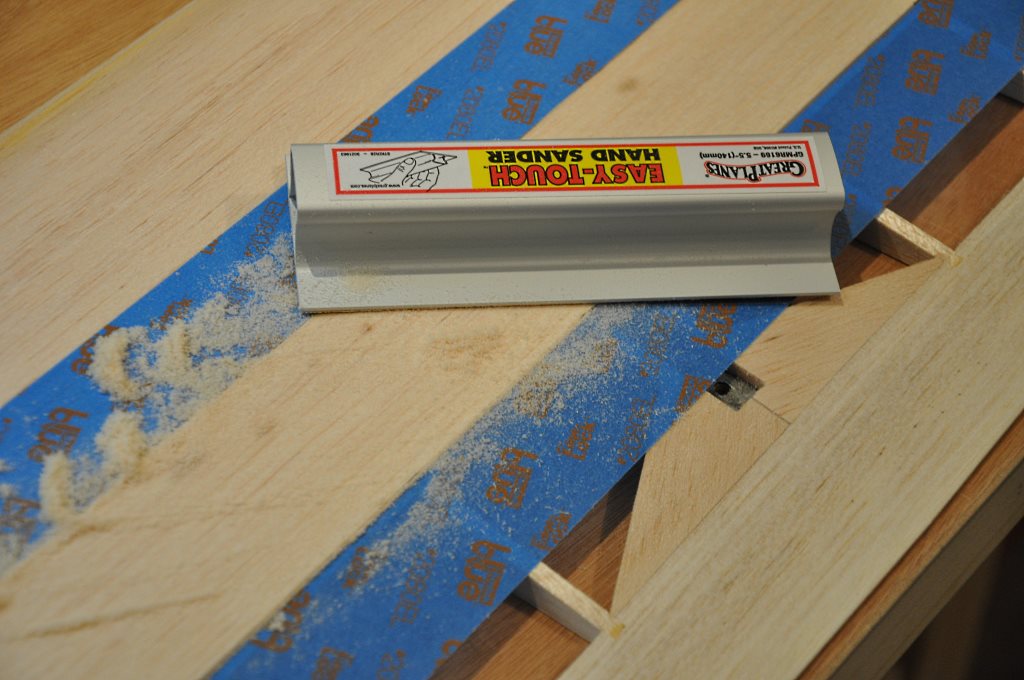
Once the carbon is cut to length wet-sand the 2 outer edges of each spar cap.
We will be wrapping Kevlar around the spar and any sharp corners will cut the Kevlar. So the top edges of the top spar cap and the bottom edges of the bottom spar cap need to be rounded.
This is a huge time-saver as maneuvering a sanding block between the ribs after the spar is laid up is difficult and can result in damage to the wing.
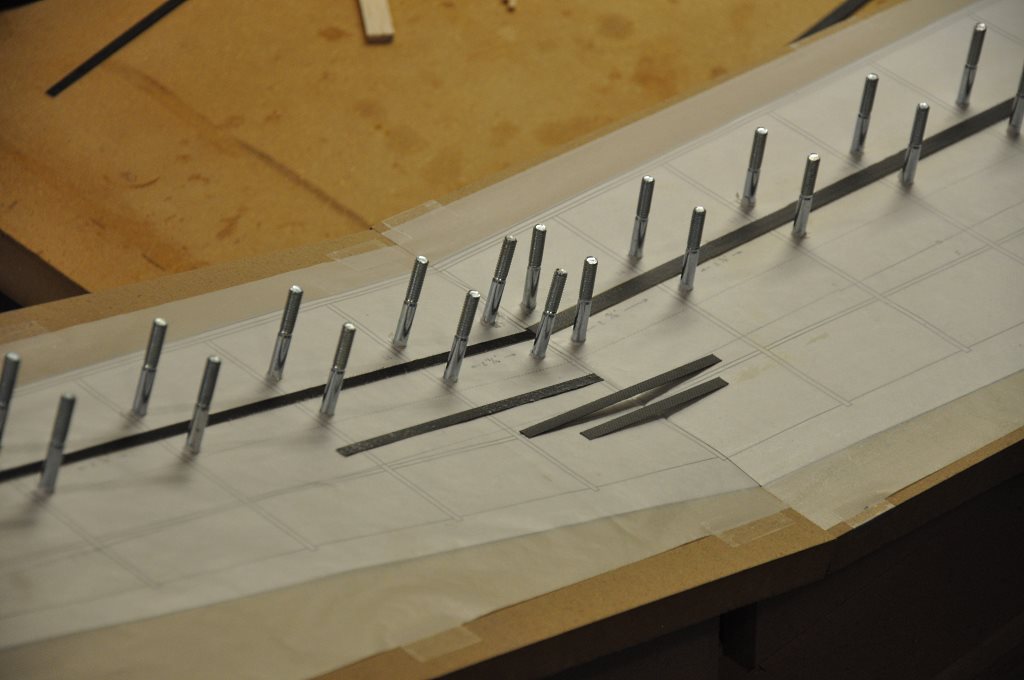
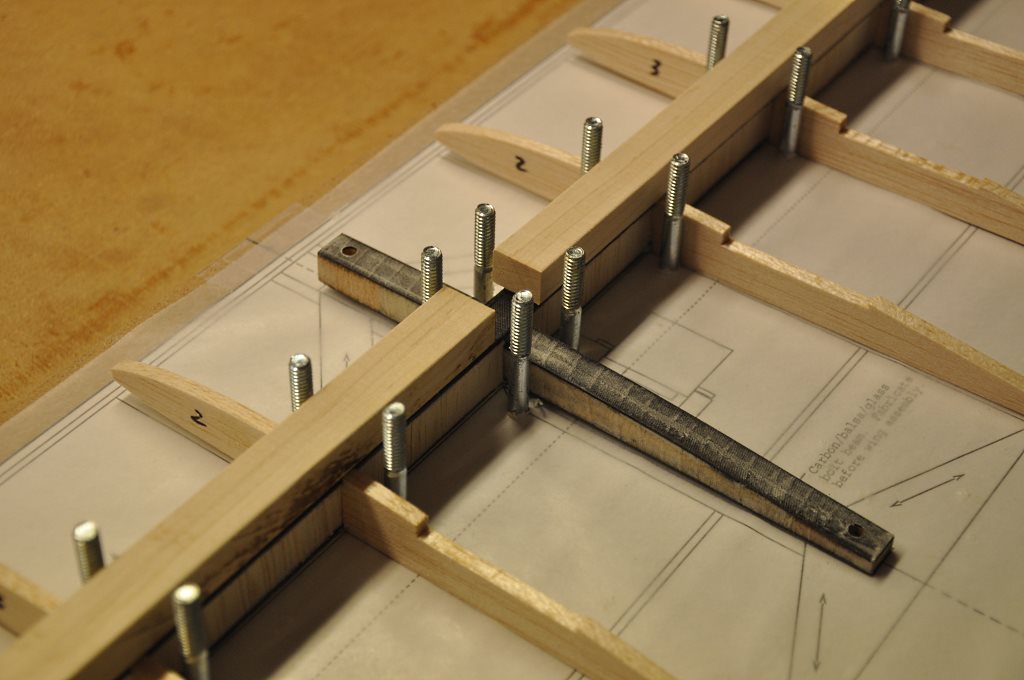
Cover the plans with wax paper.
Shim up the bottom spar location with a .015" strip of Mylar... if you don't want to use Mylar, do what I always do: layer 3 lengths of masking tape on top of each other, cut them to the right width and stick the tape in place on the plans.
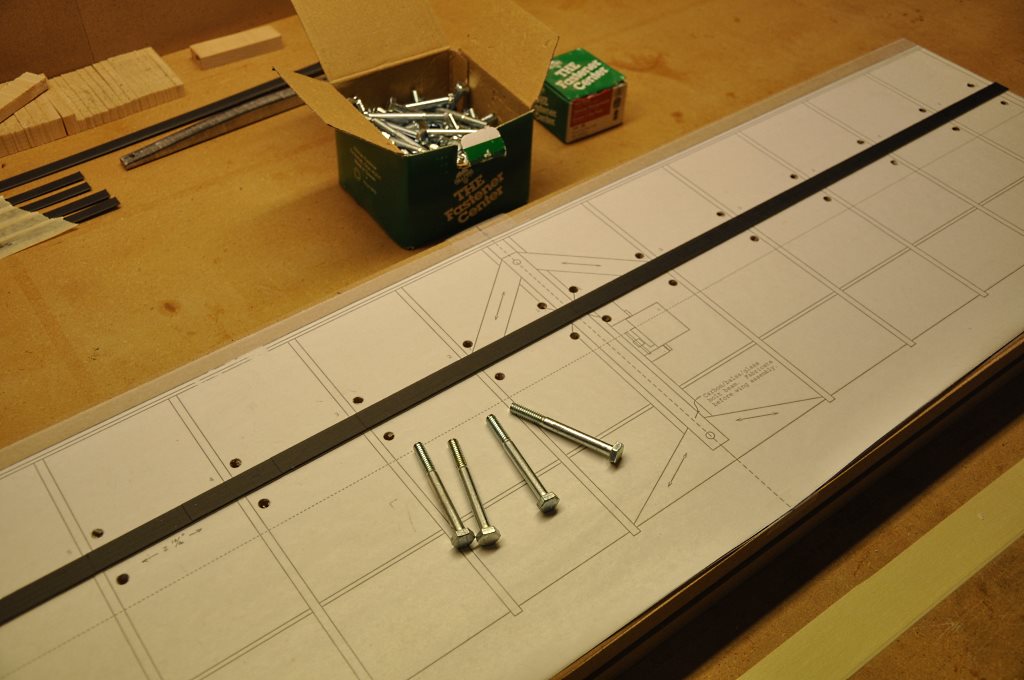
Set the bottom spar cap in place on the plans.
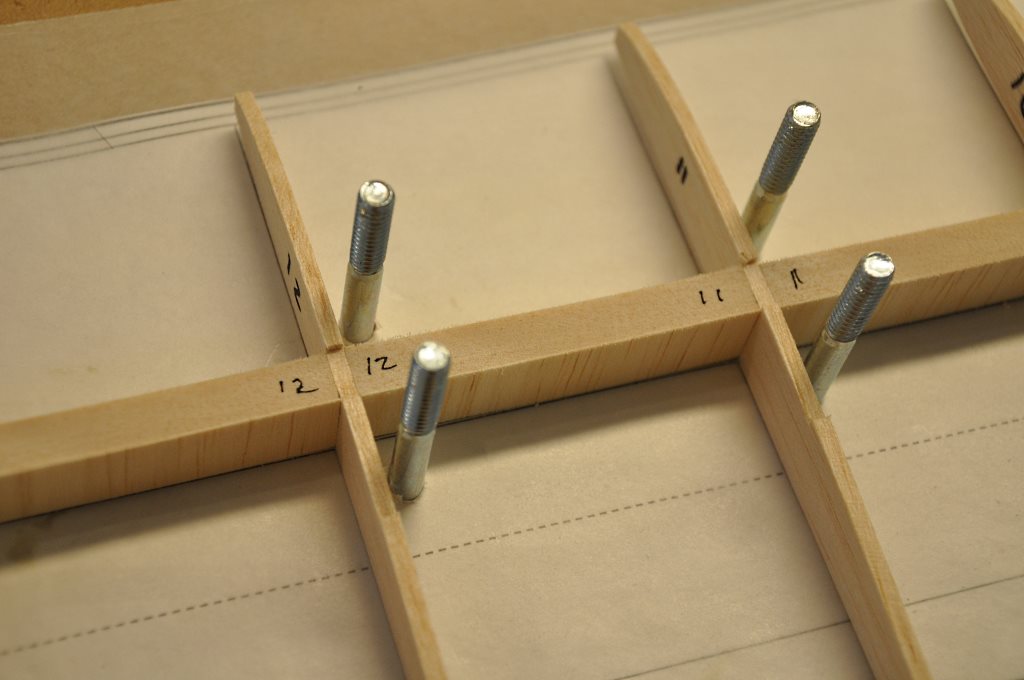
Slide the jig bolts in place from the underside of the jig panel.
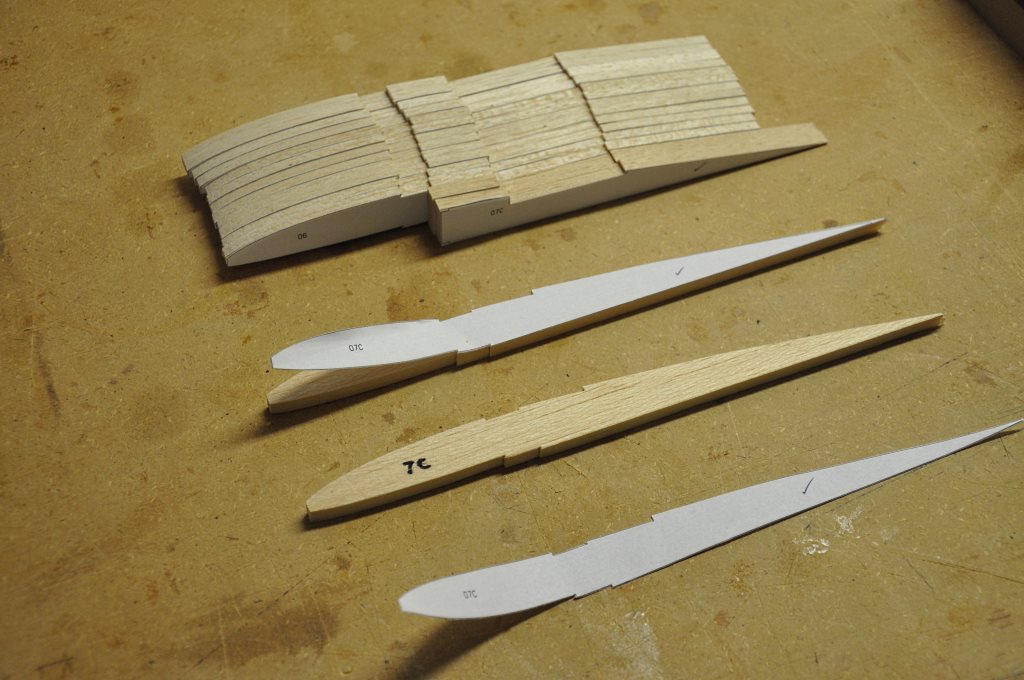
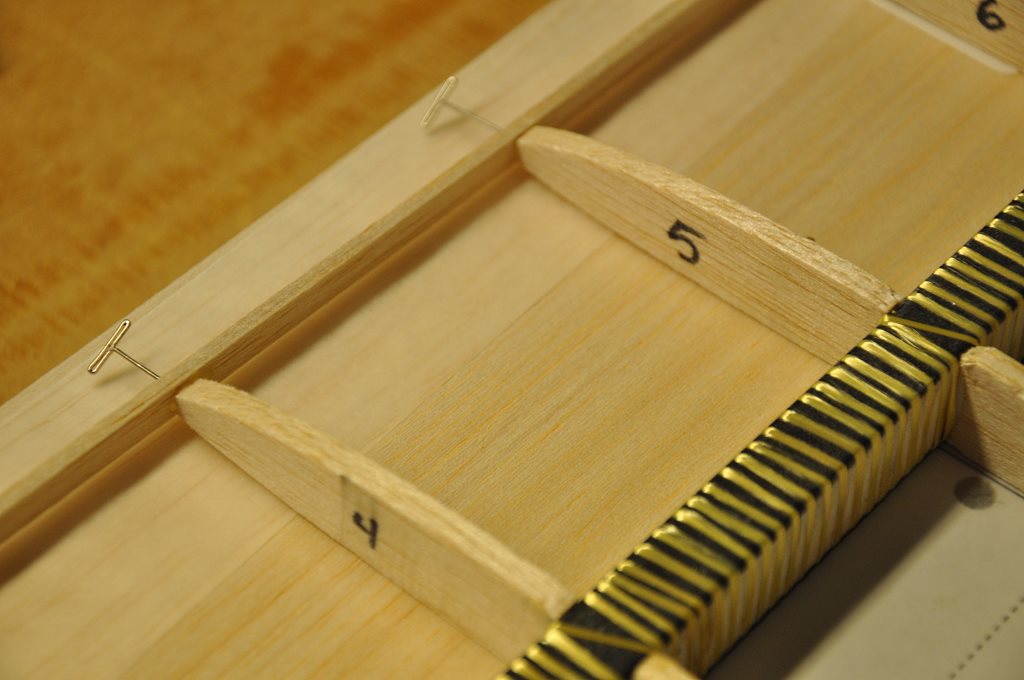
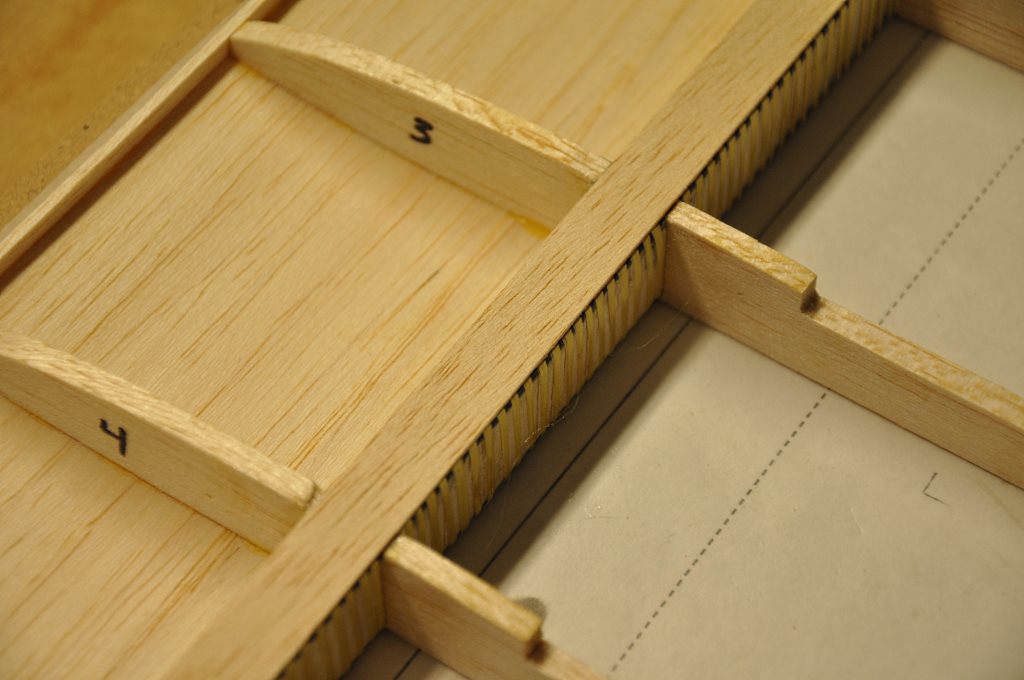
If you have made your own ribs like I do, remove the paper outlines from each rib and write the rib's number directly on the balsa.
Note: Assuming you are likely to use transparent covering on the wing, consider writing numbers in locations where they will not be visible when the wing is done. The most likely location for this is forward on the rib where it will be inside the sheeted D-Box area.
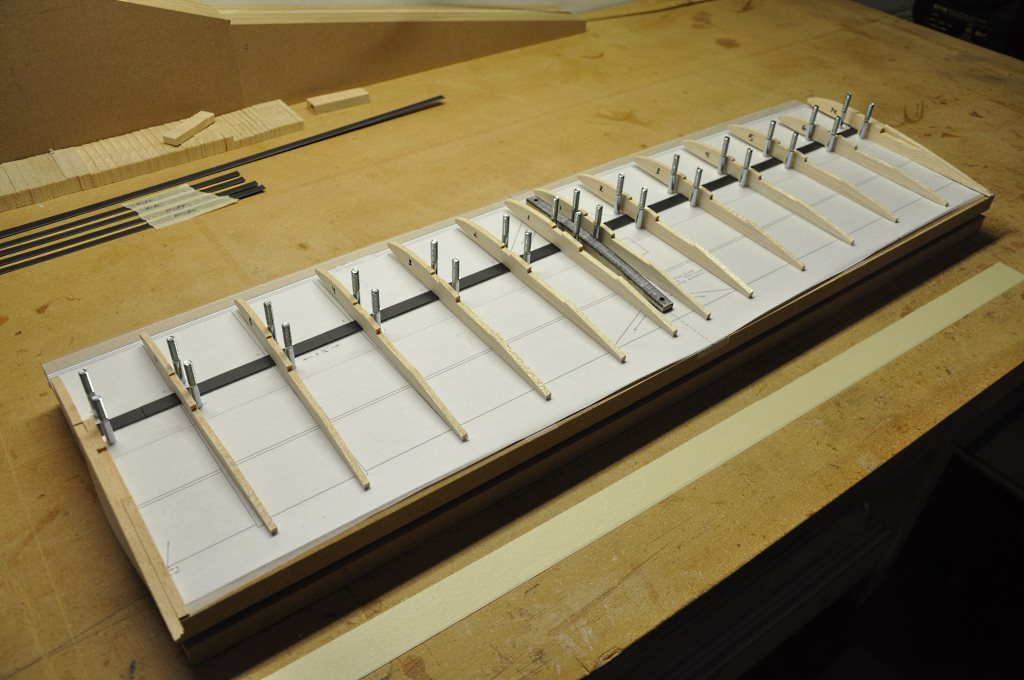
Lay everything out to ensure proper fit - checking that none of the bolts are in the way.
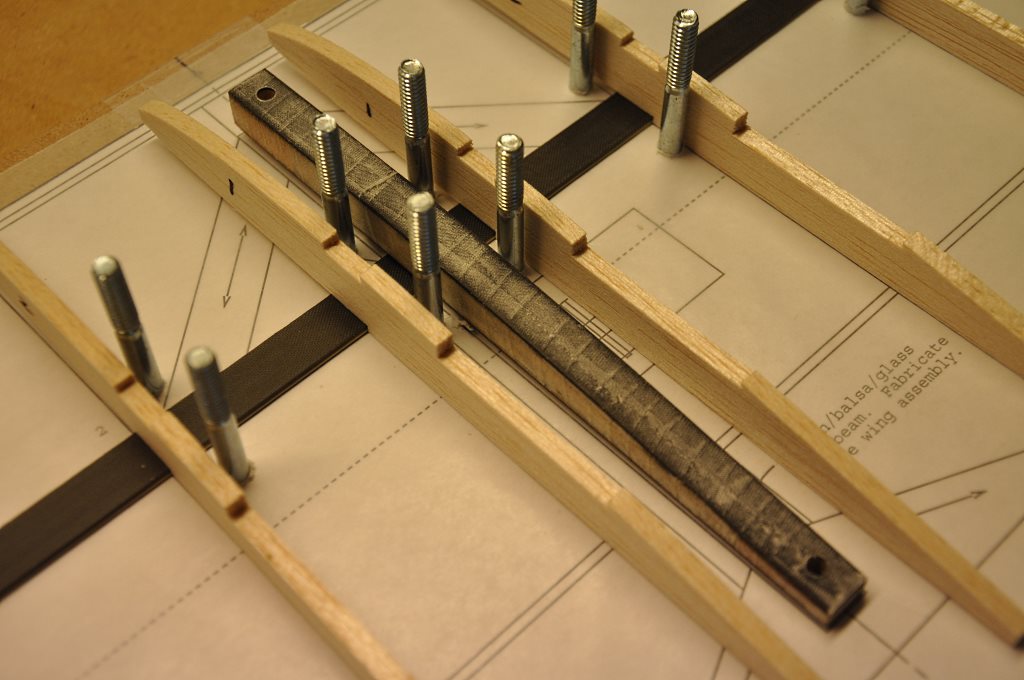
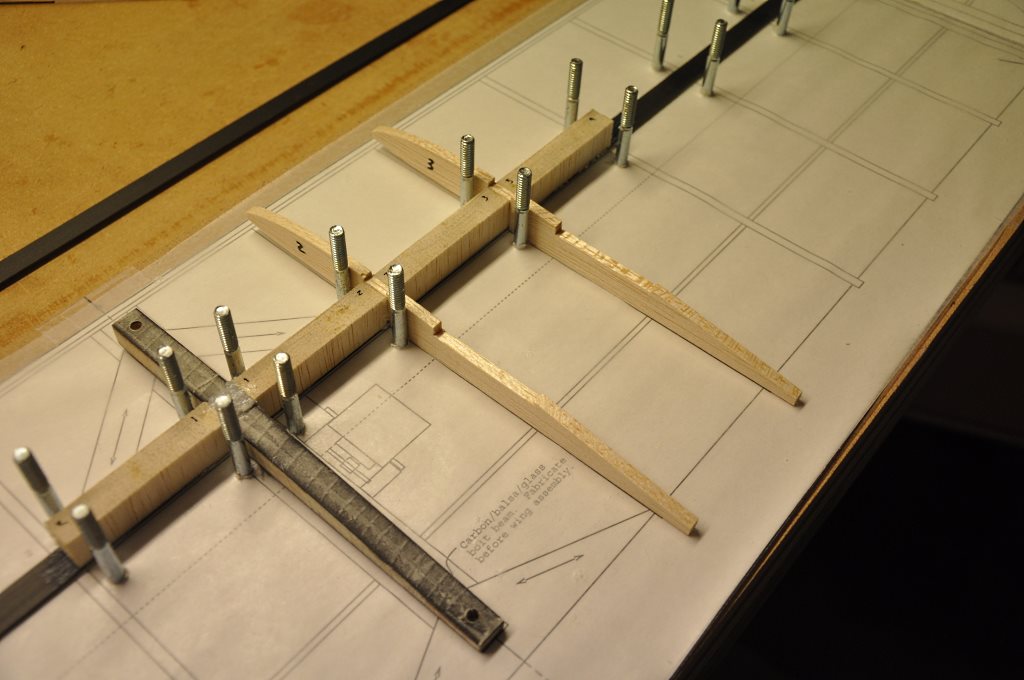
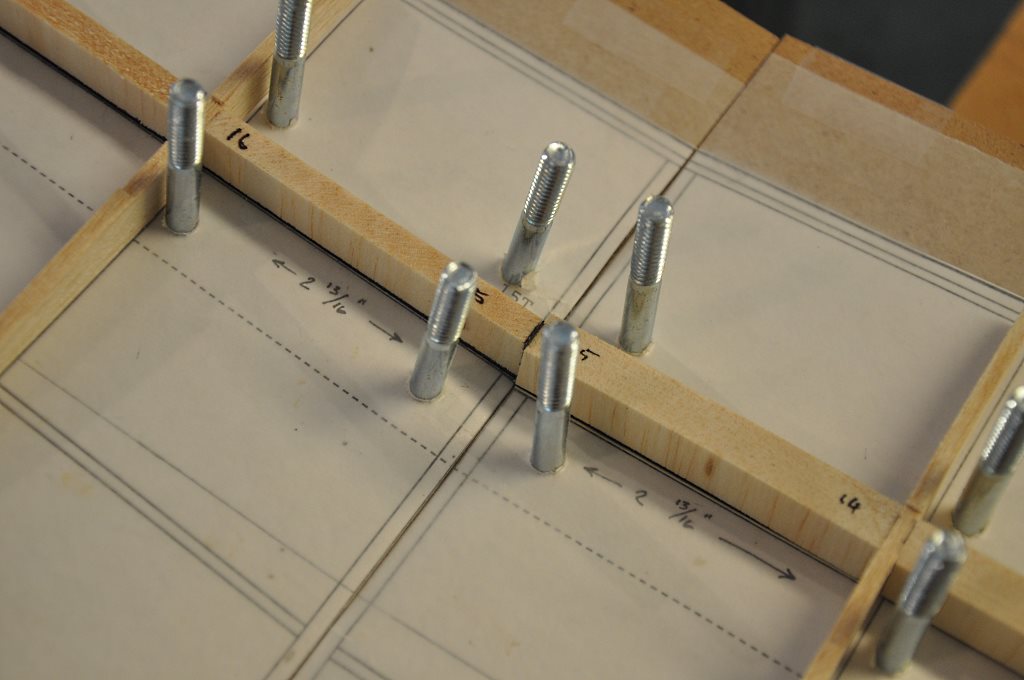
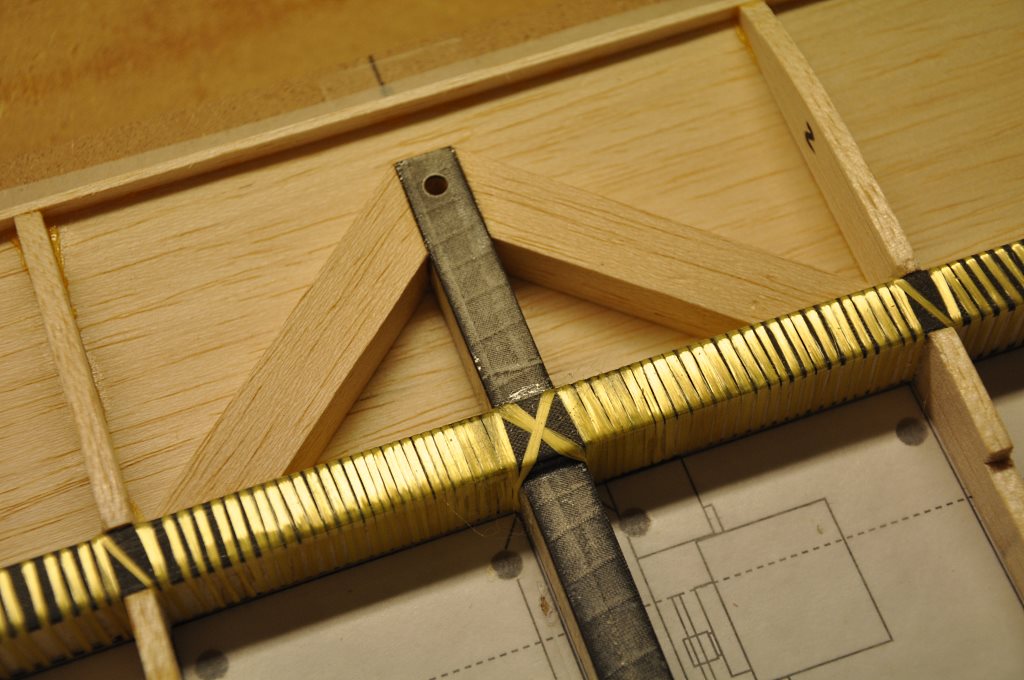
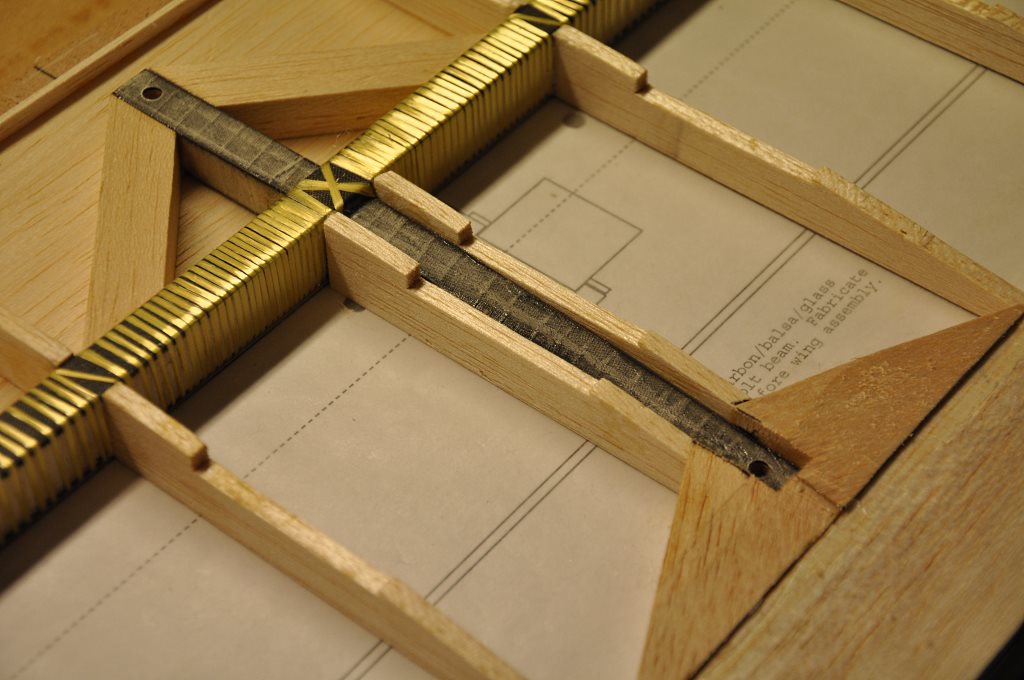
Here is a shot of the Bolt Beam sitting in its location on the plans.
Ensure that the beam is sized properly to not stick out beyond the profile of the ribs.
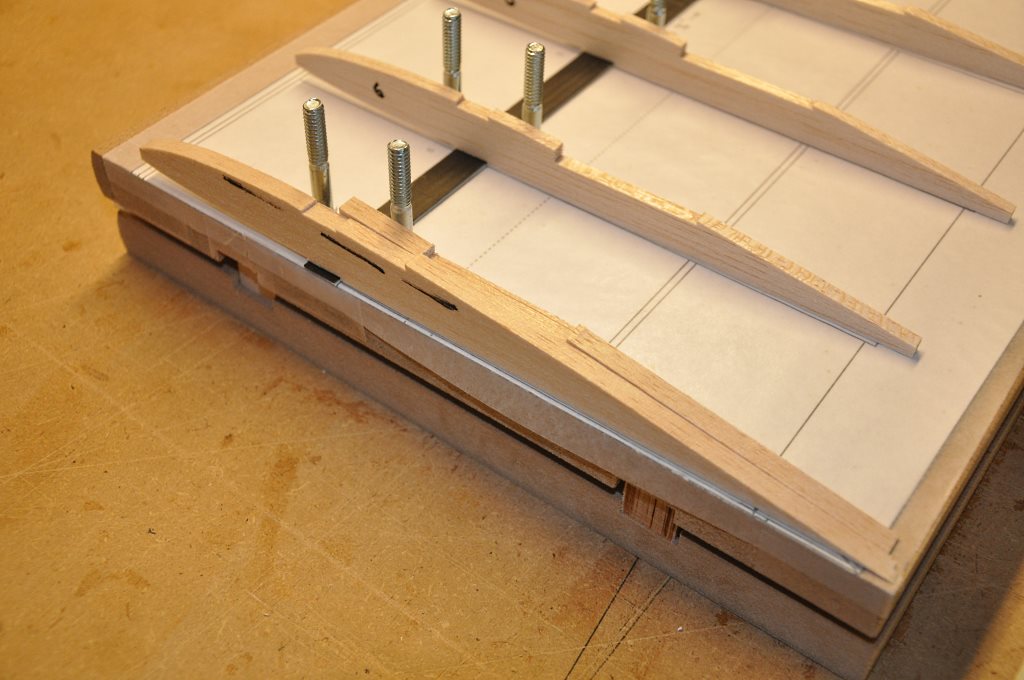
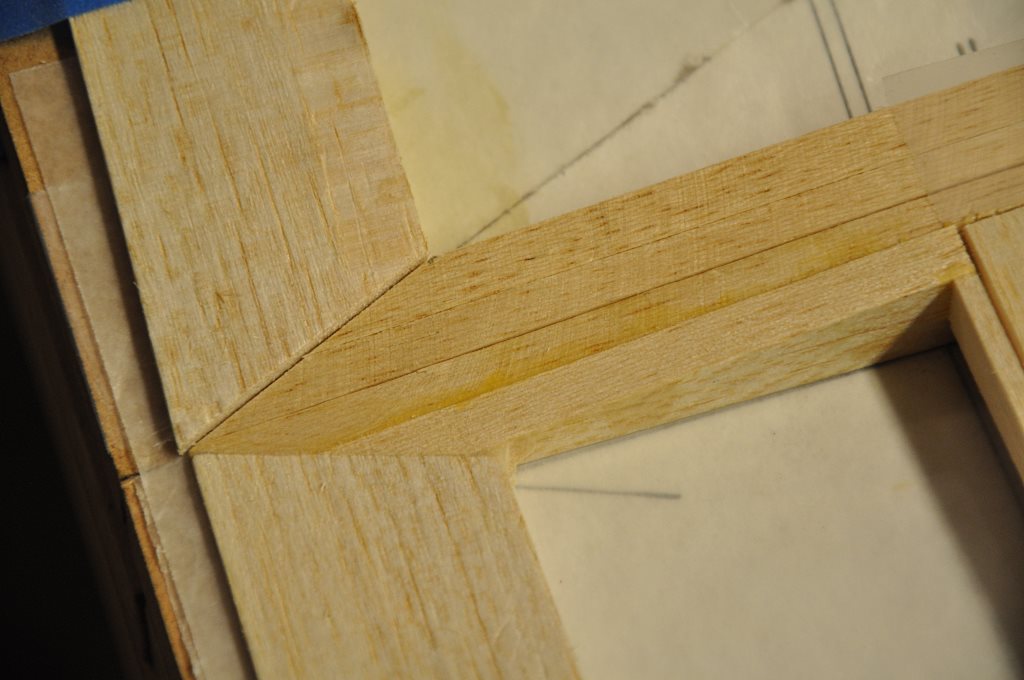
Construction of the wing with this jig requires that all panel-break ribs be sanded to a 5 degree angle. Then, when the two joining ribs are together, the total 10 degree wing bend is accounted for.
Mark the top-outside face of each panel-break rib so that you know which side to bevel. It would not do to sand the wrong side!
As described in the wing ribs write-up, I made a simple jig that allowed me to sand this 5 degree bevel into the ribs.
You can see now, the panel-break rib with its 5 degree bevel.
In truth, sanding the ribs can be done now or later, since the panel break ribs do not take part in the initial spar layup.
There are two reasons the panel break ribs won't be used at this time: 1. They need to be cut to butt up against the spar. 2. The spar needs to be Kevlar wrapped before these ribs can be glued in place.
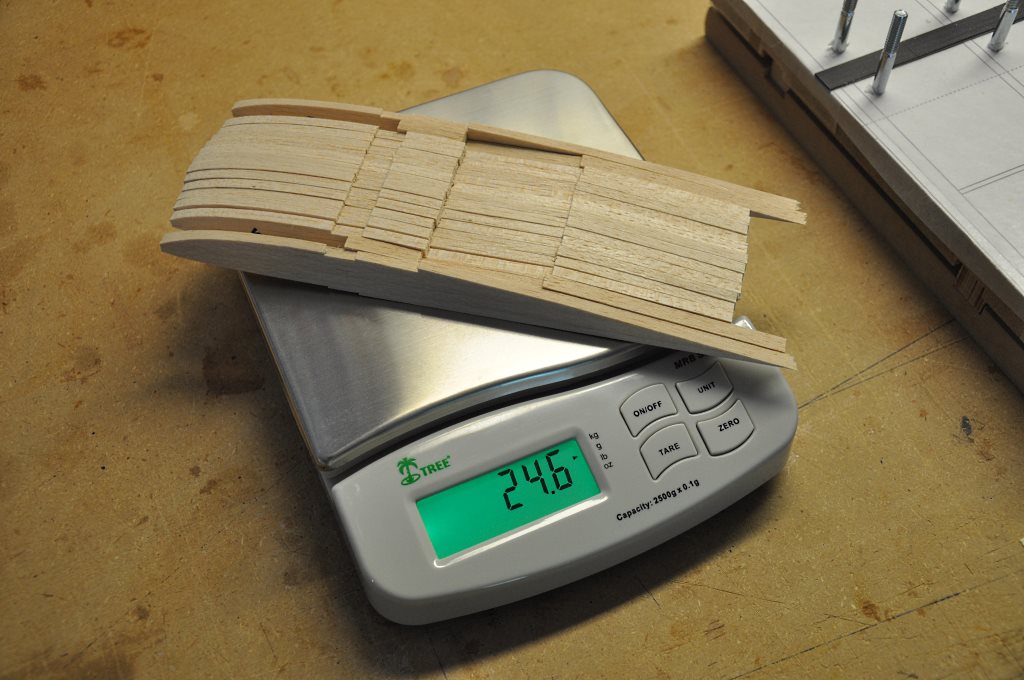
Throughout the preparation process, I keep close track of the item weights and constantly compare them to the design specifications.
On this particual build I am running very slightly under Dr. Drela's target weights.

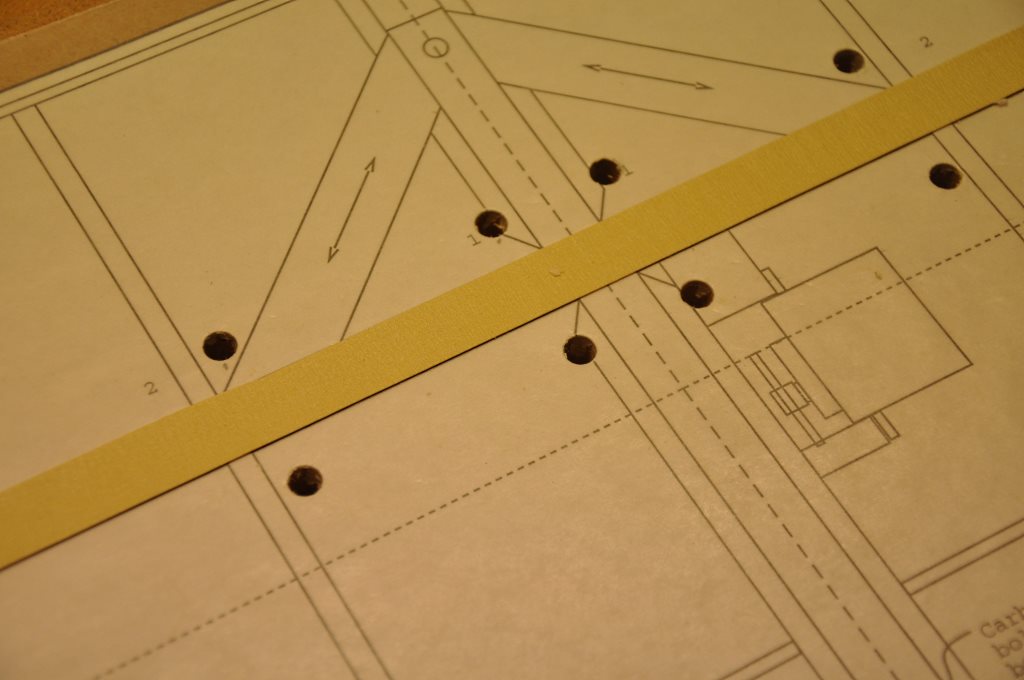
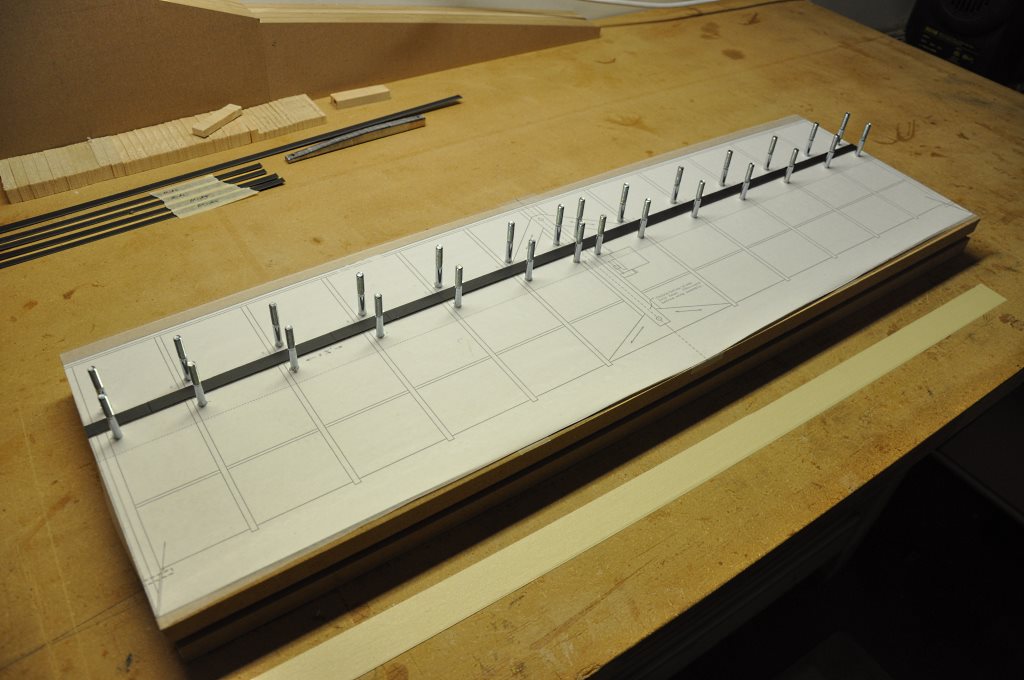
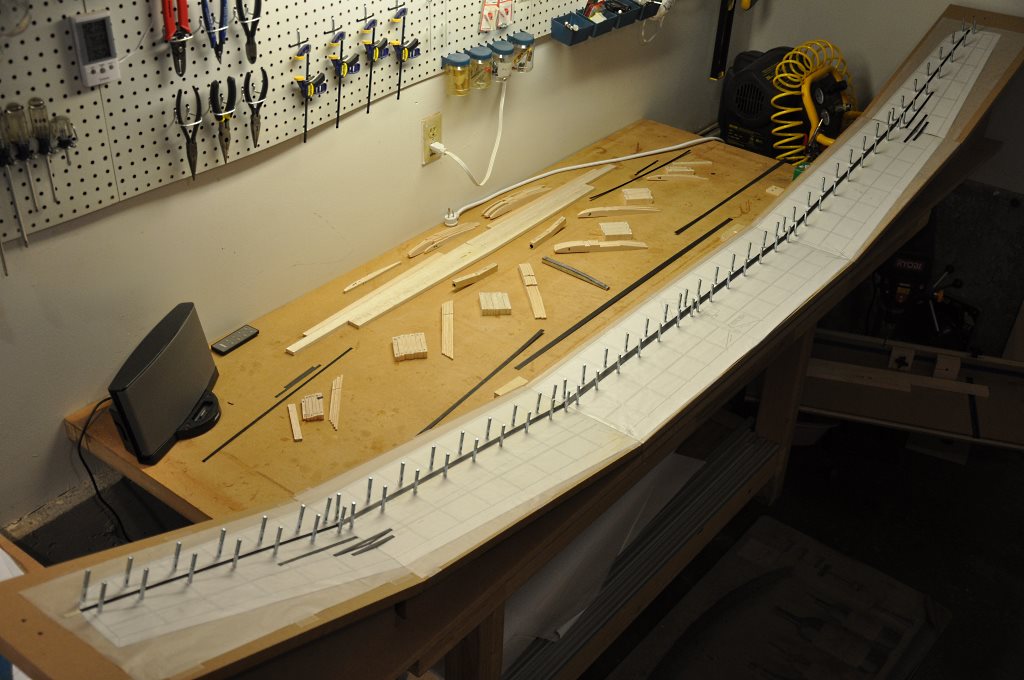
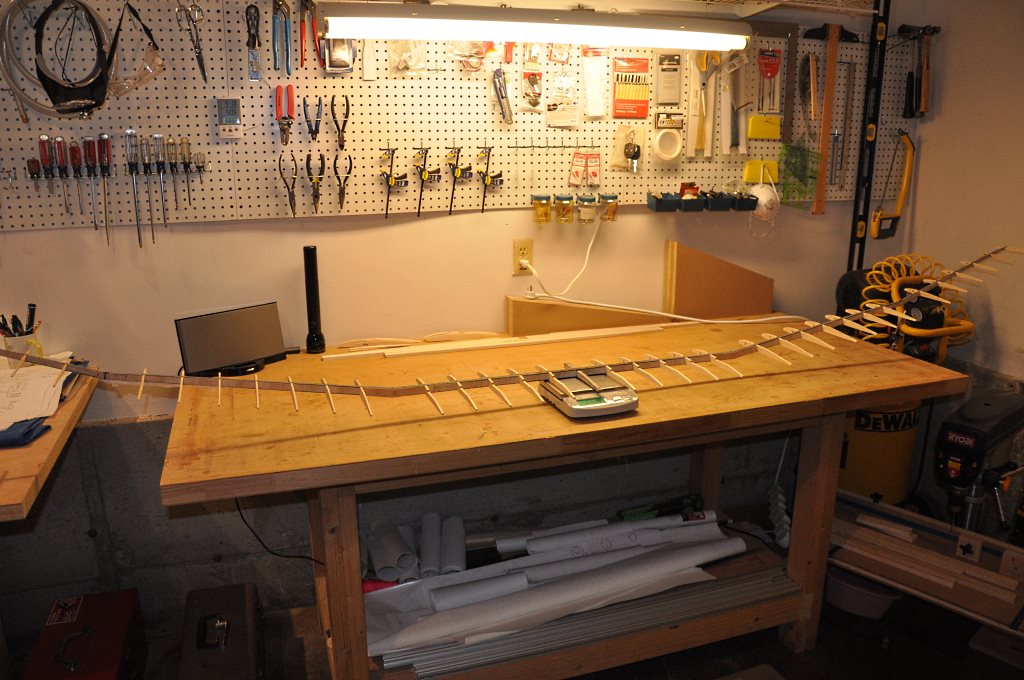
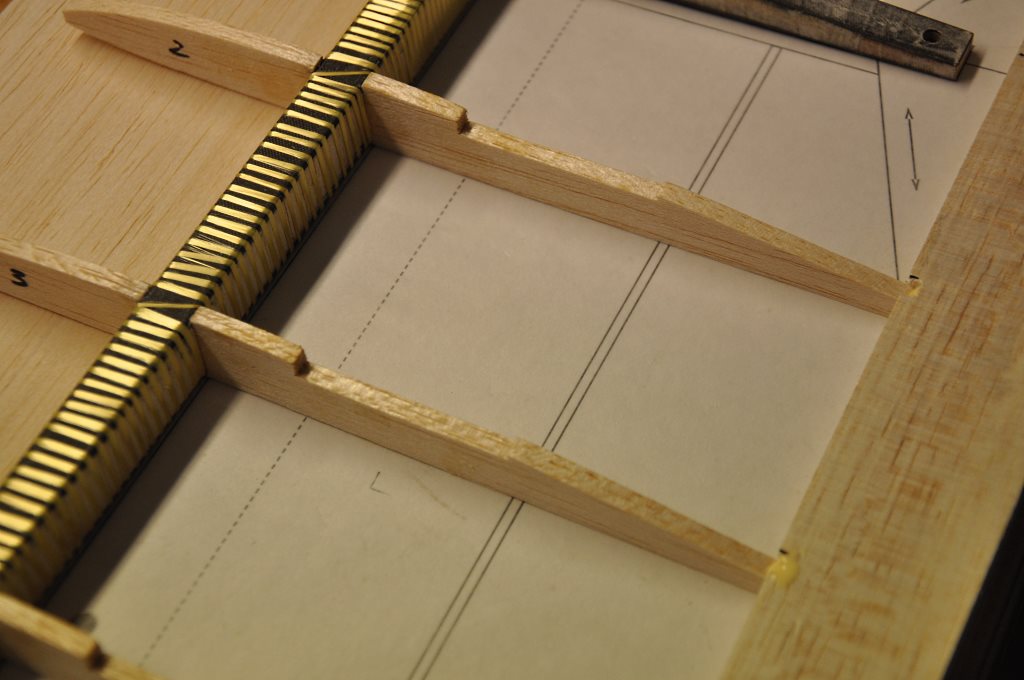
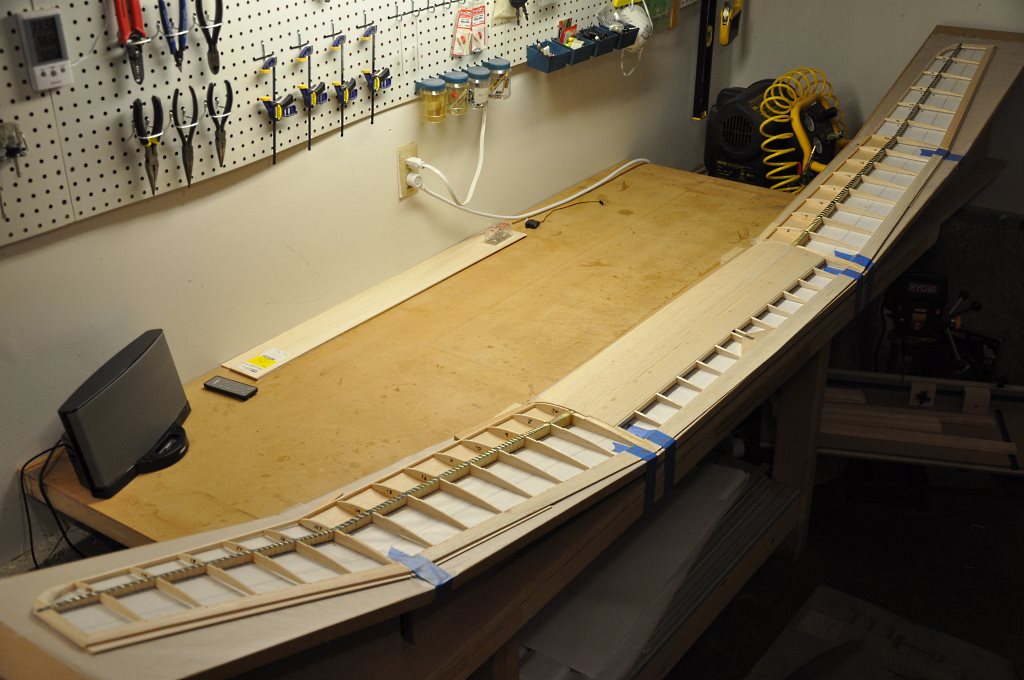
Each plan section was taped to its corresponding jig panel and covered with wax paper. Then a bolt was used to punch a hole in the plan and wax paper at each bolt hole location.
I set up the rest of the jig, making sure that each panel lined up flush and level with the others, and that the entire length of the wing was straight.
All of the jig bolts were pushed up through the jig panel bottoms at this time.
Lay out all of the bottom spar caps on top of the .015" shims.
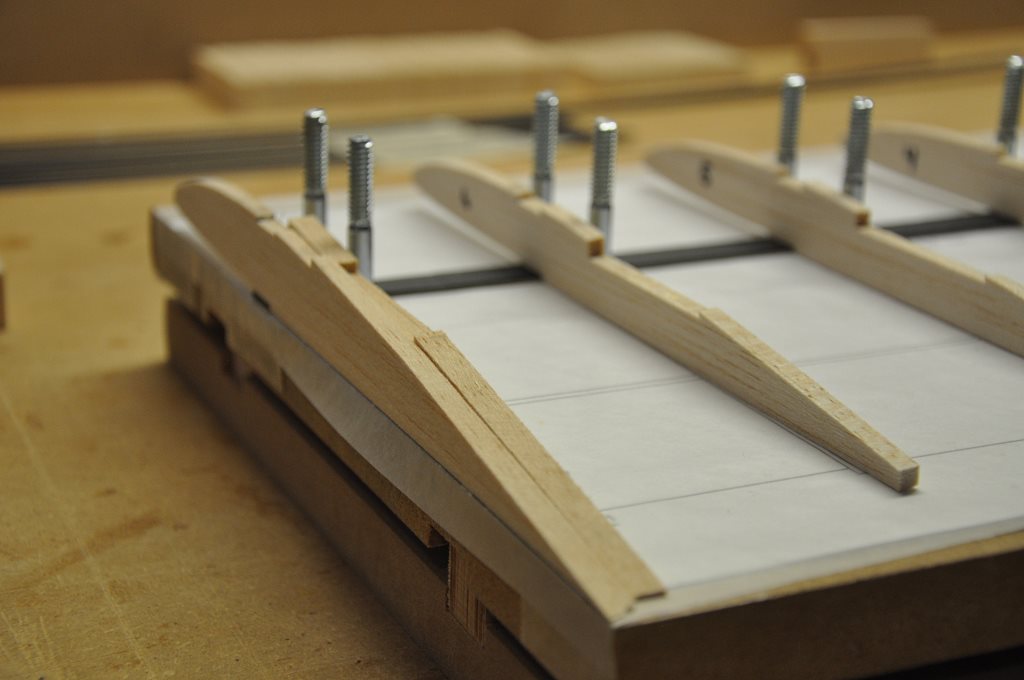
You will note in this picture that I have everything staged for doing the spar layup.
Rib and web groups are laid out close to where they will be used and the top spar caps are at hand as well. You can also see the wing joiner blocks and bolt beam are stageds as well.
Panel break ribs that will not be used at this time, are places safely out of reach so as not to cause confusion.
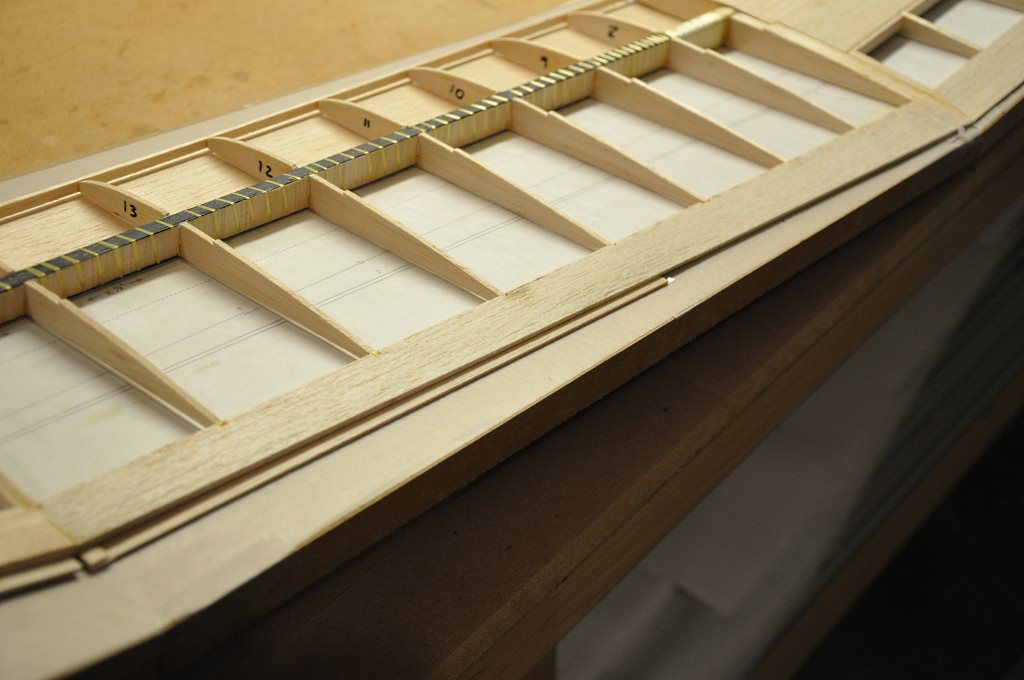
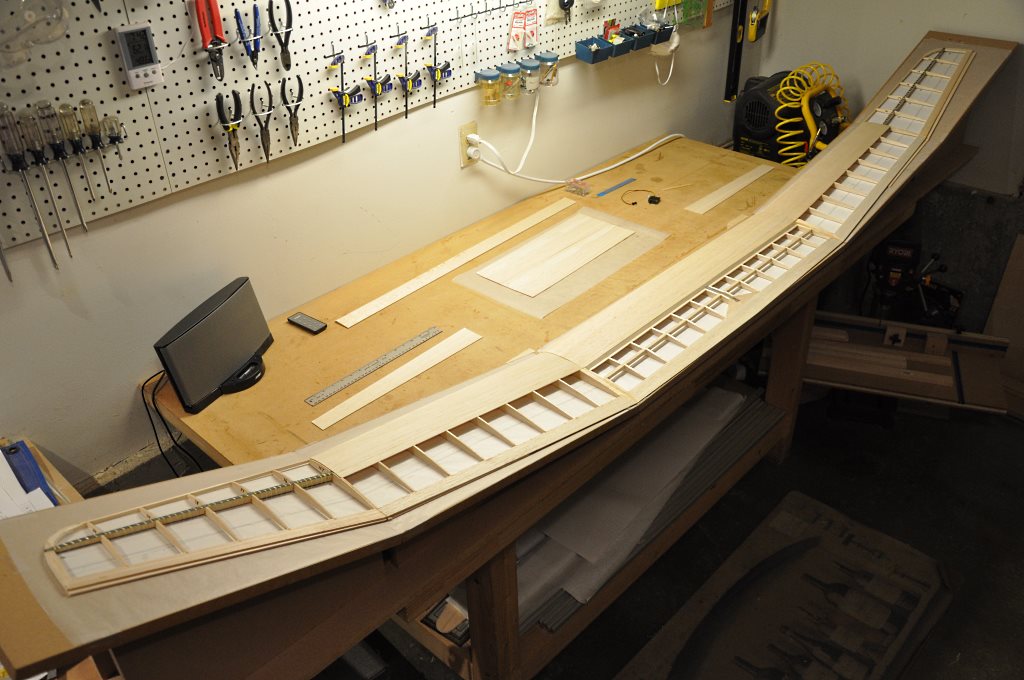
One of the really huge time-savers of using the jig is the ability to build the mid and tip panels as a single unit.
In preparation for layup, I staged the spar carry-through pieces at the respective locations.
Again, see spar_V2.pdf for details.
I like having a long working time when doing layups, so I mixed slow-cure epoxy with silica until it was the consistency of Vaseline. (very thick)
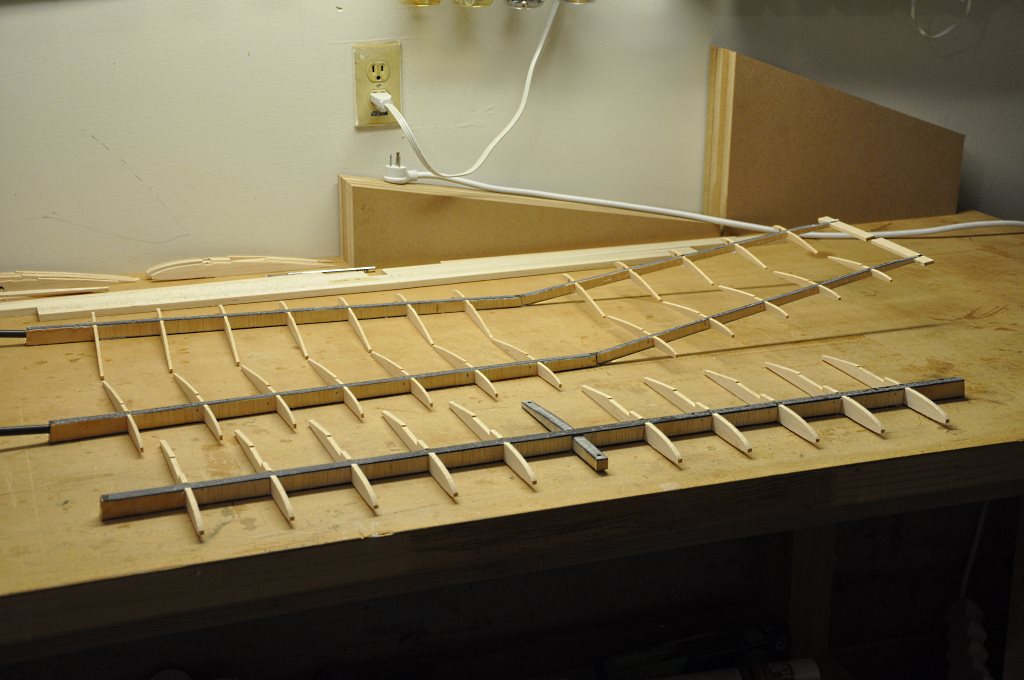
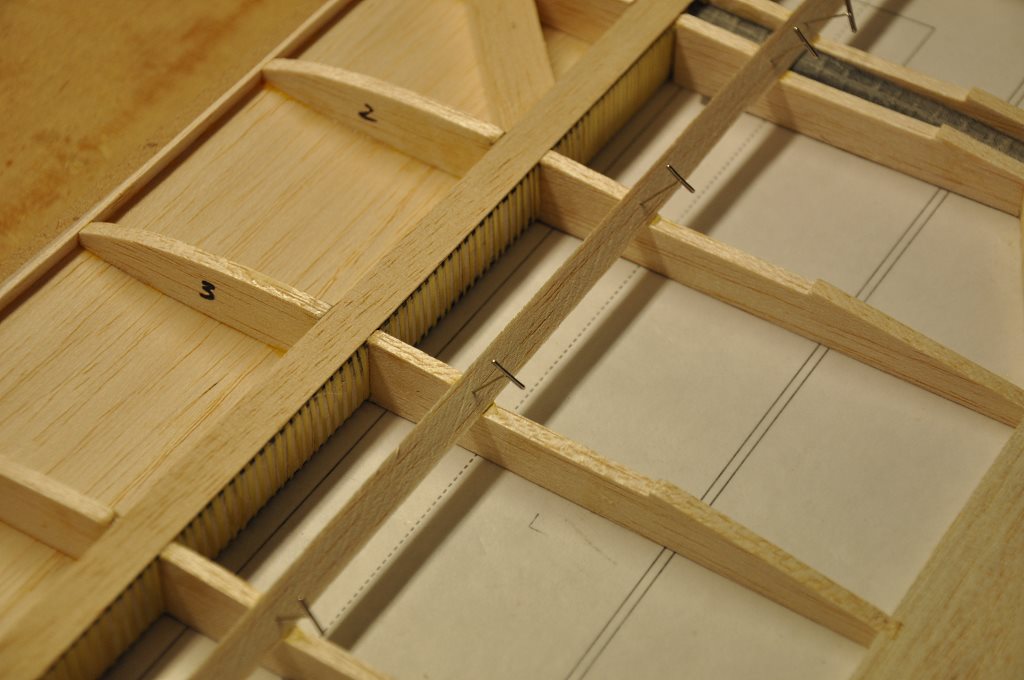
Then, starting with the Bolt Beam, I epoxied spar, web and ribs in order down the length of the wing.
Use liberal amounts of epoxy as we need complete contact between surfaces. However, as the epoxy is squeezed out take the opportunity to wipe it off the structure with a flat blade or piece of card stock.
As you continue gluing rib, web, rib, web - when you get to the wing joiners - treat them as just another web. (make sure you have the joiner rod inserted and place the entire joiner assembly down as one web.
In this shot I'm continuing the glue-up on the mid-panel.
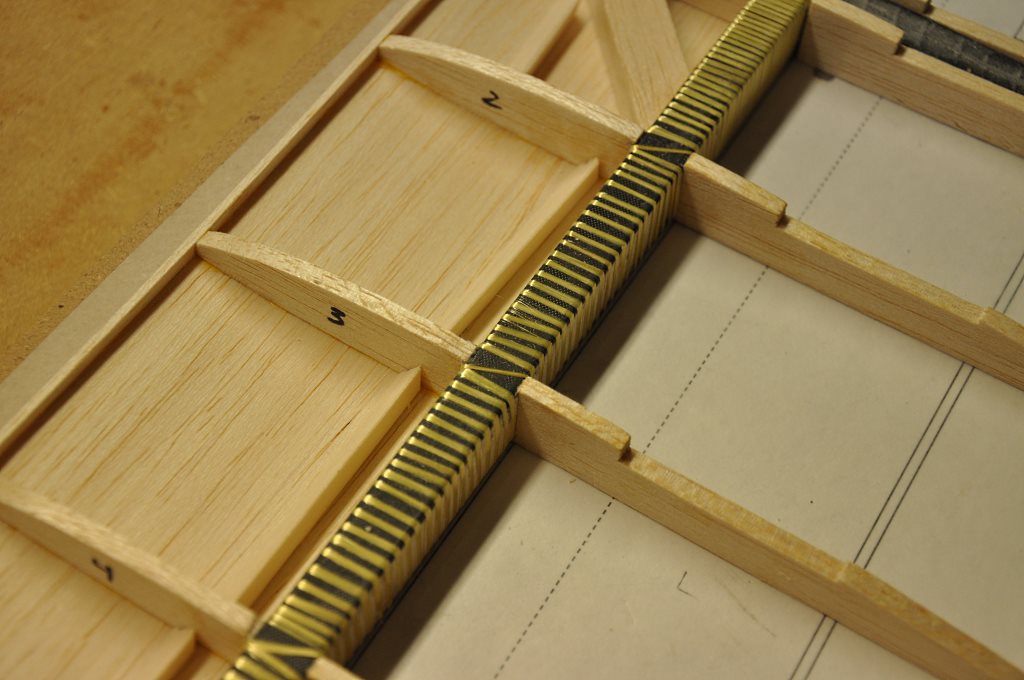
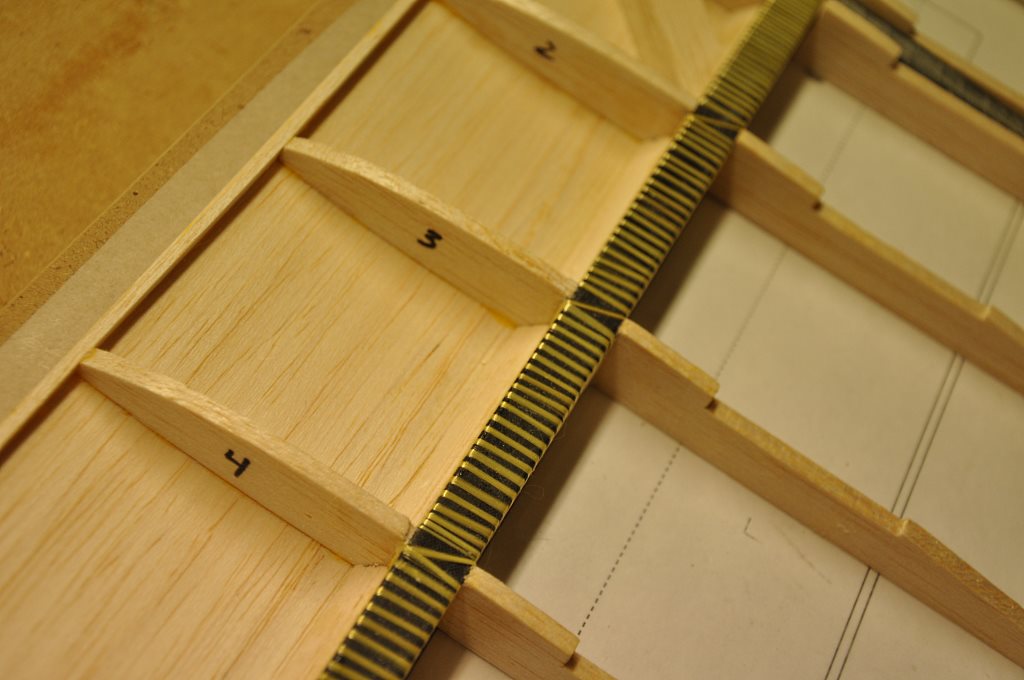
Note the numbering on the ribs and the corresponding numbers on the webs. This makes keeping everything correct quite simple.
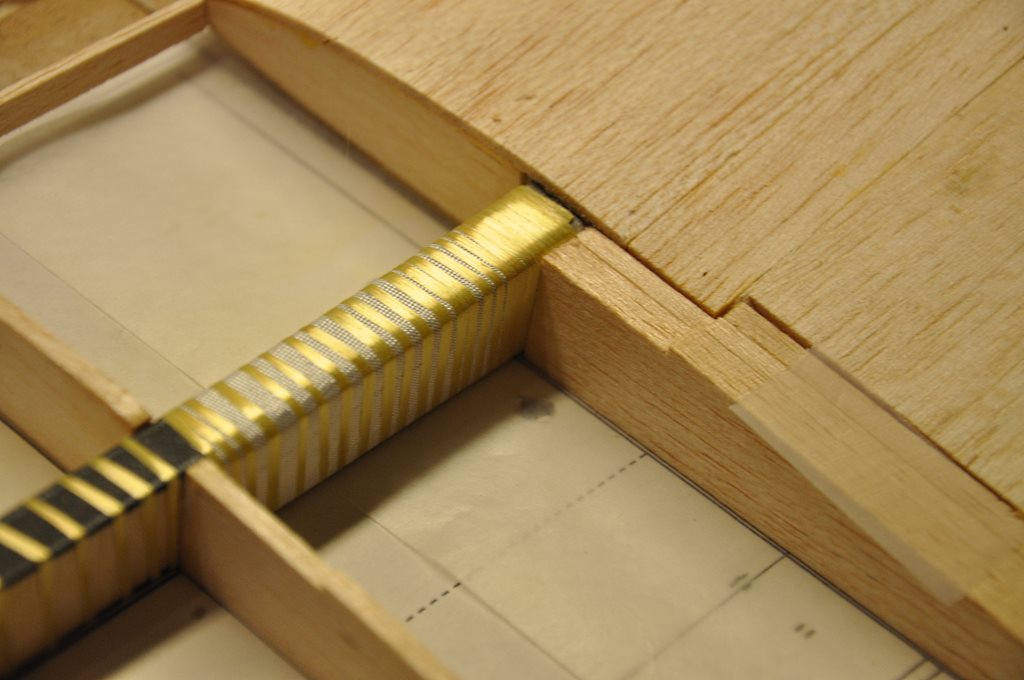
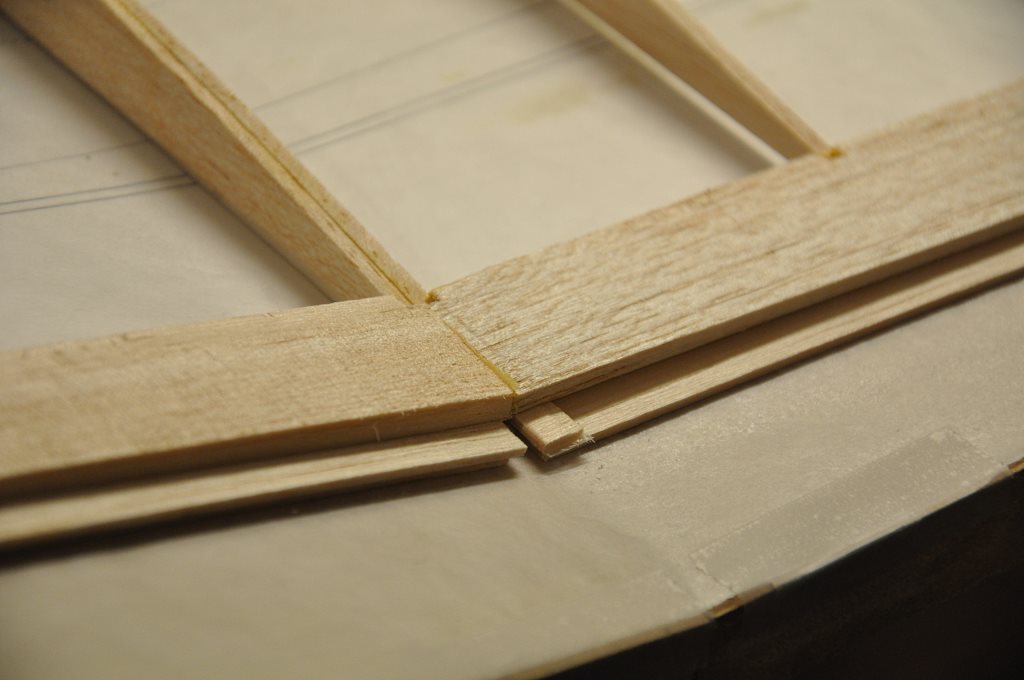
The plans call for a "compression strut" at the mid-to-tip panel break.
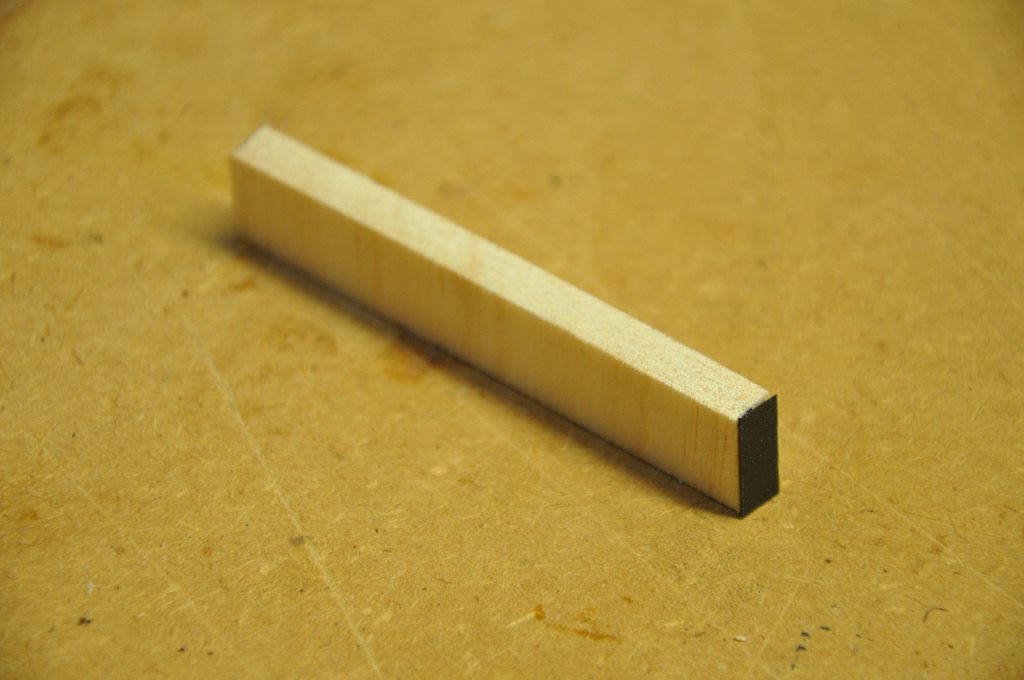
This is nothing more than a piece of .014" carbon scrap from your spar cap excess cut to the height of the shear web at that location.
Epoxy it in place as you march along the wing gluing, rib, web, rib, etc.
You can just see the "compression strut" inserted between the last mid panel web and the first tip panel web.
Once again, note that the panel-break ribs are not included in the spar layup as the Kevlar wrap needs to be done at this location first.
Continue gluing up to spar all the way to the wing-tips.
Finish the spar layup by gluing the top spar caps in place - don't forget the "spar carry-through pieces at the mid-to-tip panel break, just like on the bottom spar caps.
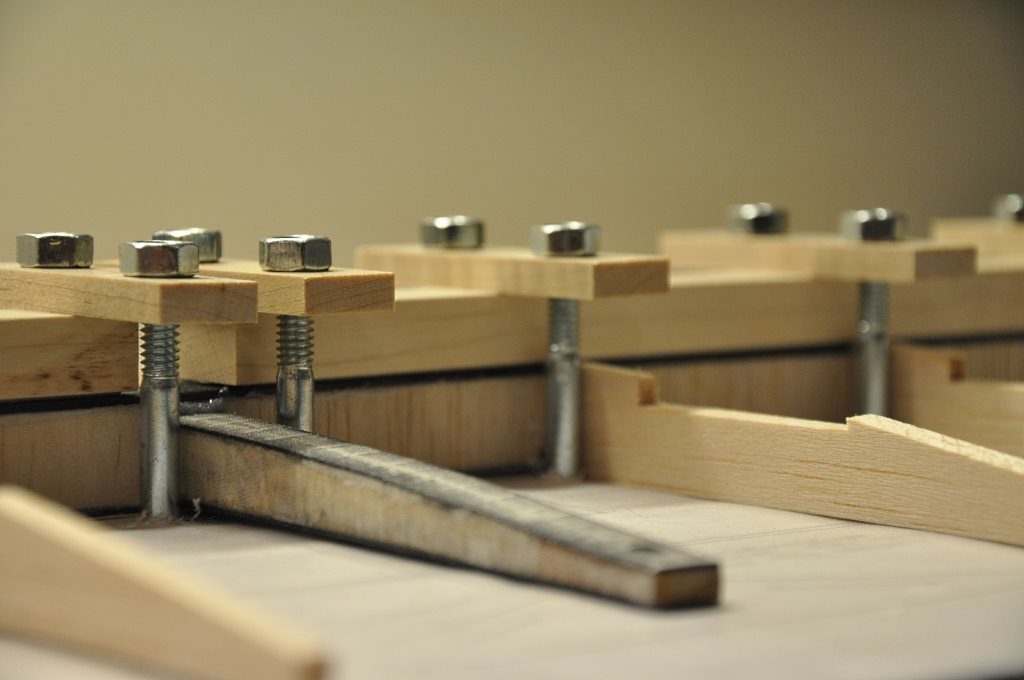
Once all the gluing is done we are ready to clamp everything down.
Place a thin strip of foam down the entire length of the spar. The foam will spread the clamping load a little more evenly on the spar.
In this picture I've used some foam tape that I purchased at an office supply store - it's about 1/8" thick - it probably could have been a bit thicker...
Quick note: don't remove the backing from this tape - it will stick to the carbon and leave an unfortunate residue.
Next, place some strong straight strips of wood or metal over the spar.

Place the jig's wooden "washers" over the pairs of bolts at each location.
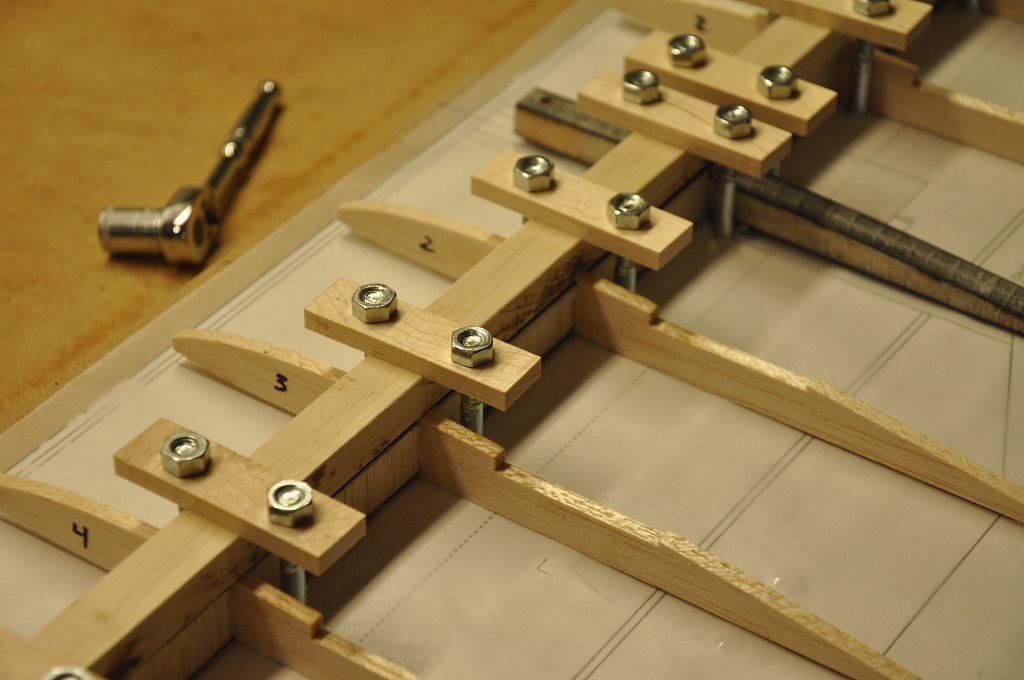
Finally screw a nut onto each bolt and then tighten the nuts down - moving evenly up and down the length of the spar to ensure firm but even force is applied.
As you tighten everything down, more epoxy will be squeezed from the layup.
Use a flat blade or bit of card stock to remove the epoxy.
This is the time to remove all excess epoxy... you don't want to have to do it after the epoxy has hardened.
Important: I schedule my layups so that I have many hours to trace down and remove all extra epoxy. You really want this task completely finished before you go to bed.

Oh yeah! I really like this method of spar clamping much, much more than precariously stacking a bunch of vegetable cans on top of the spar!
Looks kind of cool too, don't you think?
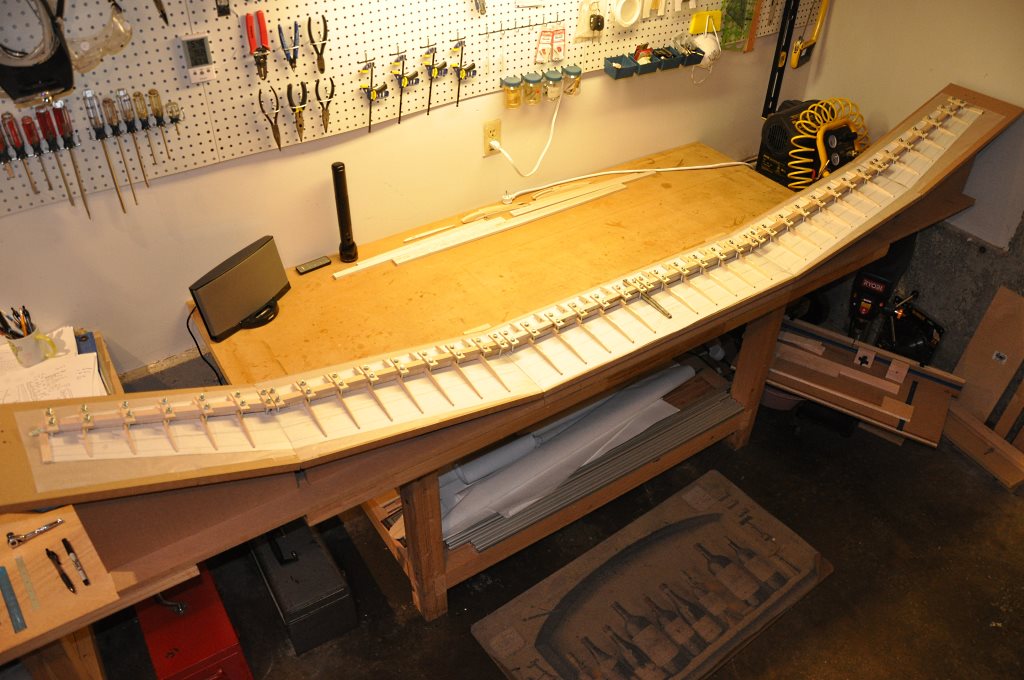
So, with the spooge cleaned up and everything clamped down tight, we wait for the spar to cure.
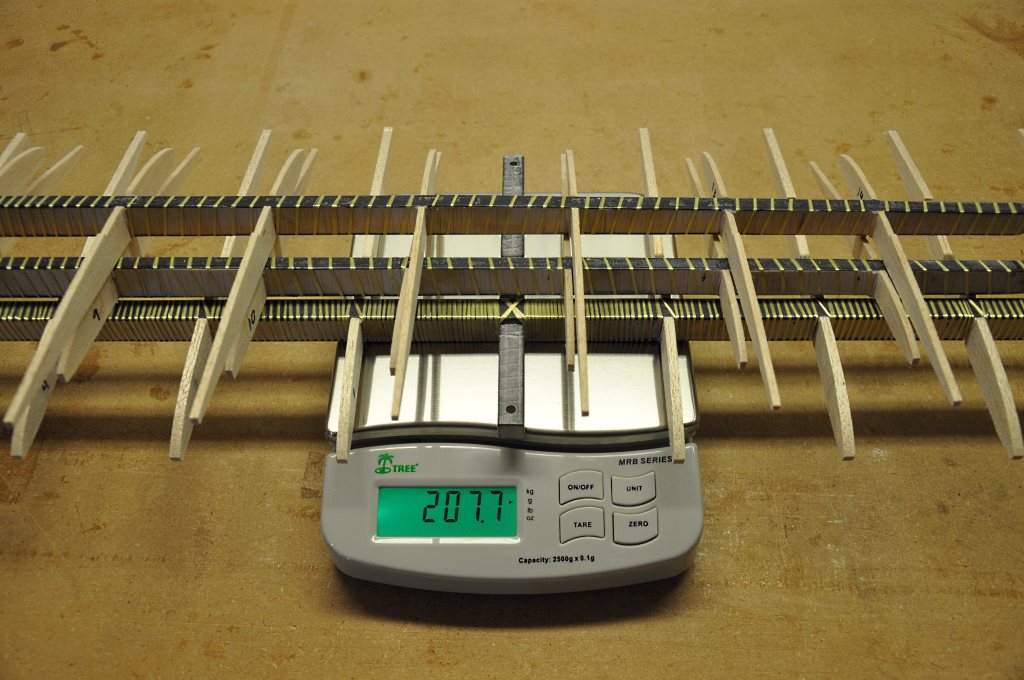
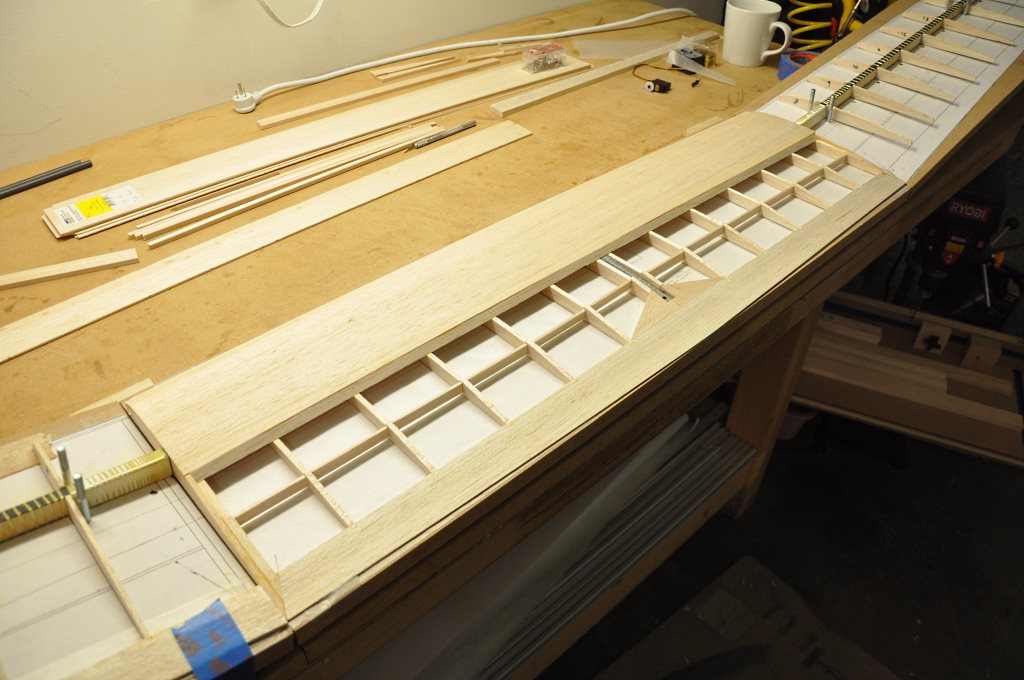
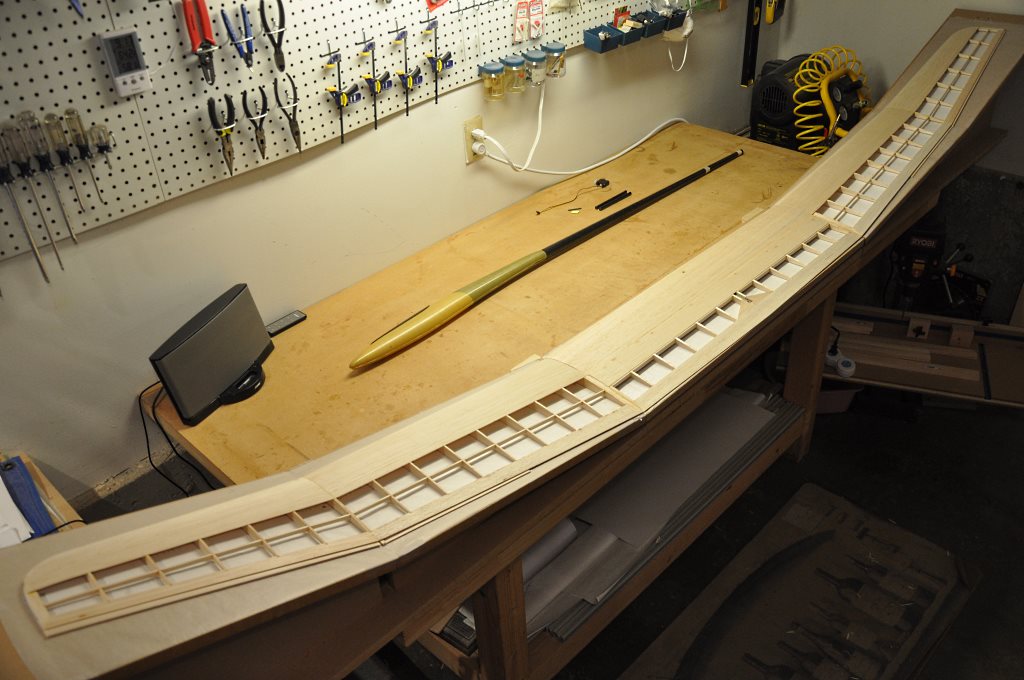
The next morning I unclamped everything and lifted a completed wing off the jig! Slick!
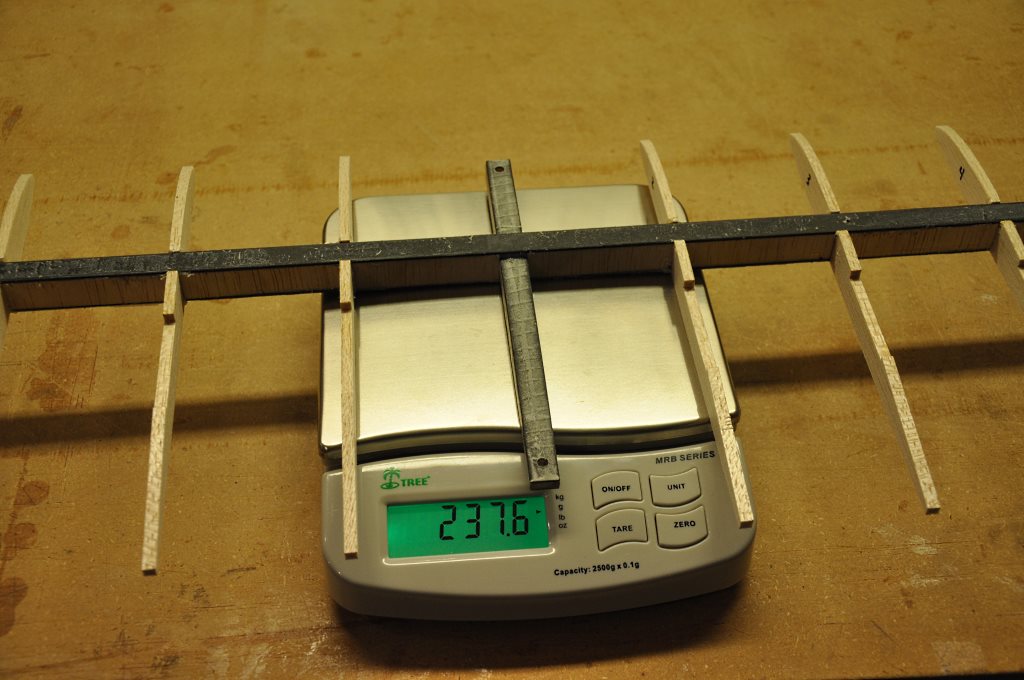
Very curious how the weight is doing... Keep in mind this has the two carbon joiner rods included, so subtracting those, the spar and rib weight is roughly 205 grams.
That means I'm still running slightly under the target weight. Cool!
I separated the 3 wing sections and did any final sanding and cleanup that might have been needed.
The previous day's work cleaning up really paid off here.
I was also gratified to see that my wings came out straight and true and that the tips lined up perfectly.
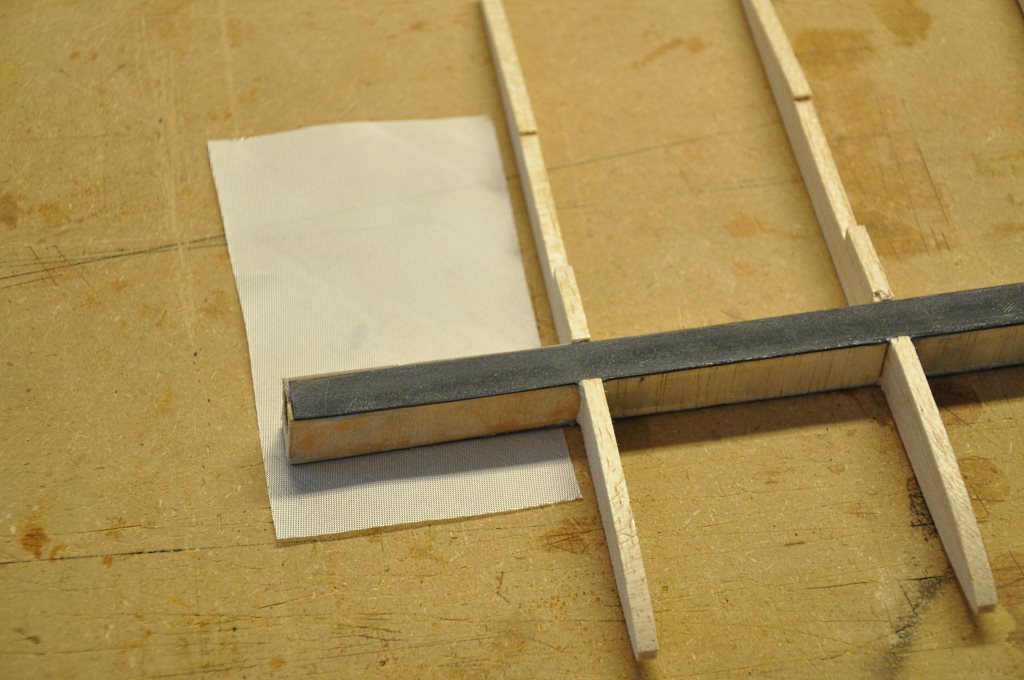
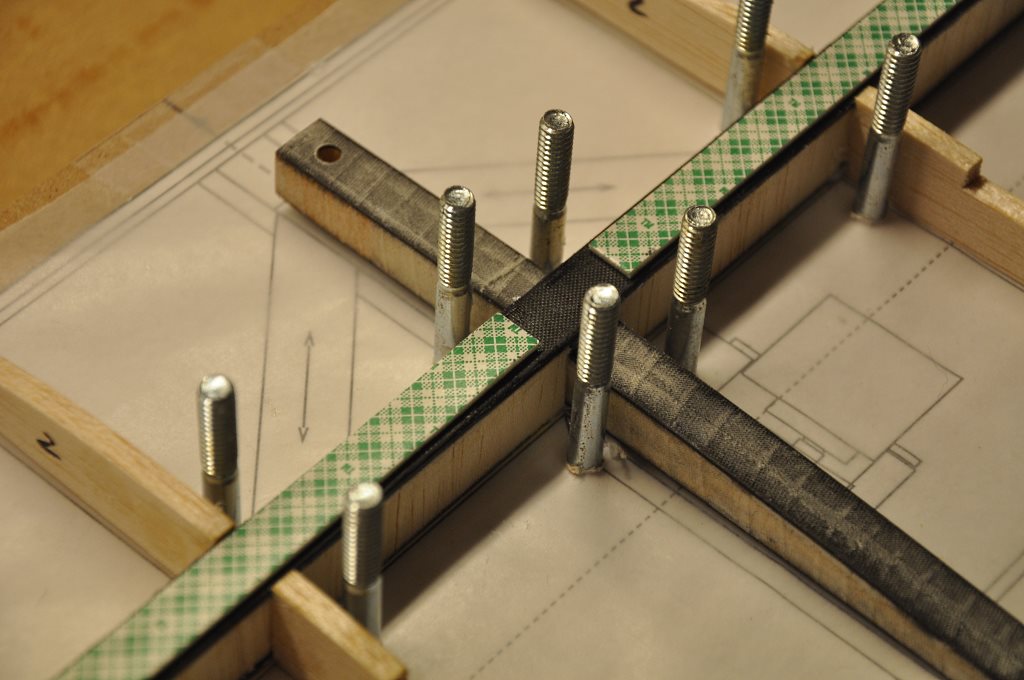
Now I cut some 2 oz. fiberglass on a 45 degree bias.
We are going to wrap the spar at the 4 joiner blocks.
Lightly mist the fiberglass with 3M #77 and wrap tighly 2 times around the joiner block
Since I am doing my level best to keep weight down, I am not going to use any epoxy on the fiberglass until after the Kevlar wrap goes on.
Here I have another opportunity to save days of work.
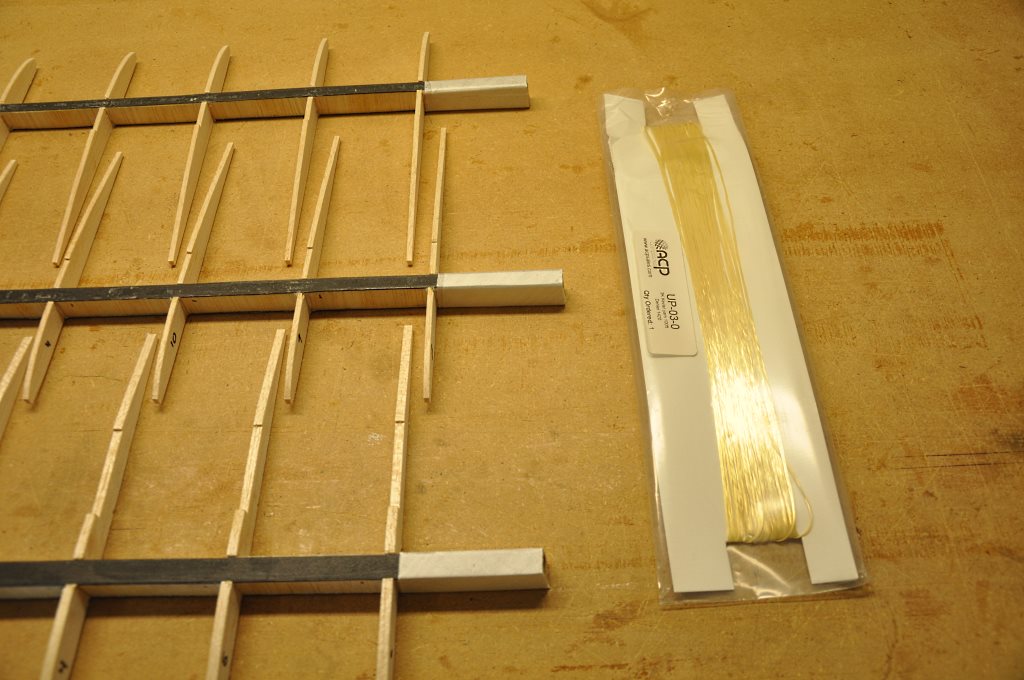
On my previous Bubble Dancer build I used Kevlar thread - don't do that! Buy the Kevlar tow instead. If you use tow, the spar wrapping can be done in less than one hour.
I unwound 25 or so feet of Kevlar and clamped one end of it to my workbench. I used CA to tack the other end to the spar.
I then took the wing panel away from the workbench until the tow was pulled tight and slowly walked back to the bench - keeping tension and carefully winding the Kevlar around the spar as I went.
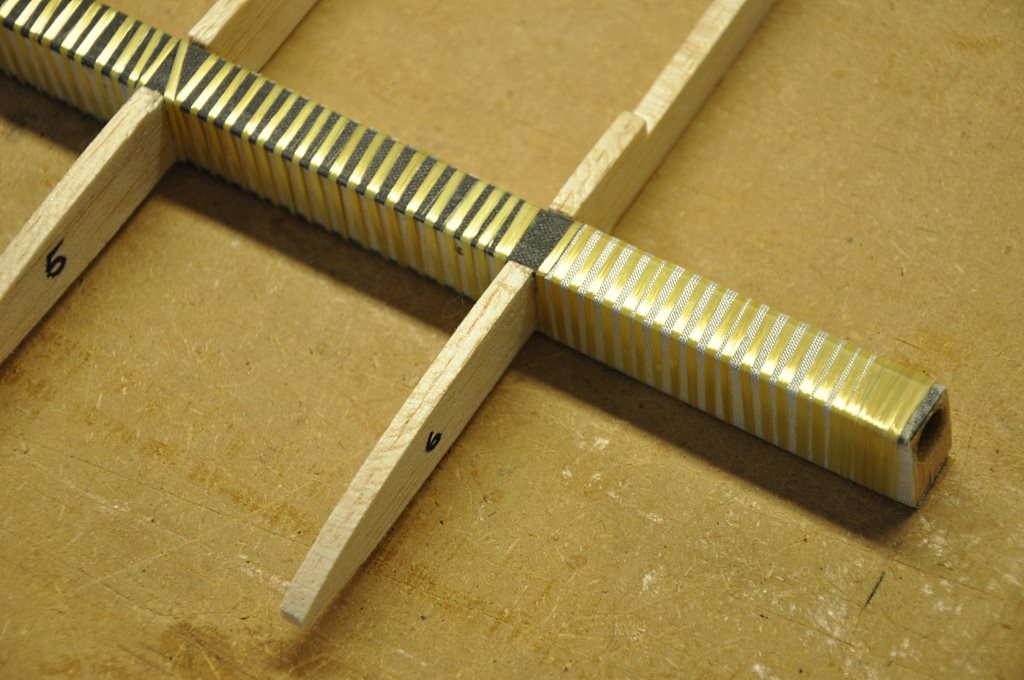
Wow, that looks pretty!
Now that the spar is wrapped, do not brush any glue over the Kevlar just yet. There will be plenty of opportunity for that later.
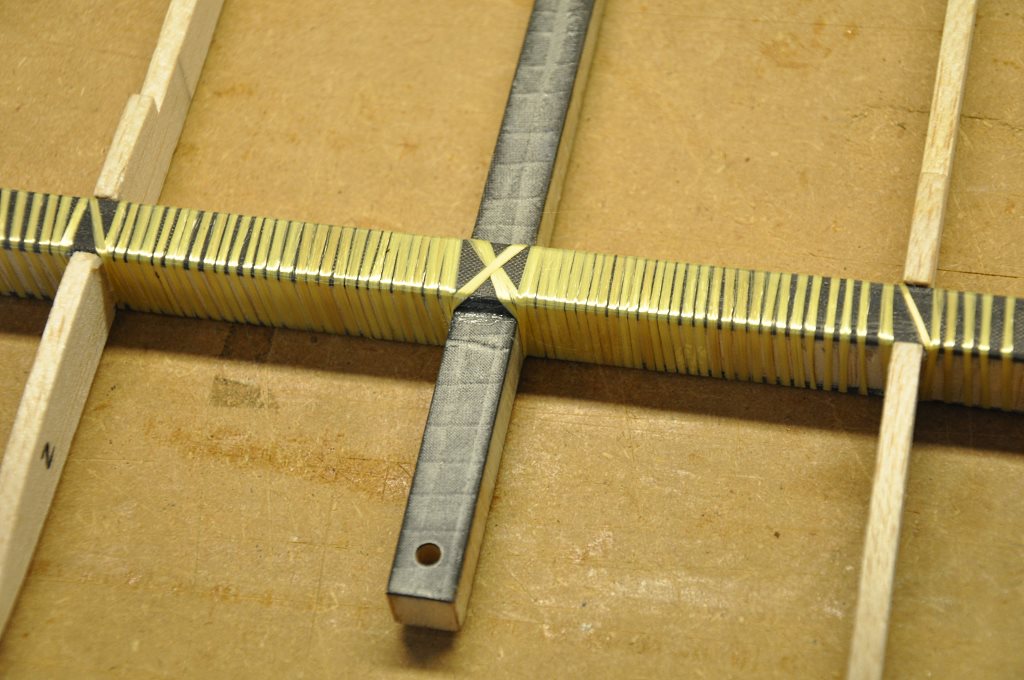
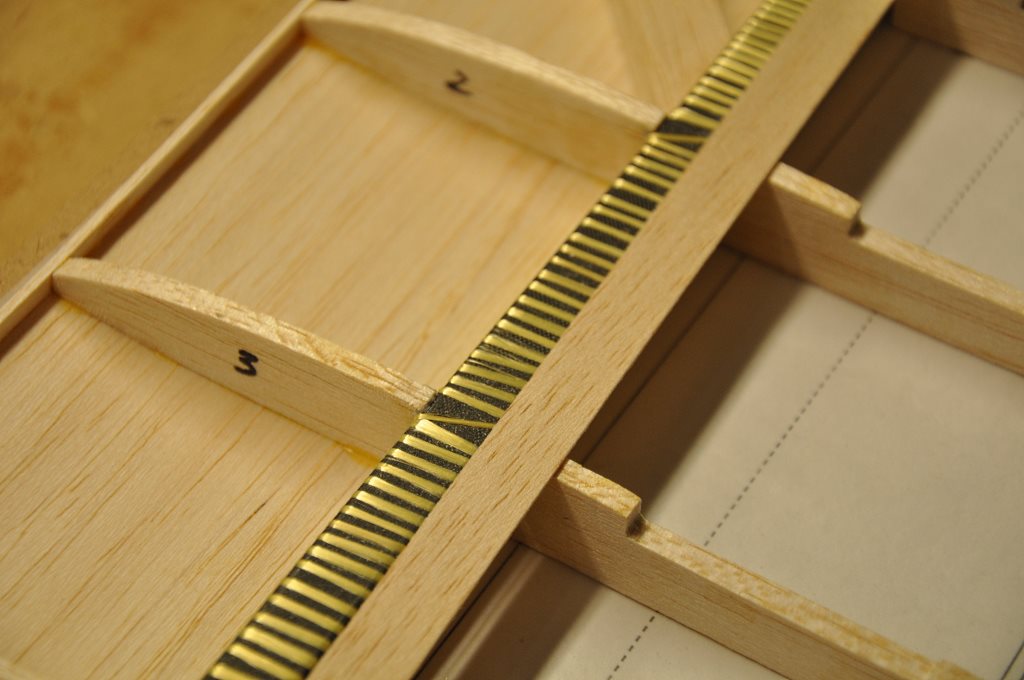
Note that the wrap is more dense close to the center of the wing and over the wing joiners as well.
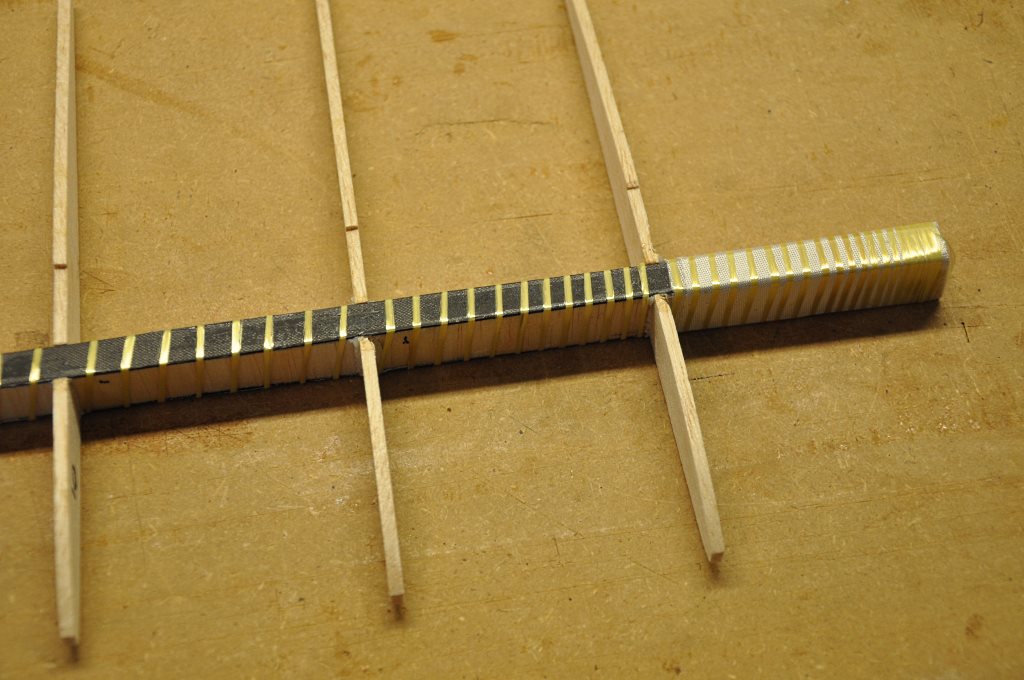
The wrap needs to be spaced closely over the wing tip joiners, but can be spread wider as we progress to the tip.
And as we can see, the Kevlar wrap adds next to no weight.
Note: You will probably find that during the course of wrapping the spars a little twist has been introduced to the wing panels. This is not uncommon.
I have seen many people on various forums worry that they've irreparably damaged their wings. Not to worry. Dr. Drela has made the comment that this twist will correct itself when the d-box sheeting is added to each wing panel - and indeed, I can verify that this is the case.
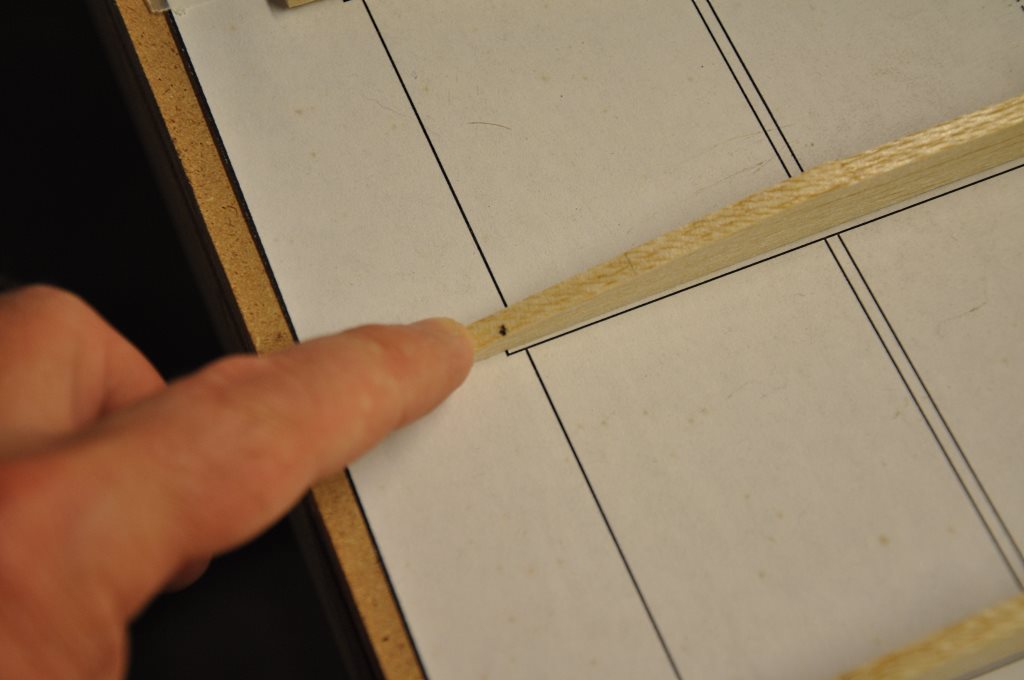
We now need to cut the trailing edges of the ribs to their final length.
I made a sanding stick slightly thinner than the width of the ribs to notch a slot for the ribs in the trailing edges.
Once the trailing edges are notched glue them to the ribs.
Next we glue the inner leading edge to the front of the ribs.
Don't glue the bottom sheeting on just yet - we have to sand the proper shape into the inner leading edges first. (In this picture, the sheeting is acting as a shim.)
Once the inner leading edges have been glued in place, sand them to the proper bevel so that the d-box sheeting will make proper contact with it the entire length of the wing.
Glue the bottom sheeting to the wing.
Add in the balsa center section braces - use thickened epoxy to glue them to the bolt beam and spar.
Also glue the trailing edge center support with thickened epoxy.
Cut to the proper length and glue in the #1 ribs.
This can be a bit tricky as you want to make sure that you keep the airfoil true.
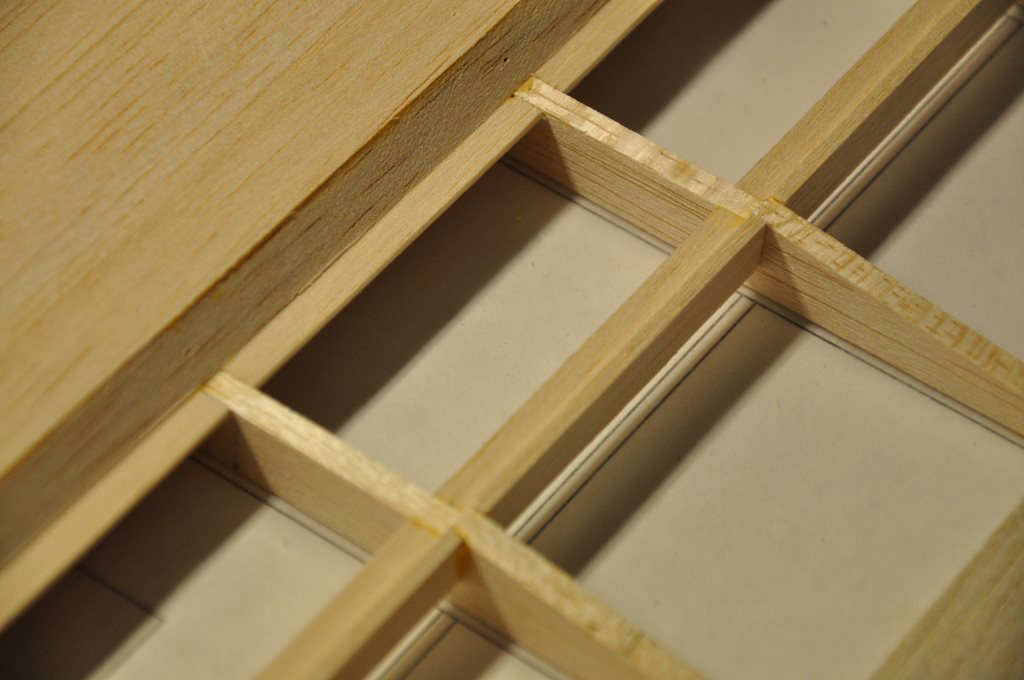
Prepare three sizes of balsa triangle stock: 1/4, 3/16 and 1/8 inch.
Fit the 1/4" stock between ribs in the center panel, the 3/16" stock in the mid panel and the 1/8" stock in the tip panel.
Glue them in with thickened epoxy - note that this will lock the Kevlar tow to the spar. If you wrapped the tow tightly, all that is required is to keep it from moving...
Here we see the triangle stock glued in place.
Next prepare the 1/32" balsa strips, that go on the top and bottom spar caps.
All panels get this balsa strip.
Glue the balsa spar cap strips to the spar with Ambroid or thinned epoxy.
Sand the strips to create a flush continuous airfoil contour.
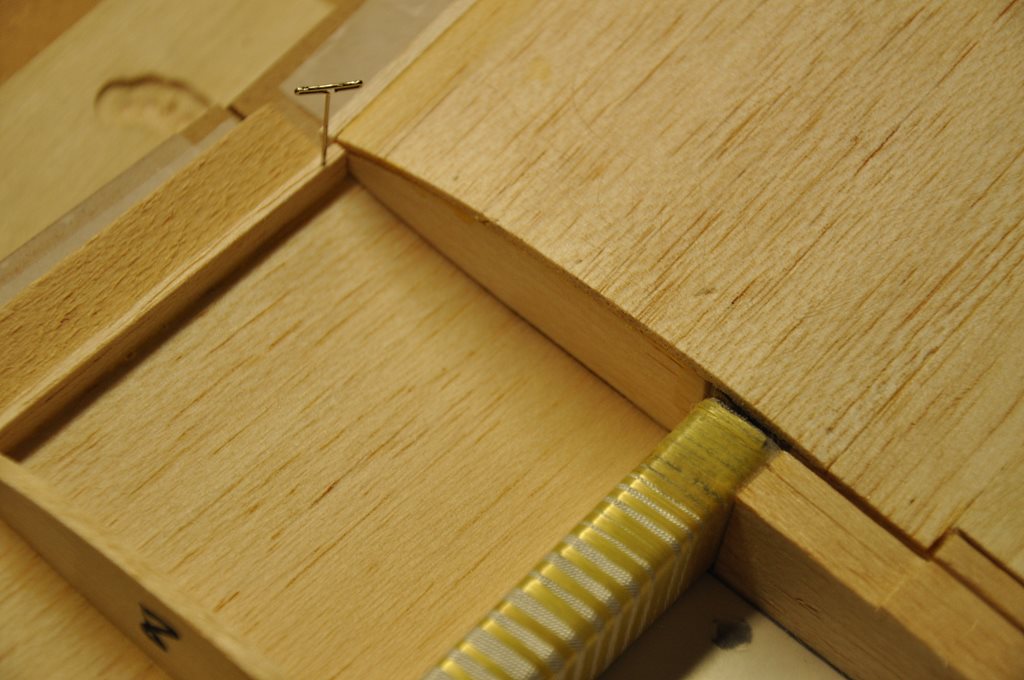
Add the spoiler bay's forward edge triangle stock.
Sheet the top of the center panel.
It is easier to line this sheet up if you butt it against the spoiler triangle stock first, and then bend it forward to the leading edge.
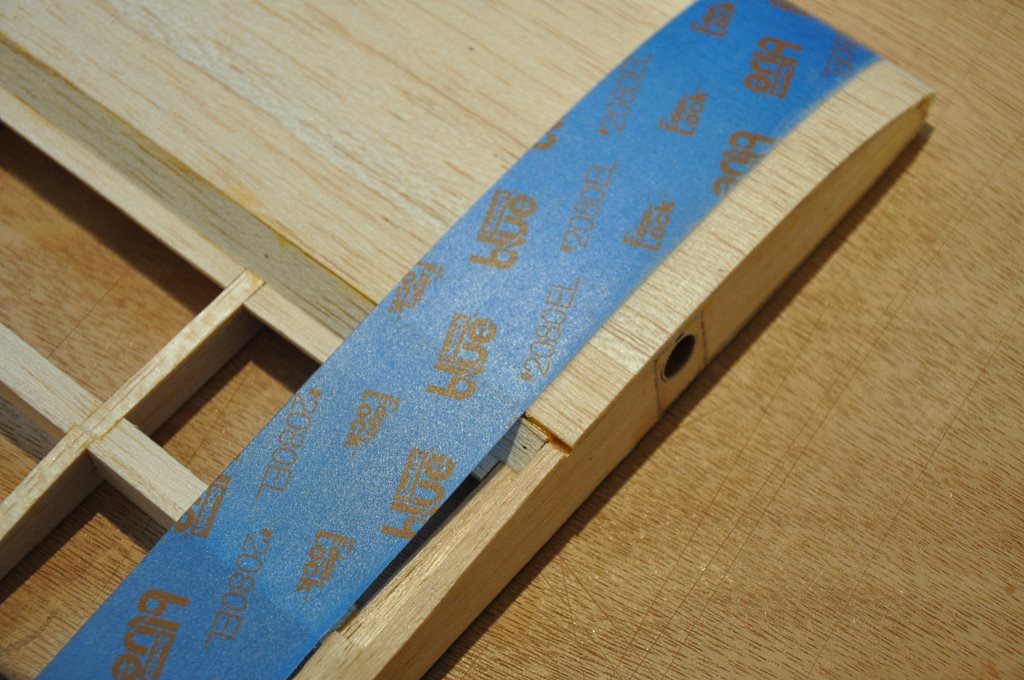
I used blue painter's tape pulled very tight around the leading edge to provide clamping force on the sheet while the glue dries.
Add in the various spoiler bay support strips and then sand everything in the spoiler bay flush so that the spoiler can sit flat in the bay.
I used painter's tape to protect the wing around the spoiler and then first with a razor plane and then with a sanding block, I shaped the spoiler stock to match the airfoil shape.
I cut the 7M ribs so that they would butt up to the spar.
Keep in mind that the rib touching the center panel should have received the 5 degree bevel.
Also note, that if you haven't already glued in the remaining inner leading edges you can do so now.
Cut the trailing edge and the 7M ribs to the specified angle.
I find that I can make an acceptable joint by just freehanding the cut with a razor saw.
When I designed the jig, I thought long and hard about whether to incorporate the mid panel's 1 degree washout into the jig itself. I decided not to. It seemed easier to build flat and then introduce the washout while sheeting the mid panels.
You can see in this particular picture that I have the bottom sheeting in place but have not glued it yet - at this point I was just busy setting up the washout shims.
I placed 2 bits of 1/16" balsa under the mid panel's trailing edge to give the panel it's washout.
The first bit of balsa started half way down the panel's length, and then a second, tiny piece, was added just before the mid-to-tip panel break.
This gives a total of 1/8" at the panel break.
The tip panel was then supported with a constant 1/8" shim along it's entire length.
To glue the sheeting, I typically lift the wing panel from the jig, run beads of Titebond along the forward ribs and along the inner leading edge and then return the panel to the jig and shim up the leading edge so that the sheet maintains good contact.
I should also point out that I don't glue in the forward piece of the 7M rib until the bottom sheeting is in place. This way the sheeting can support the rib in the right spot while it glues.
The bottom sheeting on both mid panels are now being glued in place.
Note that I have used some trailing edge stock to shim up the front end of the sheets so that they maintain good contact while the glue dries.
Also note that I have the front part of the 7M ribs now in place and gluing. Be sure to use thickened epoxy for the rib-to-spar joint.
Next, I glued in the 3/16" triangle pieces between the mid panel ribs.
The other thing to do is glue and sand the 1/32" spar cap filler strip.
Once those are in place you can close up the d-box with the top sheeting.
You can see in this picture that I'm also preparing the balsa sheets for the tip panels.
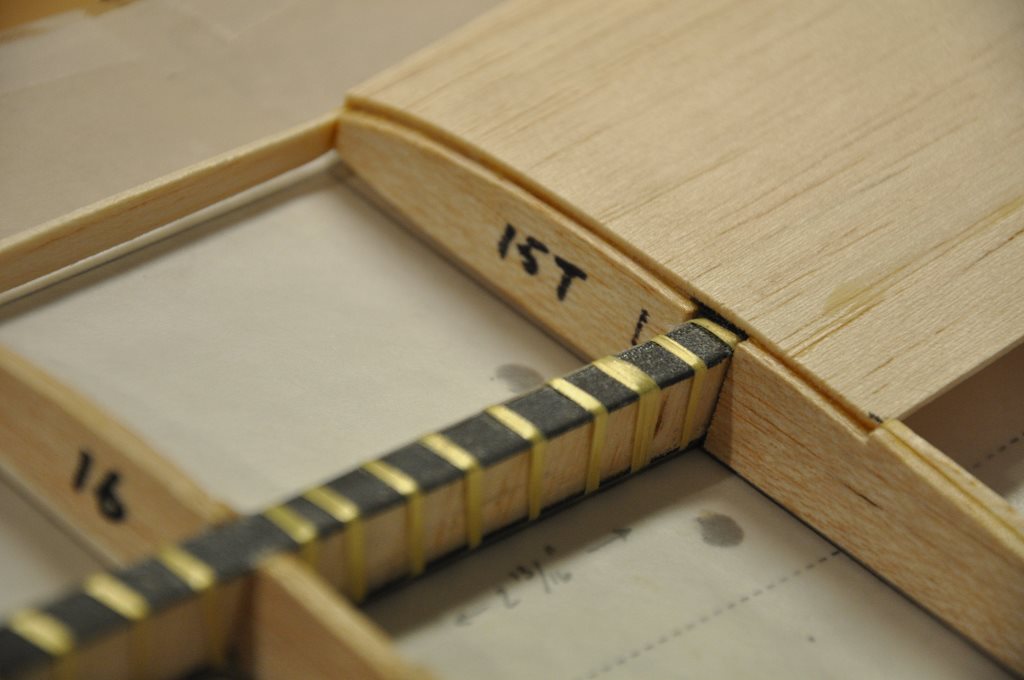
Sometimes I end up changing the order I do something - as appears to be the case here with the 15T rib being glued before the bottom sheeting.
Since I'm writing this up a few months after these pictures were taken I'm not entirely sure what might have led to on method versus another at the time...
No big deal, the point is that we're making progress.
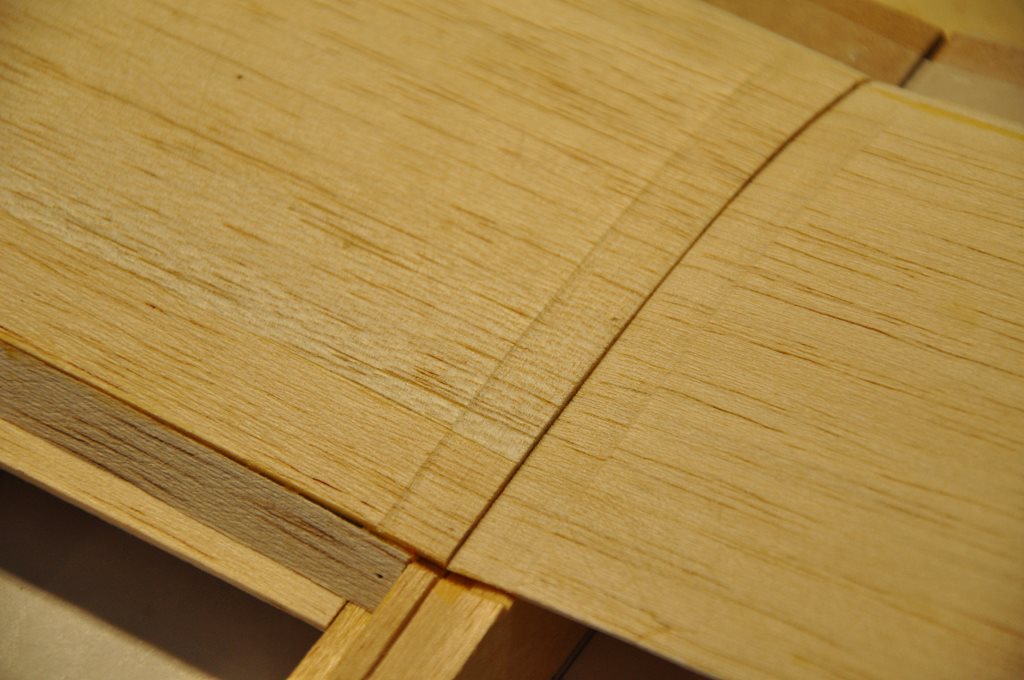
All the d-box sheeting is now complete.
We can see as well that the "support strips" have also all been glued in place.
A quick comment about the support strips - they need to be flush with the top of the rips. I've seen many Bubble Dancers that have been built with the support strips NOT making contact with the covering material.
Take a look again at wing_plan_V2b.pdf - you will see that in every case the support strips are flush to the top of the ribs.
Because the 7C and 7M ribs were cut and butt joined to the spar, this part of the wing needs reinforcement.
We need to place 2 layers of 1.5 oz. fiberglass here to kind of "tie it all together." This glassing could be done over the ribs before the balsa sheet, or after as I'm doing here.
I make a shallow recess where the glass will go so that there will not be a bump in the wing due to the added thickness of the fiberglass.
I sanded off just a bit of balsa in preparation tor adding the fiberglass.
This page is not complete yet!
The wing is just about complete, but a few things remain to be done.
Check back for the completed write-up!
-- Current through January 21, 2014